
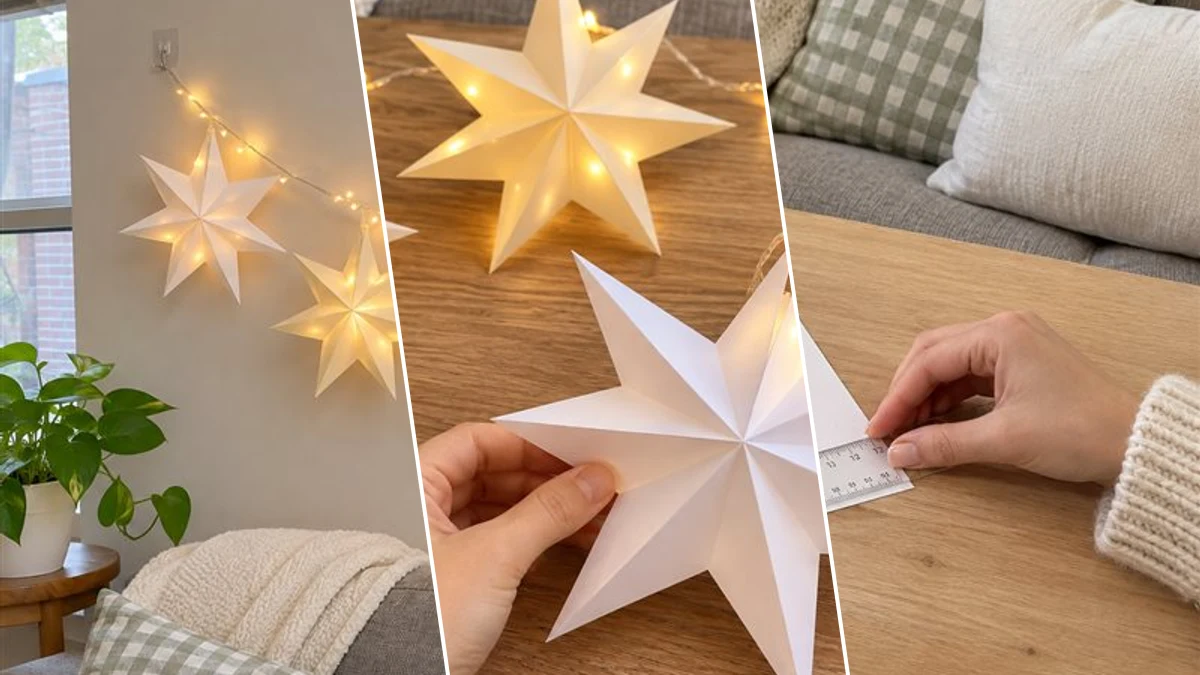
Create a warm and inviting atmosphere for the holidays with DIY folded paper star lantern string lights. This project features delicate 3D paper stars illuminated by cool-running LED fairy lights. It is designed as a renter-friendly option for Christmas apartment decor, easily hung on walls or windows without nails. Enjoy a cozy, festive glow in your space.
Project at a Glance
- Difficulty: Easy
- Estimated active time: 50 minutes to 70 minutes (drying and curing waits not included)
- Main material: Paper
- Suggested placement: Wall, Window
Cozy Christmas Apartment Decor with Paper Stars
These folded paper star lantern string lights offer a charming and adaptable way to decorate for Christmas, especially in rental spaces. The design uses lightweight paper stars and removable adhesive hooks, allowing for festive wall or window displays without causing damage. It's an ideal choice for adding a cozy, illuminated accent to any room during the holiday season.
The assembly combines simple paper-folding techniques with battery-powered LED fairy lights. Using cool-running LED lights is essential for paper crafts, ensuring safety while providing a soft, warm glow. The estimated active time for this project is 50 to 70 minutes.
Materials for DIY Folded Paper Star Lantern String Lights: Renter-Friendly Christmas Apartment.
- Cardstock (white and cream)
- Scissors
- Ruler or straight edge
- Craft adhesive (glue stick or double-sided tape)
- Battery-powered LED fairy light string (cool-running, warm white)
- Small removable adhesive hooks
Need another material? Browse current craft supplies and deals.
Crafting Your Folded Paper Star Lantern String Lights
These folded paper star lantern string lights are created through a series of simple paper-folding and assembly steps. The process involves preparing cardstock, forming 3D stars, and then attaching them to LED fairy lights. Follow these steps to create your own festive display.
Step 1: Prepare Cardstock Squares
Lay out your cardstock sheets. Using a ruler and pencil, measure and mark out equal-sized squares. For five stars, you'll need five squares. A good starting size is 8×8 inches or 10×10 inches, depending on your desired star size. Carefully cut out each square using sharp scissors for clean edges. Mix white and cream cardstock for a varied look as seen in the final project.
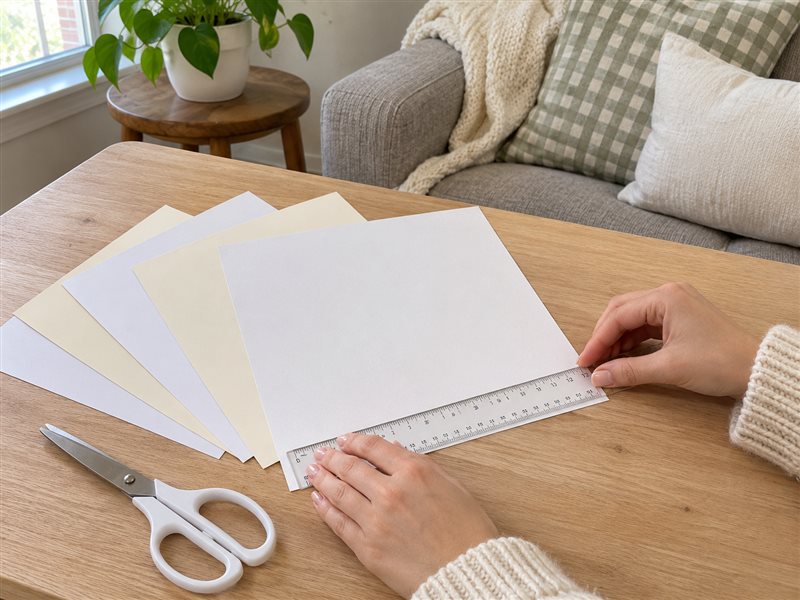
Step 2: Fold Star Points
Take one cardstock square. Fold it in half, then in half again, creating four smaller squares. Unfold and then fold it diagonally both ways, from corner to corner. You should now have an 'X' and a '+' of creases. Collapse the square along these creases to form a triangle. Next, fold the outer edges of this triangle inwards along its center line to create the star points. Make sure all your folds are precise and crisp for a sharp-looking star.
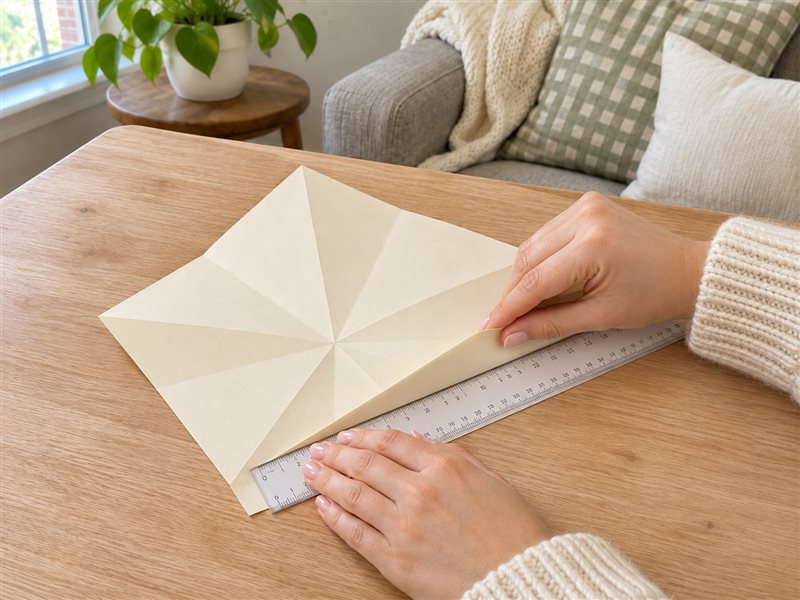
Step 3: Form 3D Star Shape
Once you have folded all the points for one star, you will notice a seam or cut line is needed to bring the star into a 3D shape. Cut along one of the radius lines from the outside edge towards the center point of the star, stopping just before the center. Overlap the two cut edges slightly, bringing the star into a conical, 3D form. Apply your craft adhesive (glue stick or double-sided tape) to the overlapping section and firmly press to secure. Repeat for all your stars.
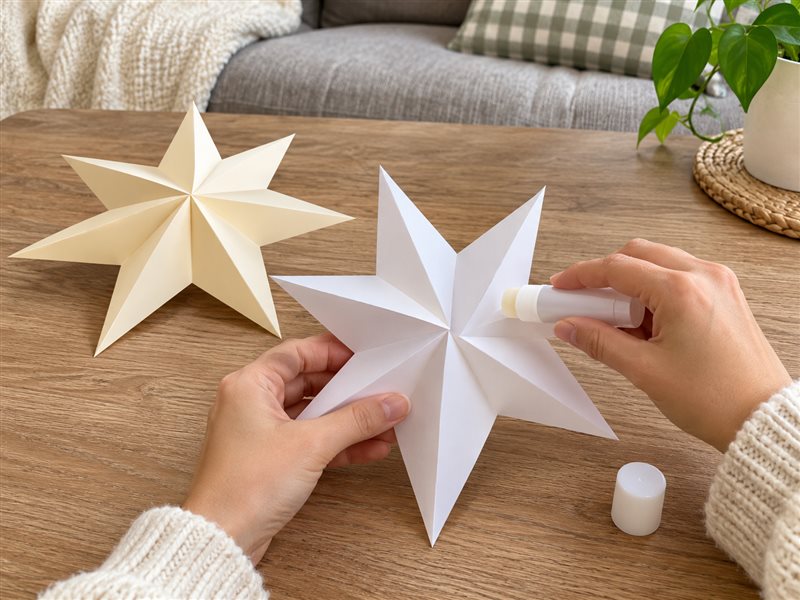


Step 4: Attach Stars to Light String
Take your battery-powered LED fairy light string. Locate the small opening or seam on the back of each 3D paper star. Carefully slip one LED bulb into the opening of each star, ensuring the star is securely positioned around the bulb. Distribute your five stars evenly along the length of your light string. Ensure the fairy lights are cool-running LEDs, as paper crafts should never be near heat sources like traditional incandescent bulbs.
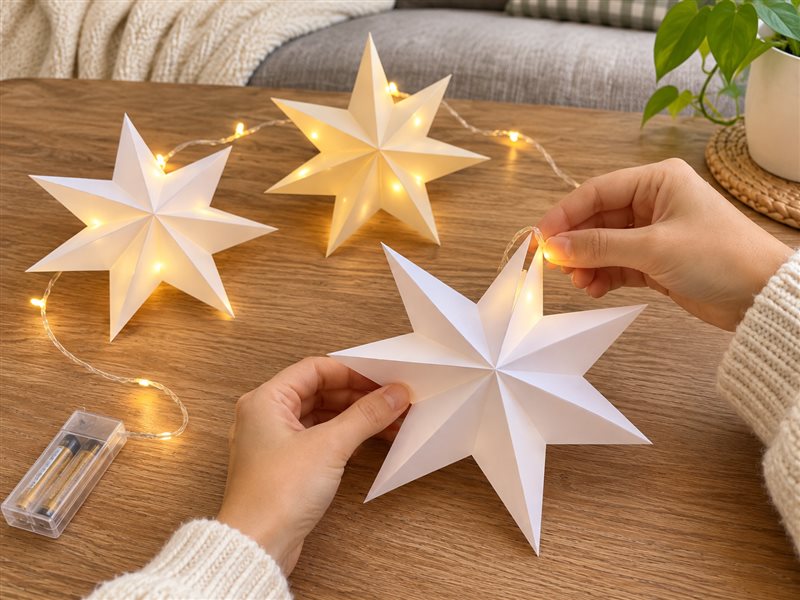
Step 5: Hang Your Star Lantern String Lights
Determine where you want to hang your star lantern string lights for your Christmas Apartment Decor. Clean the wall or window surface where you plan to attach the removable adhesive hooks. Apply the small adhesive hooks to the surface, spacing them out to create a gentle swag effect for your light string. Drape the string lights, with the attached paper stars, over the hooks. Turn on the battery pack to illuminate your beautiful, cozy display.
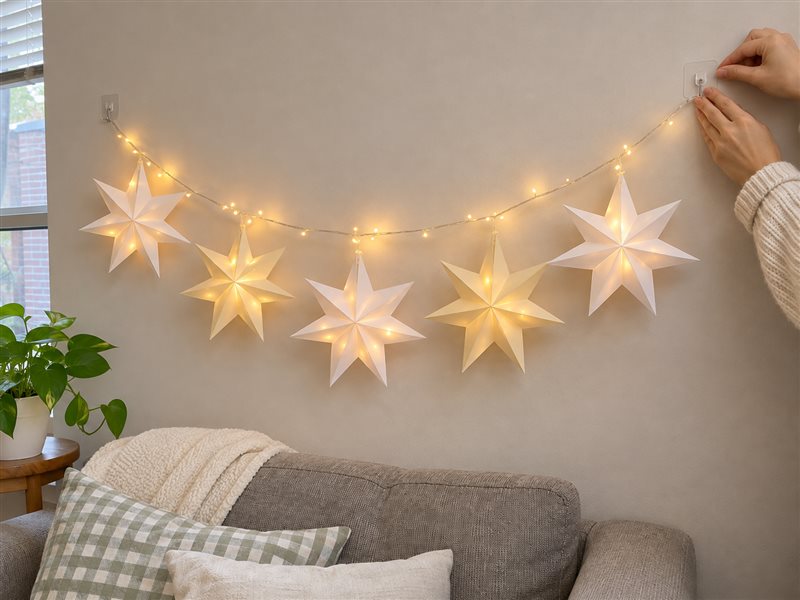
Enjoy Your Renter-Friendly Christmas Star Lanterns
Once your folded paper star lantern string lights are hung and illuminated, they provide a delightful and cozy addition to your Christmas decor. This renter-friendly project offers a personalized touch to apartment living during the holidays. Enjoy the soft glow and festive atmosphere you have created.
Related project collection: DIY 3D Paper Snowflakes and Christmas Paper Chain Garland for Window Decor
Practical Questions About This Project
What is the recommended size for the cardstock squares?
A good starting size for the cardstock squares is 8×8 inches or 10×10 inches, depending on the desired finished star size.
Why is it important to use only LED fairy lights for this project?
Only cool-running LED lights should be used because paper crafts should never be placed near heat sources like traditional incandescent bulbs or open flames.
How many stars are typically made for this string light project?
This project typically uses five folded paper stars, which are then distributed evenly along the length of the fairy light string.
Are these star lantern string lights suitable for renters?
Yes, these lights are designed to be renter-friendly, using small removable adhesive hooks to hang the string without needing nails or causing damage to walls or windows.
Search Dollar Tree for paper supplies.

Leave a Reply