

Prepare for Halloween with charming Frankenstein treat bags, perfect for party favors or candy distribution. This easy paper craft transforms simple green lunch bags into whimsical monsters. It's an ideal project for family crafting sessions to add a festive touch to your celebrations.
Project at a Glance
- Difficulty: Easy
- Estimated active time: 30 minutes to 45 minutes (drying and curing waits not included)
- Estimated component cost: $6 to $11 (reusable tools and general supplies excluded)
- Main material: Paper
Why Make Frankenstein Paper Treat Bags for Halloween
These Frankenstein treat bags offer a charming and practical way to celebrate Halloween. They are designed to be an easy project, making them suitable for beginner crafters and families looking for a fun activity. Once completed, these spooky-cute bags are perfect for holding party favors, distributing candy to trick-or-treaters, or sharing classroom treats.
The craft uses readily available and affordable materials, primarily green paper lunch bags and construction paper, alongside googly eyes. This simple material list allows for a straightforward assembly process, focusing on cutting, gluing, and layering to bring the monster design to life. The estimated active time for this project is between 30 to 45 minutes for a set of four to six bags, excluding any unattended drying time.
Materials for DIY Frankenstein Paper Lunch Bag Treat Bags for Halloween Party Favors
- Green Paper Lunch Bags
- Construction Paper (Black, White, Gray)
- Googly Eyes
- Glue Stick or Hot Glue
- Scissors
- Wrapped Halloween Candy
Need another material? Browse current craft supplies and deals.
How to Assemble Frankenstein Paper Treat Bags
Follow these steps to create your own set of Frankenstein treat bags. This guide details the process of transforming green paper lunch bags into festive Halloween monsters using simple paper cutting and gluing techniques. The process is designed to be straightforward, ensuring a fun and rewarding crafting experience.
Step 1: Prepare Bags and Cut Hair Strips
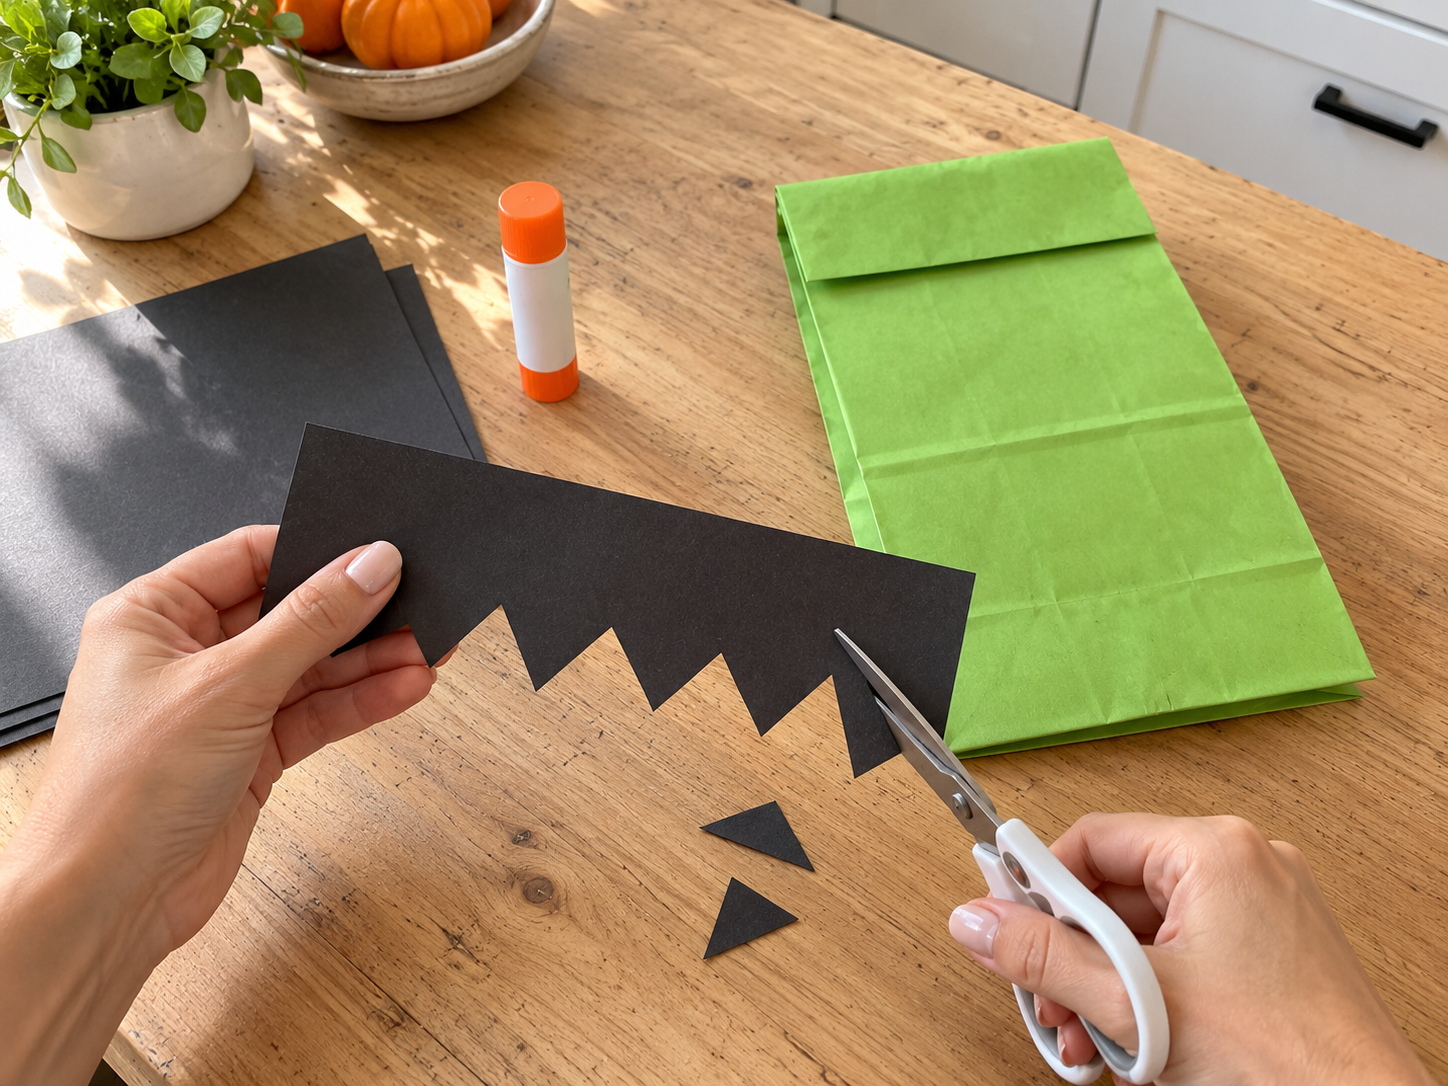
Start by laying your green paper lunch bags flat. Fold the top 1.5 to 2 inches of each bag towards the front to create a flap that will serve as the forehead. Take a sheet of black construction paper and cut strips that are roughly the width of your bags and about 2 inches tall. Using scissors, cut a zigzag pattern along one long edge of each black strip to create the Frankenstein's hair.
Step 2: Attach Frankenstein's Hair
Apply glue along the backside of the straight edge of your zigzag black paper strips. Carefully align the straight edge with the top crease of the folded-over flap on your green bag. Press firmly to secure the hair in place, ensuring the zigzag edge faces upwards and slightly overhangs the front of the bag.

Step 3: Add Googly Eyes
Once the hair is secure, choose two googly eyes for each bag. Apply a small dab of glue to the back of each googly eye. Carefully position them on the green bag, just below the black hair, leaving enough space for the mouth below. Press gently to make sure they stick well.



Step 4: Craft and Attach the Mouth
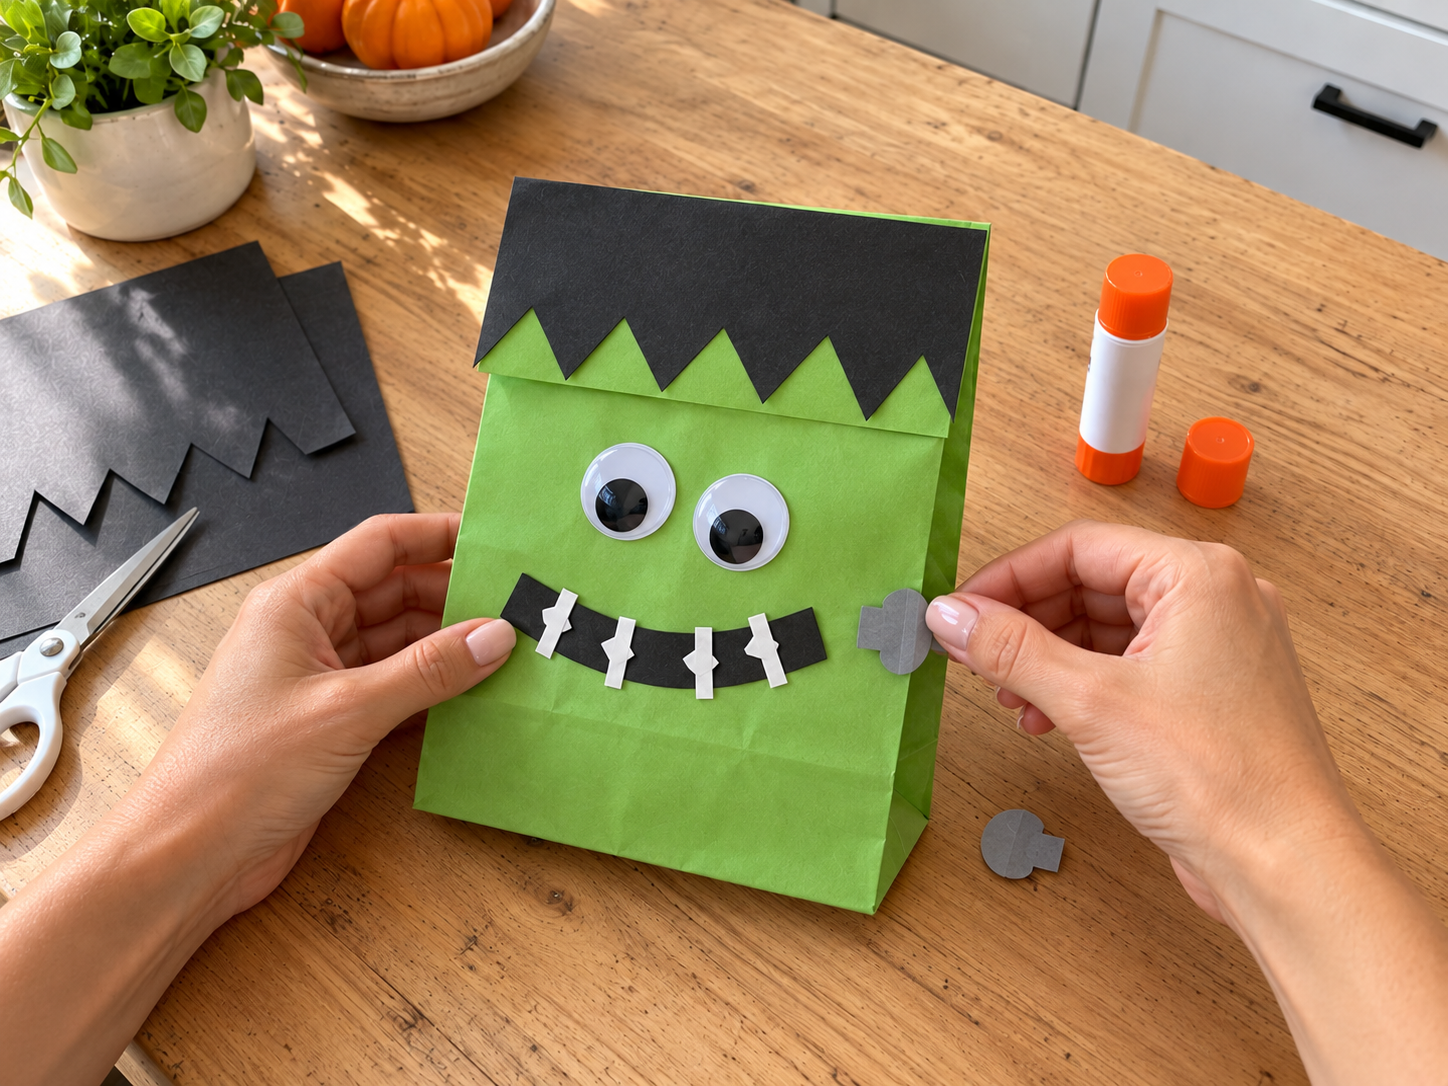
From black construction paper, cut a thin, slightly curved strip for the mouth. From white construction paper, cut several very small, thin rectangles or lines to represent stitches. Glue the white stitch lines onto the black mouth strip. Once assembled, apply glue to the back of the stitched mouth and attach it to the green bag below the eyes.

Step 5: Create and Place Neck Bolts
From gray construction paper, cut two small, squat rectangles for each bag to serve as the neck bolts. For added dimension, you can fold a small flap on one end of each gray rectangle. Apply glue to the folded flap (or the entire back if not folding) and attach one bolt to each side of the green bag, around the mouth area. Ensure they are symmetrical and facing outwards.
Step 6: Fill with Treats
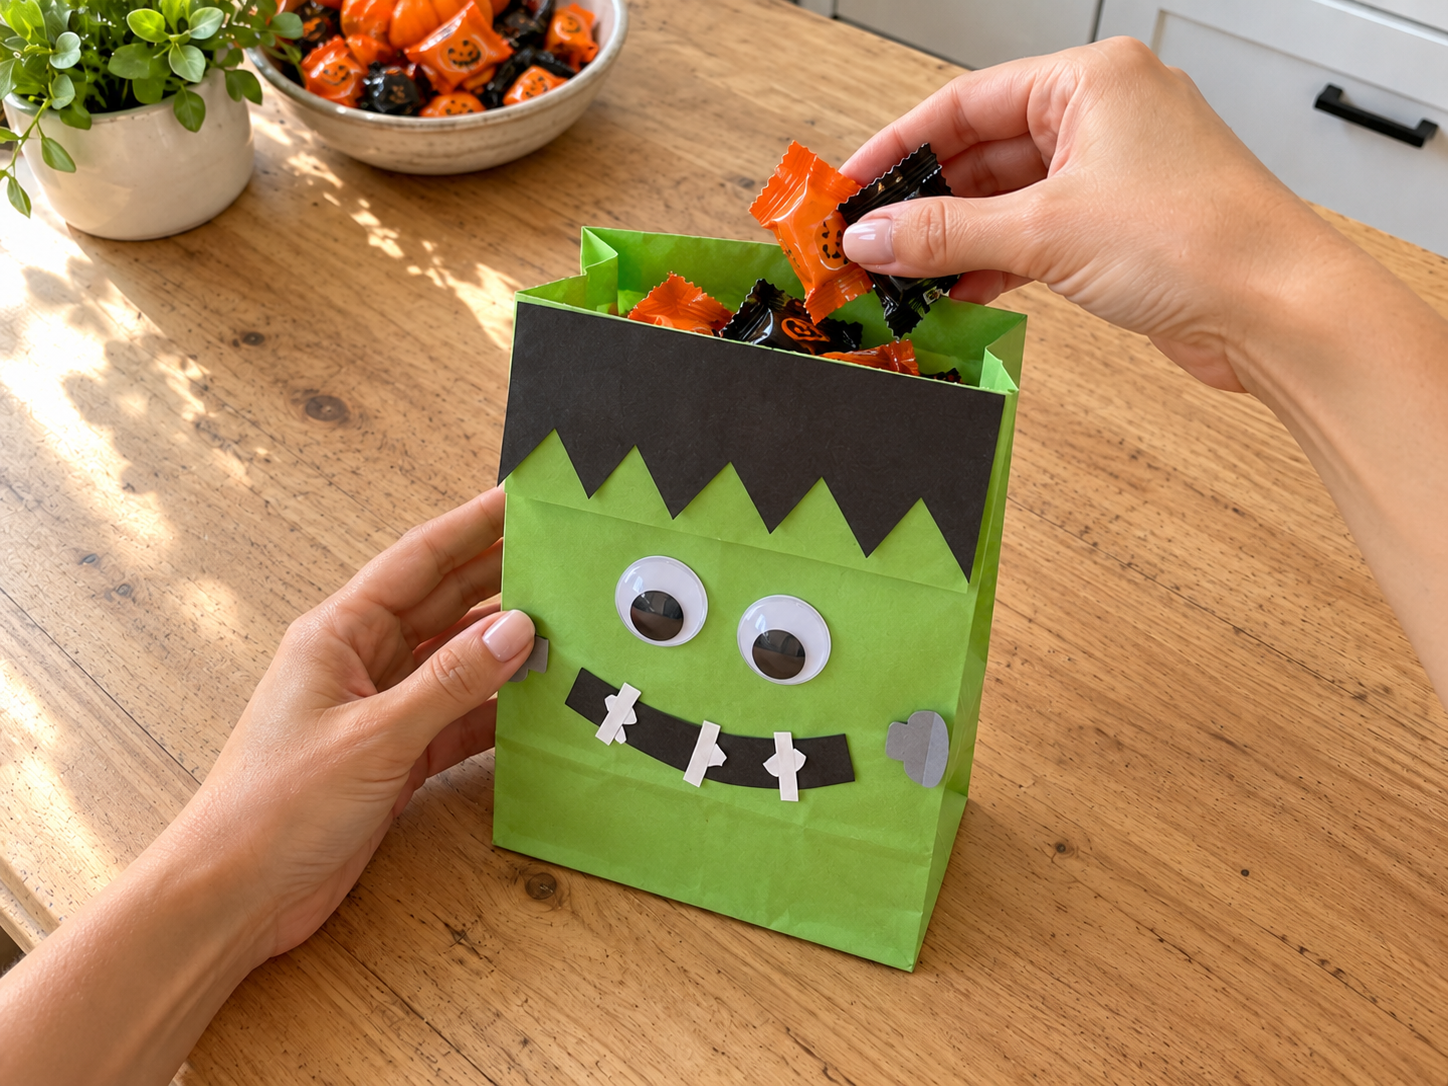
Once all the Frankenstein features are dry and securely attached, your treat bags are ready to be filled! Carefully open each bag and fill it with an assortment of wrapped Halloween candies. Arrange the candy so that some of the colorful wrappers peek out of the top, adding to the festive look. Your Frankenstein treat bags are now complete and ready for gifting or decorating!
Your Finished Frankenstein Halloween Treat Bags
With the final touches complete, your collection of Frankenstein treat bags is ready for Halloween. These charming creations are ideal for adding a festive and personalized element to any celebration. Whether used for gifts, party decor, or candy distribution, they are sure to bring a smile.
Related project collection: DIY Mummy Candy Bowl for Halloween Entryway or Party Decor
Practical Questions About This Project
What materials are needed for these Frankenstein treat bags?
Green paper lunch bags, black, white, and gray construction paper, googly eyes, glue stick or hot glue, and scissors are needed. Wrapped Halloween candy is for filling the bags.
Is this craft suitable for kids?
Yes, this project is classified as easy and is suitable for kids with adult supervision. It is designed for families and beginner crafters.
What occasions are these treat bags good for?
These Frankenstein treat bags are ideal for Halloween celebrations, children's parties, and family craft time. They function well as party favors, trick-or-treating candy bags, or classroom treats.
How long does this project take to complete?
The estimated active time for this project is between 30 to 45 minutes for a set of four to six bags. This estimate excludes any unattended drying or curing time.
What type of glue works best for these treat bags?
Both a glue stick or hot glue can be used for assembling these Frankenstein treat bags. A glue stick is often preferred for kid-friendly projects, while hot glue offers a quicker bond.
Search Dollar Tree for paper supplies.

Leave a Reply