

Create a classic Halloween spider web wall hanging with a simple embroidery hoop. This easy DIY project uses basic materials like black fabric and white yarn to craft a spooky yet charming piece of seasonal decor. Display it on a door or wall to welcome trick-or-treaters or add a festive touch to any room.
Project at a Glance
- Difficulty: Easy
- Estimated active time: 30 minutes to 45 minutes (drying and curing waits not included)
- Estimated component cost: $3 to $5 (reusable tools and general supplies excluded)
- Main material: Fabric
- Suggested placement: Interior Door, Wall
Why This Halloween Spider Web Hoop Works
This DIY spider web embroidery hoop offers a classic, visually striking piece of Halloween decor. The contrast of a white yarn web against black fabric, framed by a natural wooden hoop, creates a charmingly spooky accent. It is a versatile piece, suitable for hanging on an interior door or a wall, adding a festive touch to an entryway or any room.
The project is designed to be easy, making it accessible for beginner crafters and families. It utilizes readily available materials such as a wooden embroidery hoop, black fabric, white yarn, and a plastic spider. With an estimated active time of 30 to 45 minutes, this craft allows for quick assembly and a satisfying result.
Materials for Easy DIY Spider Web Embroidery Hoop Wall Decor for Halloween
- Wooden embroidery hoop (10-inch)
- Black fabric or felt (cotton, burlap, or similar)
- White yarn
- Plastic spider
- Black ribbon
- Hot glue gun and glue sticks
- Scissors
- Large blunt needle (or tape)
Need another material? Browse current craft supplies and deals.
Crafting Your Spider Web Embroidery Hoop
Creating this Halloween spider web embroidery hoop involves a few straightforward steps. The process begins with framing your fabric, then moves to stitching the distinctive web pattern. Finish by adding the spider and a hanger to complete your seasonal decor.
Step 1: Frame Fabric in Hoop
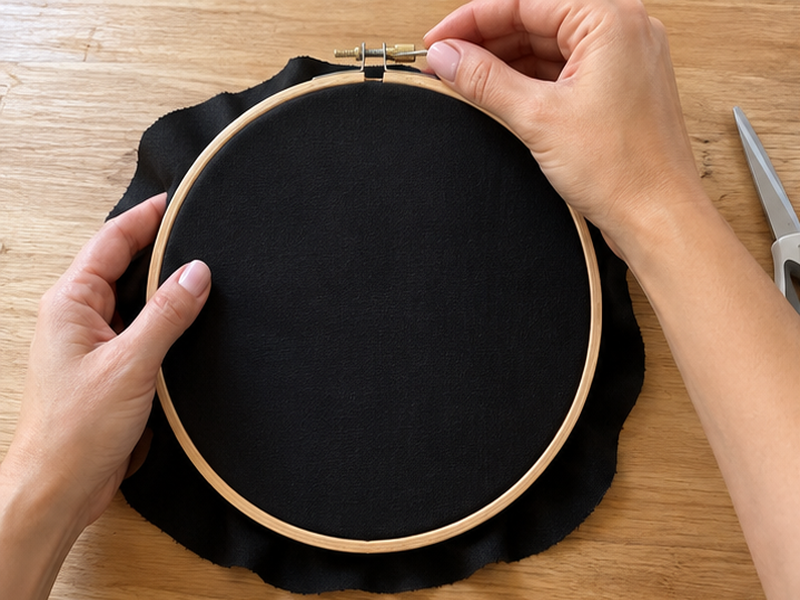
Take your black fabric and separate the two rings of the embroidery hoop. Drape the fabric over the smaller inner ring, then place the larger outer ring over the fabric and inner ring. Press firmly, ensuring the fabric is centered and stretched tautly. Tighten the screw mechanism on the outer hoop to secure the fabric in place. Once tight, use scissors to carefully trim any excess fabric from around the back of the hoop, leaving a neat edge.
Step 2: Stitch Radial Spokes
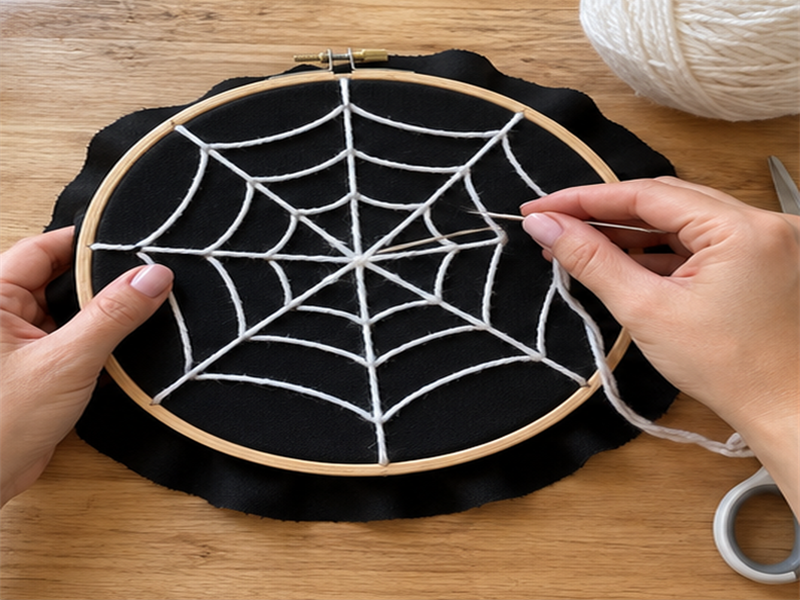
Cut a long piece of white yarn. If using a large blunt needle, thread the yarn through it. If not, you can wrap a small piece of tape around one end of the yarn to create a 'needle'. Starting from the center of the hoop, push the yarn through the fabric from back to front. Then, create straight 'spoke' lines by pushing the yarn back through the fabric near the outer edge of the hoop, pulling it taut. Repeat this process, stitching multiple radial lines from the center to various points on the edge, aiming for even spacing around the hoop. You can secure the yarn on the back with a simple knot or a dab of hot glue if needed, though the tautness of the web should hold it.

Step 3: Weave Connecting Threads
Once your radial spokes are complete, it's time to create the circular connecting threads of the web. Starting near the center of the hoop, tie off a new piece of white yarn to one of the radial spokes. Then, loop the yarn over and under each subsequent spoke as you move in a circular or spiral pattern outwards. Keep the loops slightly curved to mimic a natural web. Work your way outwards from the center, creating several concentric rings. Secure the yarn on the back when you reach the desired size or the edge of the hoop.


Step 4: Adhere the Spider
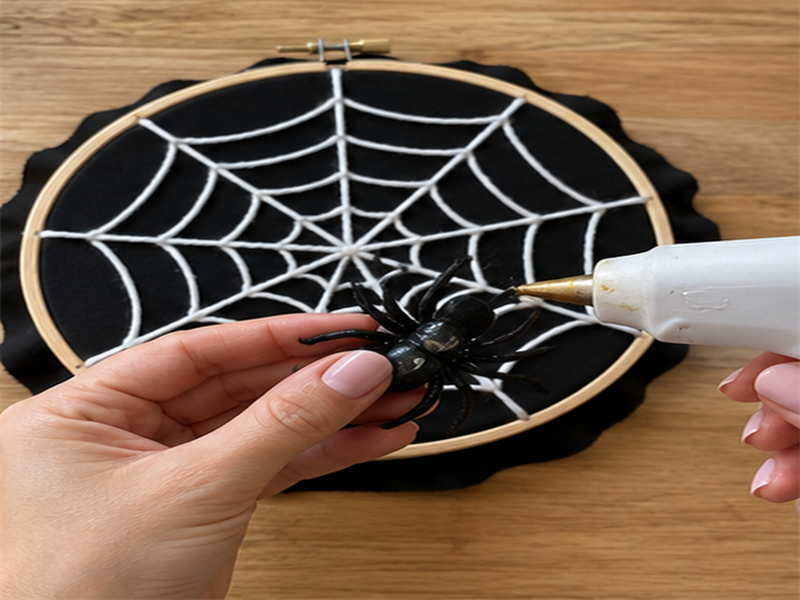
With your spider web completely stitched, it's time to add the finishing touch. Choose a corner or a natural resting spot on your white yarn web for the plastic spider. Heat up your hot glue gun. Apply a small dab of hot glue to the underside of the plastic spider, then carefully press it onto the desired spot on the web. Hold it in place for a few seconds until the glue cools and sets.
Step 5: Add Hanging Ribbon
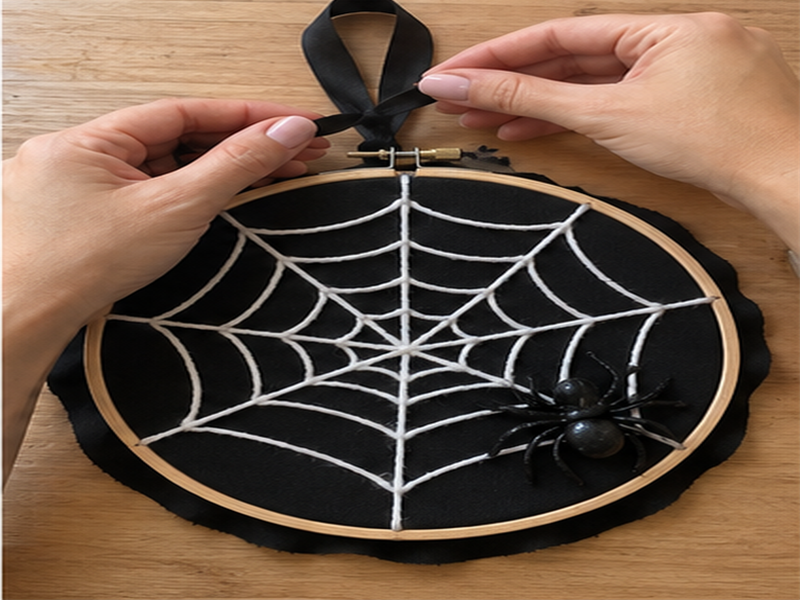
Cut a piece of black ribbon to your desired hanging length, typically around 12-18 inches. Fold the ribbon in half to form a loop. Thread the folded end of the ribbon through the metal hardware (the screw mechanism) at the top of the embroidery hoop. Then, bring the two loose ends of the ribbon through the loop you just created and pull taut to secure it with a lark's head knot. Trim any excess ribbon if necessary, and your Halloween spider web wall hanging is ready to display!
Displaying Your Halloween Spider Web Hoop
Once your spider web embroidery hoop is complete, it is ready to be displayed. Hang this charmingly spooky piece on an interior door, a wall, or as part of a larger Halloween vignette. This handmade decoration adds a personalized touch to your seasonal home decor.
Related project collection: DIY Spooky Haunted House Luminaria Craft for Halloween Decor
Practical Questions About This Project
How long does this project take to make?
The estimated active time for this project is 30 to 45 minutes, which excludes any unattended drying or curing time.
Is this craft suitable for children?
This craft is considered kid-friendly, but an adult should handle the hot glue gun for safety.
What kind of fabric works best for the spider web hoop?
Black fabric or felt, such as cotton or burlap, is suitable for this project. The key is to choose a material that can be stretched tautly within the embroidery hoop.
Where can this Halloween spider web hoop be displayed?
This spider web embroidery hoop is designed for indoor display and can be hung on an interior door or a wall, making it a versatile piece of seasonal decor.
Explore fabric craft supplies at Dollar Tree.

Leave a Reply