
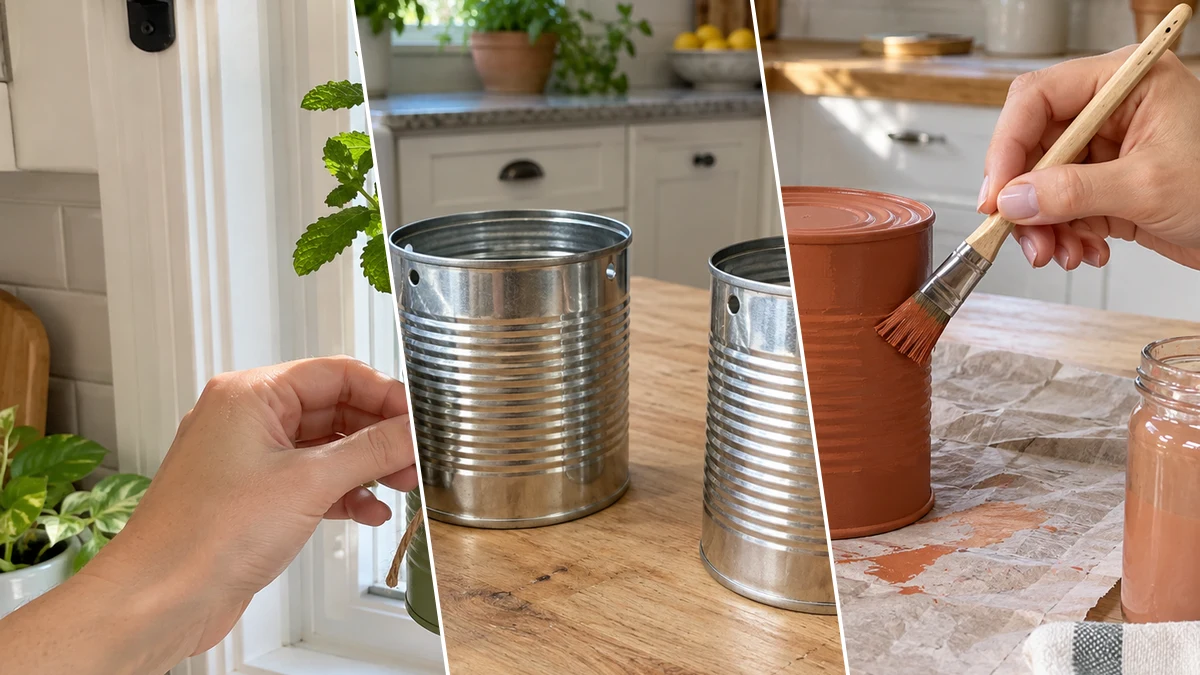
Fresh herbs are a delightful addition to any kitchen, but finding space for them can be a challenge. This DIY hanging tin can planter rail offers a practical and stylish solution. Repurpose everyday tin cans into a charming display that provides easy access to your favorite cooking herbs right in your kitchen window.
Project at a Glance
- Difficulty: Easy
- Estimated active time: 60 minutes to 90 minutes (drying and curing waits not included)
- Estimated component cost: $10 to $15 (reusable tools and general supplies excluded)
- Main material: Metal
- Suggested placement: Window
Why Create a Kitchen Window Herb Planter?
A hanging herb planter rail transforms a simple kitchen window into a functional and decorative space. Having fresh basil, mint, or parsley within arm's reach while cooking enhances meals and adds a vibrant touch to your home. This project is particularly suitable for small spaces or apartment living where counter space is limited.
Utilizing cleaned tin cans for this project is an example of upcycling, giving new purpose to items that might otherwise be discarded. The combination of painted cans in sage green, cream, and terracotta, along with natural jute twine and a wooden dowel rod, creates a rustic, farmhouse-style aesthetic that complements many kitchen decors.
This craft is classified as easy, making it accessible for beginner crafters and those looking for a budget-friendly home decor project. The estimated active crafting time is between 60 to 90 minutes, excluding unattended drying and curing, with an estimated component cost of $10 to $15, excluding reusable tools and general supplies.
Materials for DIY Hanging Tin Can Herb Planter Rail for a Kitchen Window
- Empty Tin Cans (3-4, cleaned)
- Acrylic Craft Paint (Sage Green, Cream, Terracotta)
- Jute Twine (thick)
- Wooden Dowel Rod
- Cup Hooks (2)
- Potting Soil & Drainage Pebbles
- Small Herb Plants (Basil, Mint, Parsley)
- Basic Craft Tools (Hammer, Nail, Drill, Paint Brushes)
Need another material? Browse current craft supplies and deals.
How to Make Your Hanging Tin Can Herb Planter Rail
Creating this hanging herb planter involves a few straightforward steps, from preparing your cans to planting your herbs. Follow these instructions to assemble a functional and attractive herb garden for your kitchen window. The process begins with preparing the tin cans for their new purpose.
Step 1: Prepare Cans with Drainage & Hanger Holes
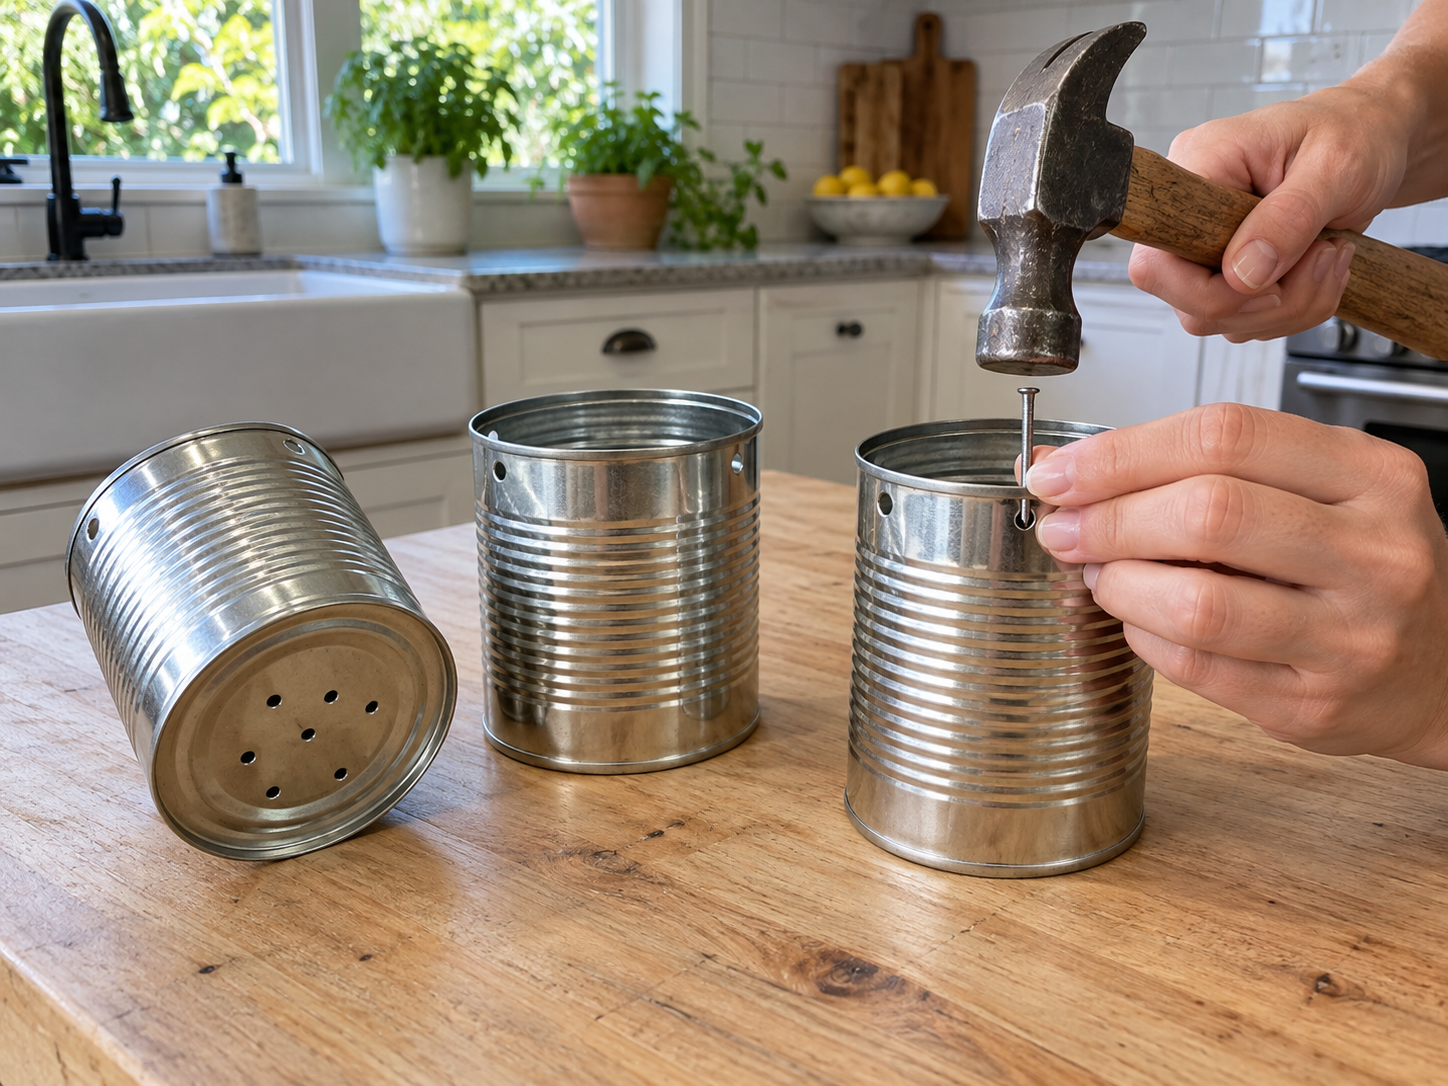
Thoroughly wash and dry your empty tin cans, removing any labels and adhesive residue. Using a hammer and a sturdy nail (or a drill with a small bit), carefully punch several drainage holes in the bottom of each can. Then, punch two holes near the rim on opposite sides of each can. These will be used for threading the hanging twine.
Step 2: Paint the Tin Cans
Choose your desired acrylic craft paint colors (sage green, cream, and terracotta are used here for a rustic look). Apply a thin, even base coat to the exterior of each can using a paintbrush. Allow the first coat to dry completely, then apply additional thin coats until you achieve opaque coverage. Ensure the paint fully dries between coats according to product instructions.

Step 3: Attach Twine Hangers and Bows
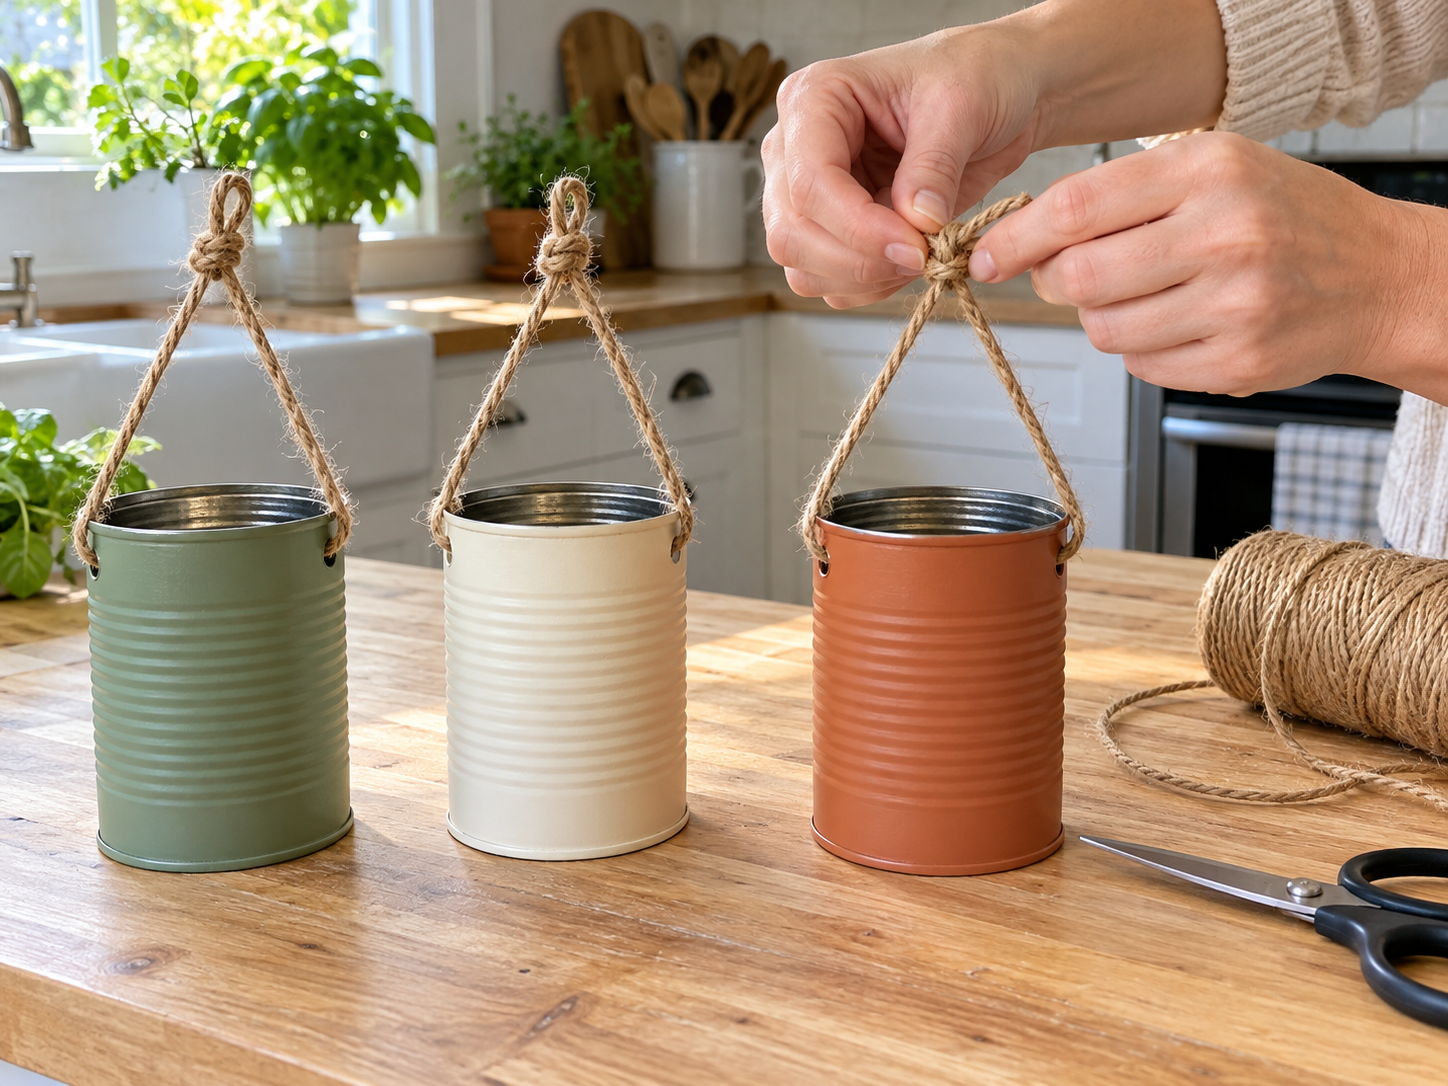
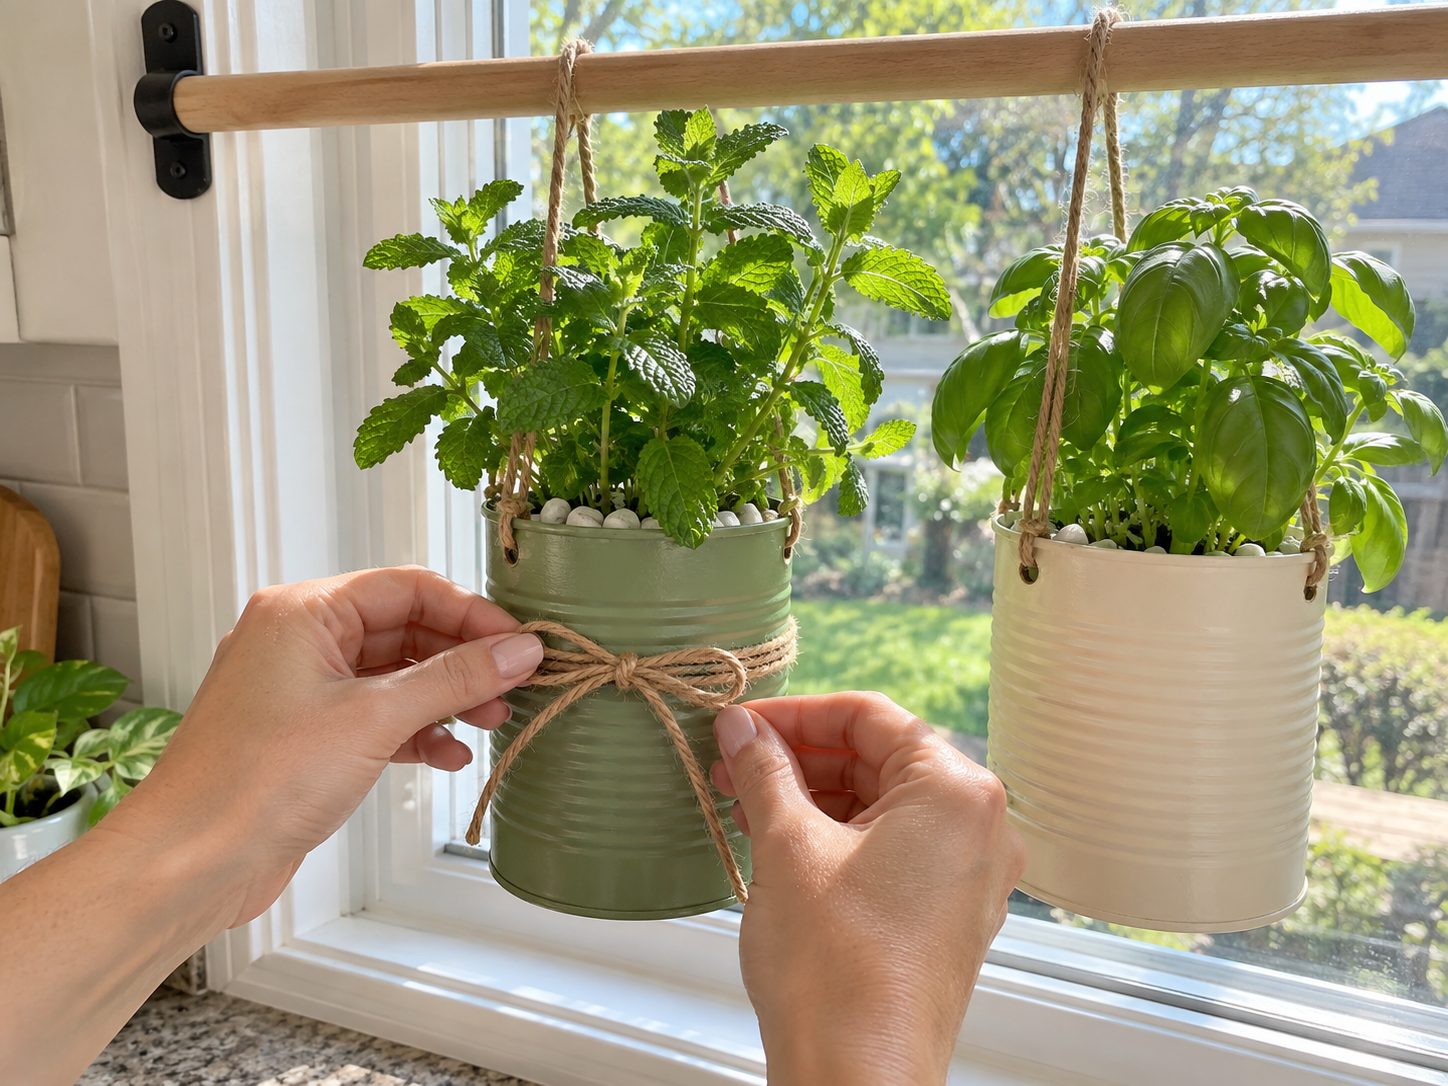
Once the paint is fully cured, cut three equal lengths of thick jute twine, approximately 24-30 inches each (adjust based on desired hanging height). For each can, thread one end of a twine length from the inside out through one of the rim holes, and the other end through the opposite rim hole. Bring both ends together above the can, adjust to level, and tie a secure knot to form a hanging loop. Next, cut shorter pieces of twine and tie a decorative bow around the body of each can, securing with a knot on the back.


Step 4: Install Dowel Rod Mounts
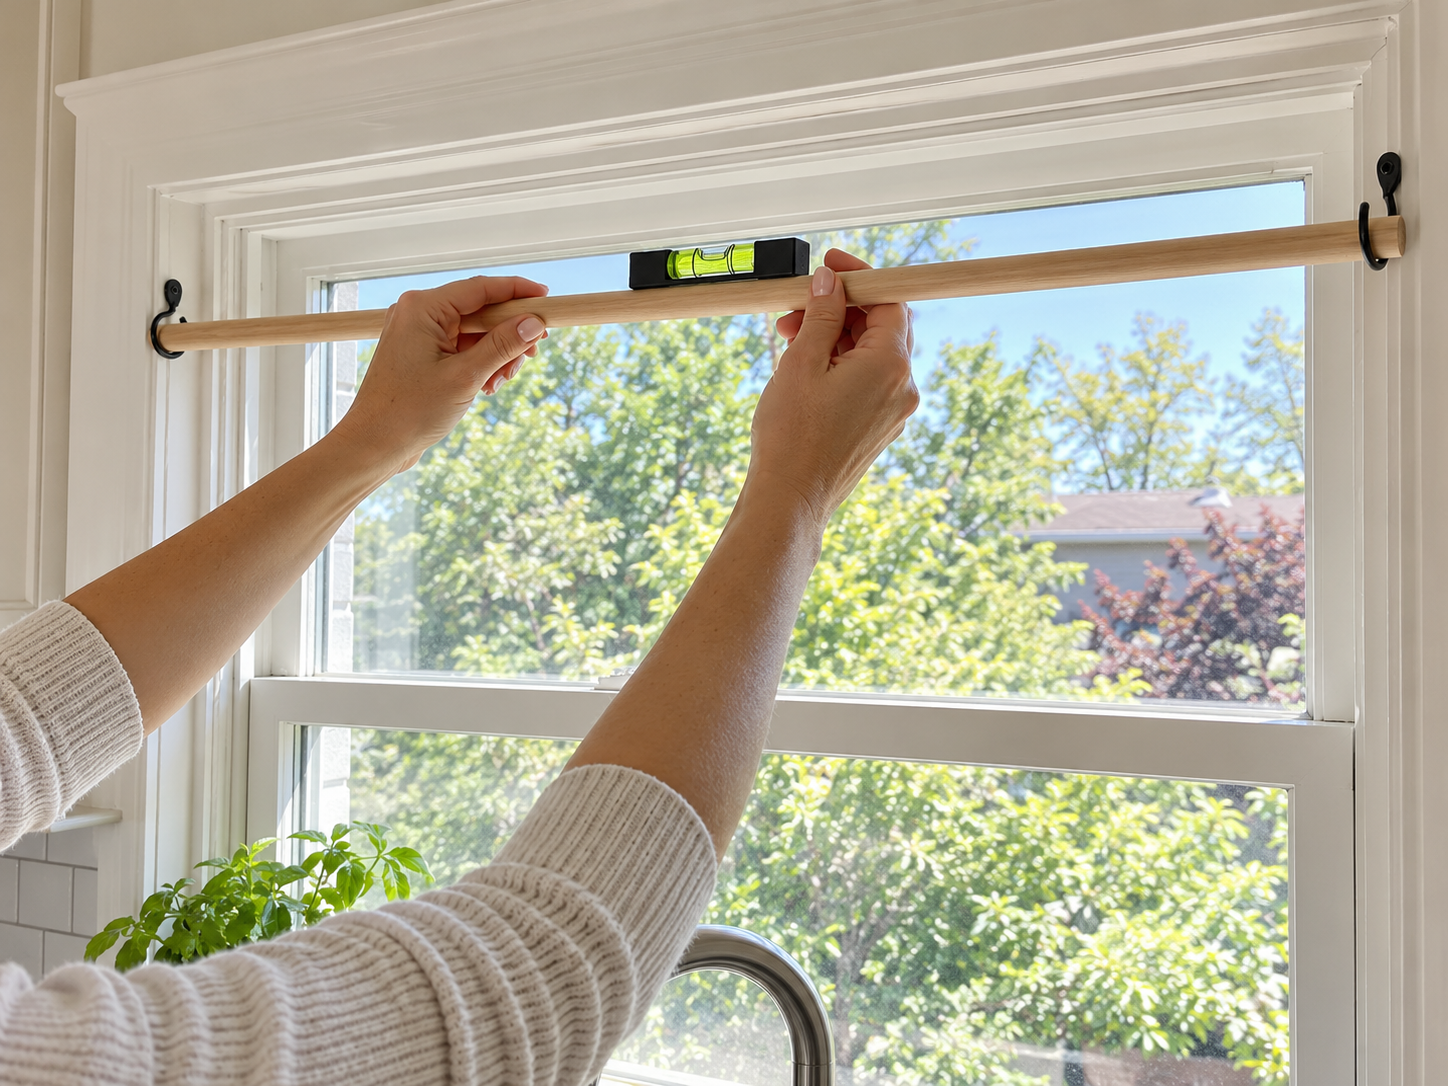
Determine the desired location for your planter rail across your kitchen window. Measure the width of your window and cut your wooden dowel rod to fit, allowing a little extra length to rest securely in the cup hooks. Mark the positions for the two cup hooks on your window frame, ensuring they are level and spaced appropriately for the dowel. Pre-drill small pilot holes if necessary, then twist the cup hooks firmly into the window frame.
Step 5: Plant the Herbs
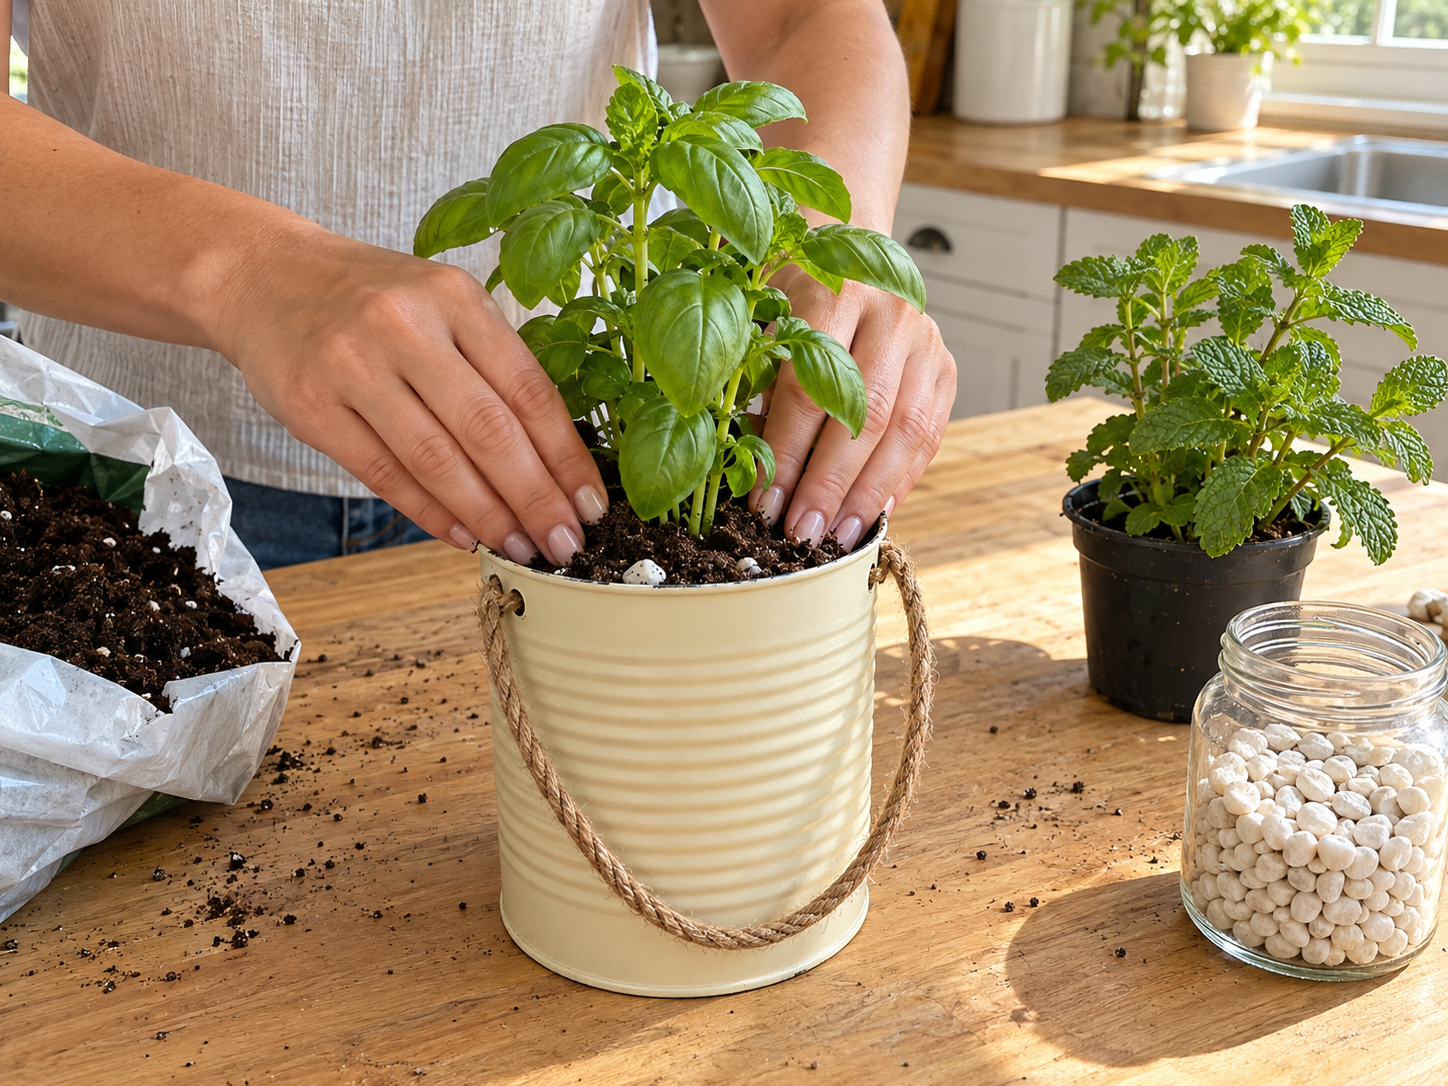
Begin by adding a layer of drainage pebbles, about 1-2 inches deep, to the bottom of each painted tin can. This helps prevent root rot. Next, fill the cans with fresh potting soil, leaving a little room at the top. Gently remove your small herb plants (basil, mint, parsley) from their nursery pots, loosen any compacted roots, and plant them into the prepared cans. Top with a thin layer of soil and lightly pat around the base of the plants.
Step 6: Hang Your Herb Planters
With your herbs planted and cans fully assembled, carefully hang each individual can by its twine loop from the wooden dowel rod. Ensure the dowel rod is securely resting in the cup hooks you installed in the window frame. Arrange the cans evenly along the dowel, and step back to admire your new, thriving kitchen herb garden!
Enjoy Your Fresh Kitchen Herbs
Once your hanging tin can herb planter rail is complete and installed, you will have a convenient source of fresh herbs for cooking. This project not only adds practical functionality but also contributes to a warm, rustic aesthetic in your kitchen. Regularly water your herbs and enjoy the fresh flavors they bring to your meals.
Related project collection: DIY Repurposed Teacup and Saucer Bird Feeder for Garden Decor
Practical Questions About This Project
What type of herbs are suitable for this planter?
Small herb plants such as basil, mint, and parsley are suitable for these tin can planters, providing fresh ingredients for cooking.
How are drainage holes created in the tin cans?
Drainage holes can be carefully punched in the bottom of each cleaned tin can using a hammer and a sturdy nail, or a drill with a small bit.
What kind of paint should be used for the tin cans?
Acrylic craft paint is used for painting the tin cans, with colors like sage green, cream, and terracotta suggested for a rustic look.
Where is the best placement for this hanging planter?
This hanging planter rail is designed for a kitchen window, providing convenient access to fresh herbs and enhancing the window space.
What decor style does this planter complement?
The design, featuring painted tin cans and jute twine, complements rustic, farmhouse, and neutral home decor styles.
Search Dollar Tree for metal supplies.

Leave a Reply