
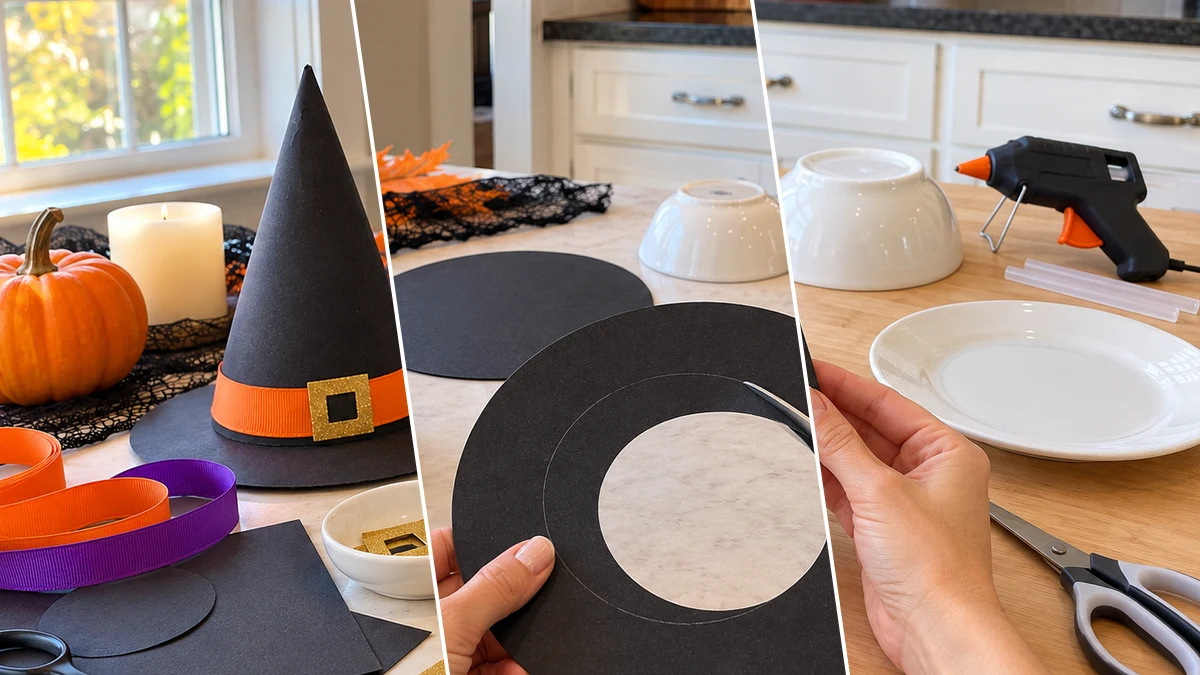
Add a whimsical and festive touch to your Halloween celebrations with mini witch hat treat cones. These charming cardstock creations are designed to hold small candies, making them ideal party favors or decorative accents for your seasonal table. Crafting a set is an easy way to enhance your spooky decor.
Project at a Glance
- Difficulty: Easy
- Estimated active time: 30 minutes to 45 minutes (drying and curing waits not included)
- Estimated component cost: $1 to $3 (reusable tools and general supplies excluded)
- Main material: Cardstock
- Suggested placement: Tabletop, Kitchen Counter
Festive Halloween Table Decor with Mini Witch Hat Treat Cones
Mini witch hat treat cones offer a delightful way to present candies and add a whimsical element to your Halloween party table or kitchen island. Made from black cardstock, these small, cone-shaped hats feature colorful ribbon bands and sparkly gold glitter buckles, creating a recognizable spooky silhouette. They are designed with an open base to easily tuck in wrapped orange and black candies, making them a functional and charming decoration.
These treat cones are versatile, serving as individual party favors for guests or as a cohesive centerpiece when arranged together. Their playful design complements various Halloween themes, from cute and whimsical to slightly spooky. The project is classified as easy, making it accessible for crafters looking for a quick and impactful seasonal decoration.
Materials for DIY Mini Witch Hat Treat Cones for Halloween Table Decor
- Black cardstock
- Ribbon (orange and purple grosgrain, or desired colors)
- Gold glitter cardstock or foam sheet
- Hot glue gun and glue sticks (or strong craft glue)
- Scissors
- Pencil
- Two round objects for tracing (e.g., bowl and small plate)
Need another material? Browse current craft supplies and deals.
Crafting Mini Witch Hat Treat Cones: Step-by-Step
Creating these mini witch hat treat cones involves simple cutting and assembly steps. The process uses common craft materials like cardstock and ribbon to form the iconic shape. Follow these instructions to construct your own set of festive Halloween decorations.
Step 1: Form the Cone Base
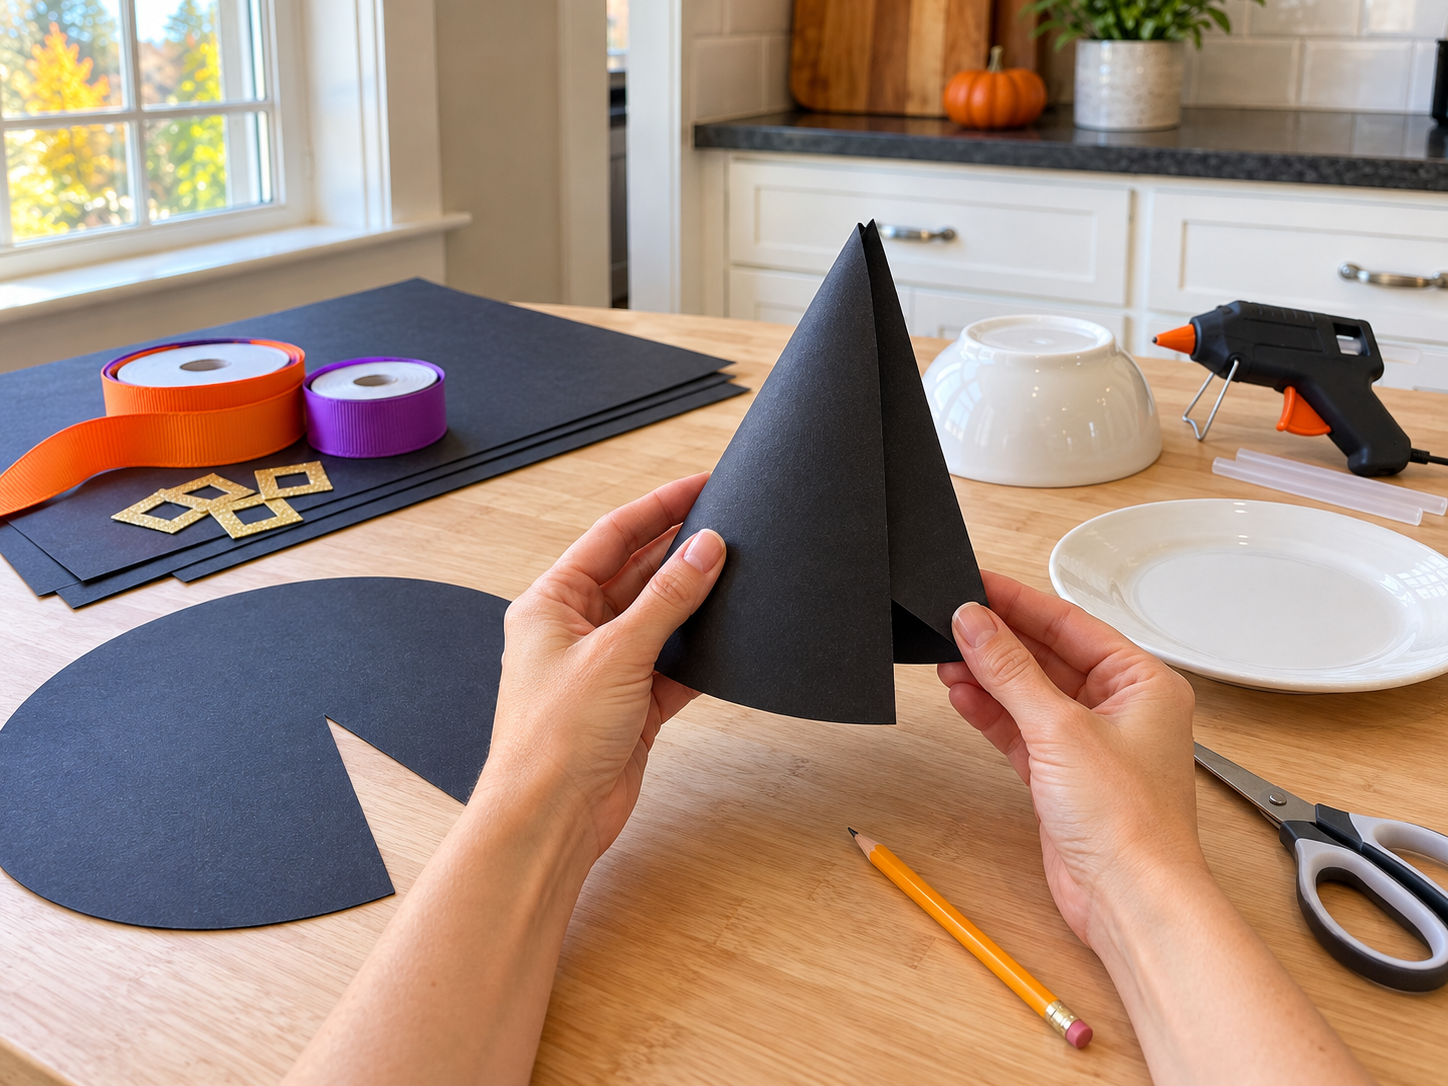
Begin by tracing a large circle (about 6-7 inches in diameter) onto a piece of black cardstock using a bowl or plate as a guide. Carefully cut out this circle. Next, cut a wedge from the circle, similar to a slice of pizza. A wedge that is about 1/4 to 1/3 of the circle will create a good cone shape. Overlap the straight edges of the remaining cardstock and secure them together with hot glue or strong craft glue to form a cone. Ensure the tip is pointed and the base is open.
Step 2: Cut the Hat Brim
For the hat brim, trace a larger circle (approximately 8-9 inches in diameter) onto black cardstock using a plate or another round object. Then, center a smaller round object (like a mug or a smaller bowl) on the larger circle and trace a second, smaller circle inside it. This inner circle should be slightly larger than the base opening of your cone, allowing the cone to sit securely but not fall through. Carefully cut out the large circle, then cut out the inner circle to create a ring-shaped brim.

Step 3: Attach Cone to Brim
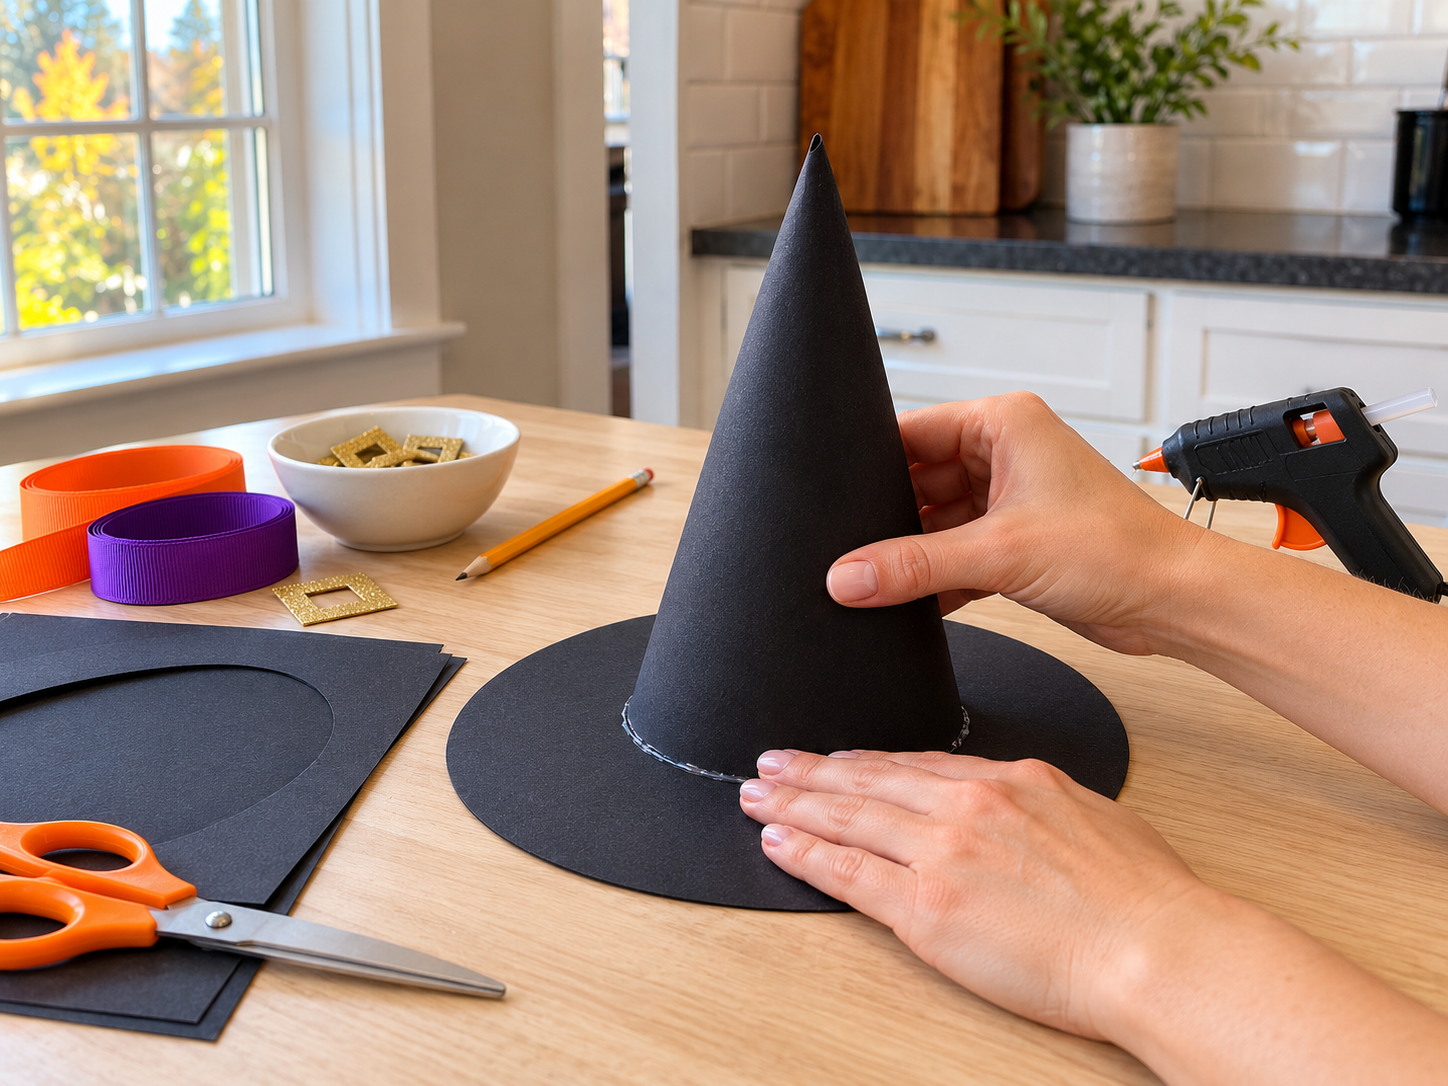
Carefully insert the wider, open end of your cardstock cone into the inner hole of the brim. The cone should rest on the brim's edge. Apply a line of hot glue or strong craft glue around the inside edge of the brim where it meets the cone. Press firmly to secure the cone to the brim. Hold in place until the glue sets completely. Repeat this process for all desired witch hats.


Step 4: Add Ribbon Band
Cut a length of ribbon (orange or purple, or your chosen colors) long enough to wrap around the base of the hat cone, just above the brim, with a small overlap. Apply a thin line of hot glue to one end of the ribbon and press it onto the hat cone. Wrap the ribbon snugly around the cone, ensuring it is level, and secure the other end with another dab of hot glue, overlapping slightly for a clean finish.

Step 5: Attach Glitter Buckle
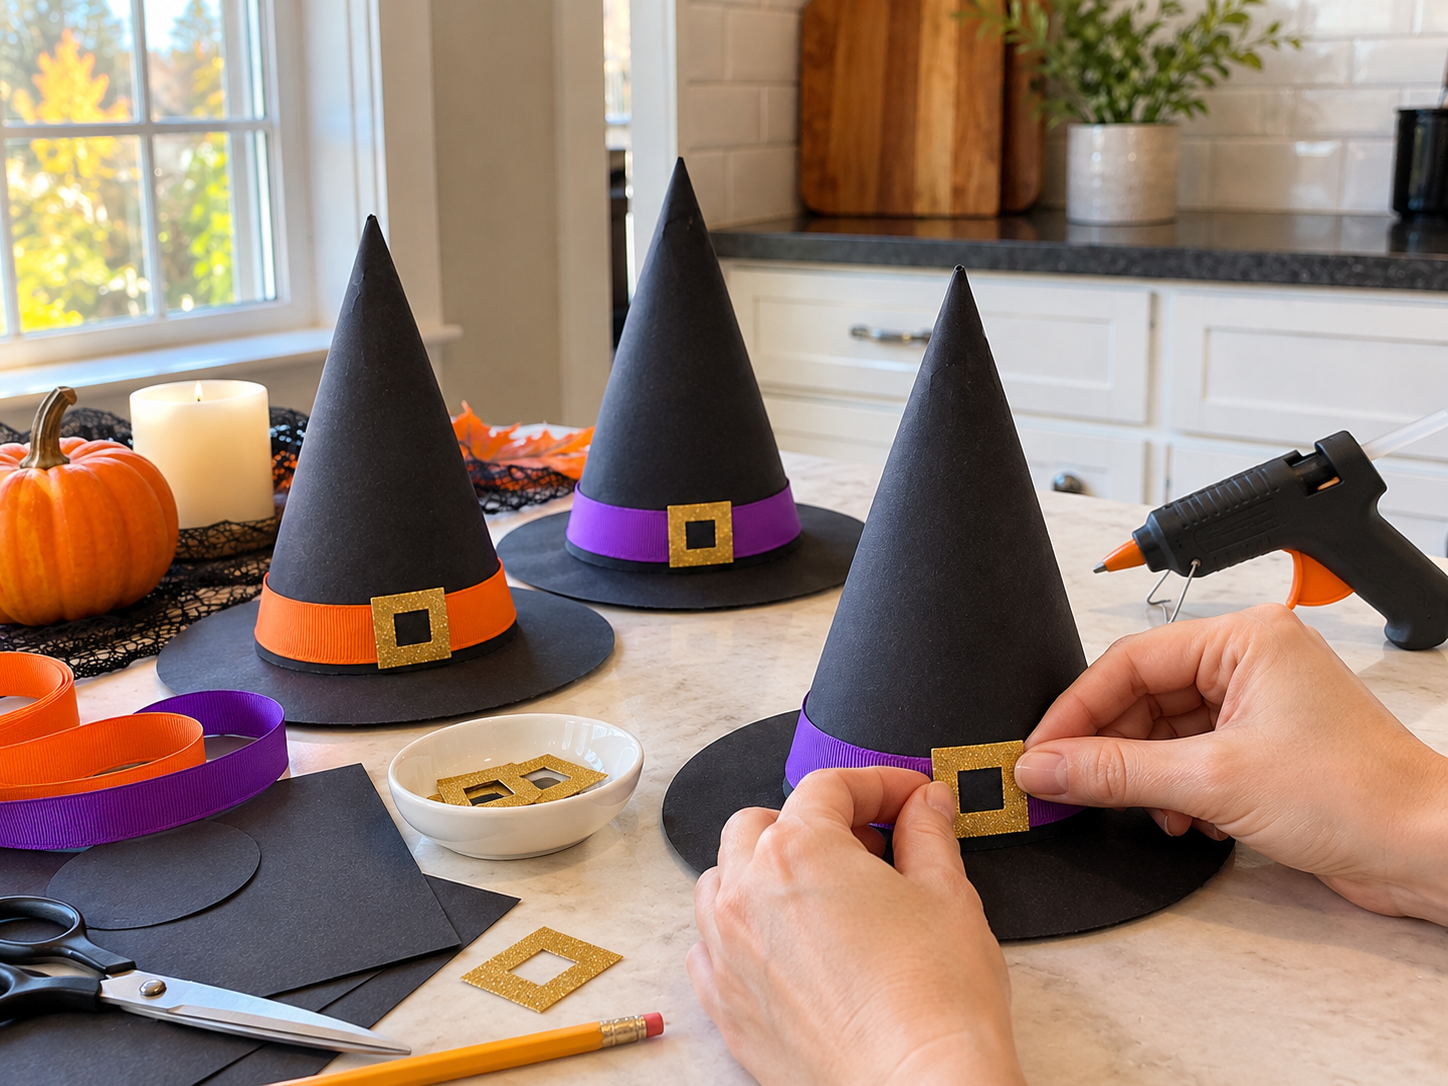
From your gold glitter cardstock or foam, cut out small square shapes to serve as buckles. For a realistic look, you can cut a smaller square from the center of each gold square to create an open buckle frame. Apply a small dot of hot glue to the back of each buckle and carefully press it onto the center front of the ribbon band on each witch hat. Hold until secure. Once all buckles are attached, your witch hat treat cones are ready to be filled with candy!
Displaying Your Finished Witch Hat Treat Cones
Once your mini witch hat treat cones are complete, they are ready to be filled with your favorite Halloween candies. Arrange them on a party table, a kitchen island, or a mantelpiece to add a festive and whimsical touch to your seasonal decor. These charming creations are sure to delight guests and enhance your Halloween celebration.
Related project collection: DIY Farmhouse Glowing Ghost Jar Halloween Centerpiece for a Rustic Tray
Practical Questions About This Project
What materials are needed to make mini witch hat treat cones?
To craft these treat cones, you will need black cardstock, ribbon (such as orange and purple grosgrain), gold glitter cardstock or foam, a hot glue gun and glue sticks, scissors, a pencil, and two round objects for tracing circles.
Is this a suitable craft for beginners?
Yes, this project is classified as easy. It involves basic cutting and assembly techniques, making it accessible for beginner crafters and families with adult supervision for hot glue use.
What can the witch hat treat cones hold?
These treat cones are designed to hold small, wrapped candies. They are open at the base, allowing for easy placement of items like wrapped orange and black candies.
How long does it take to make a set of these treat cones?
The estimated active crafting time for a set of five mini witch hat treat cones is between 30 to 45 minutes. This estimate excludes any unattended drying or curing time for the glue.
Explore cardstock craft supplies at Dollar Tree.

Leave a Reply