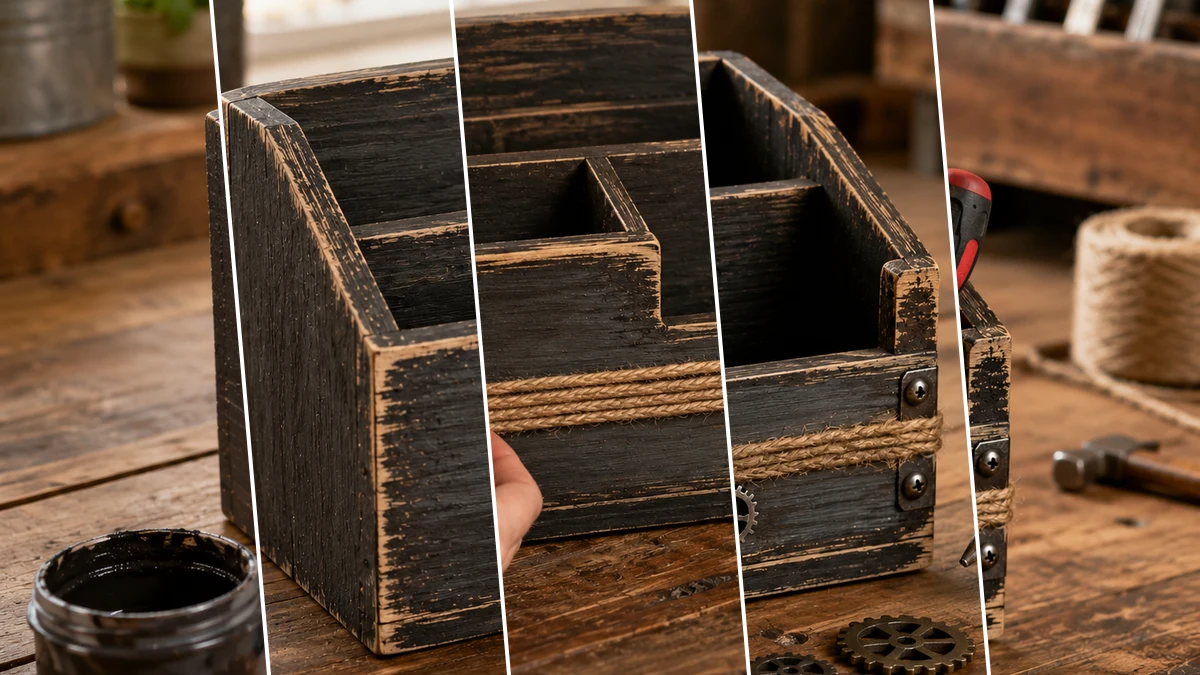
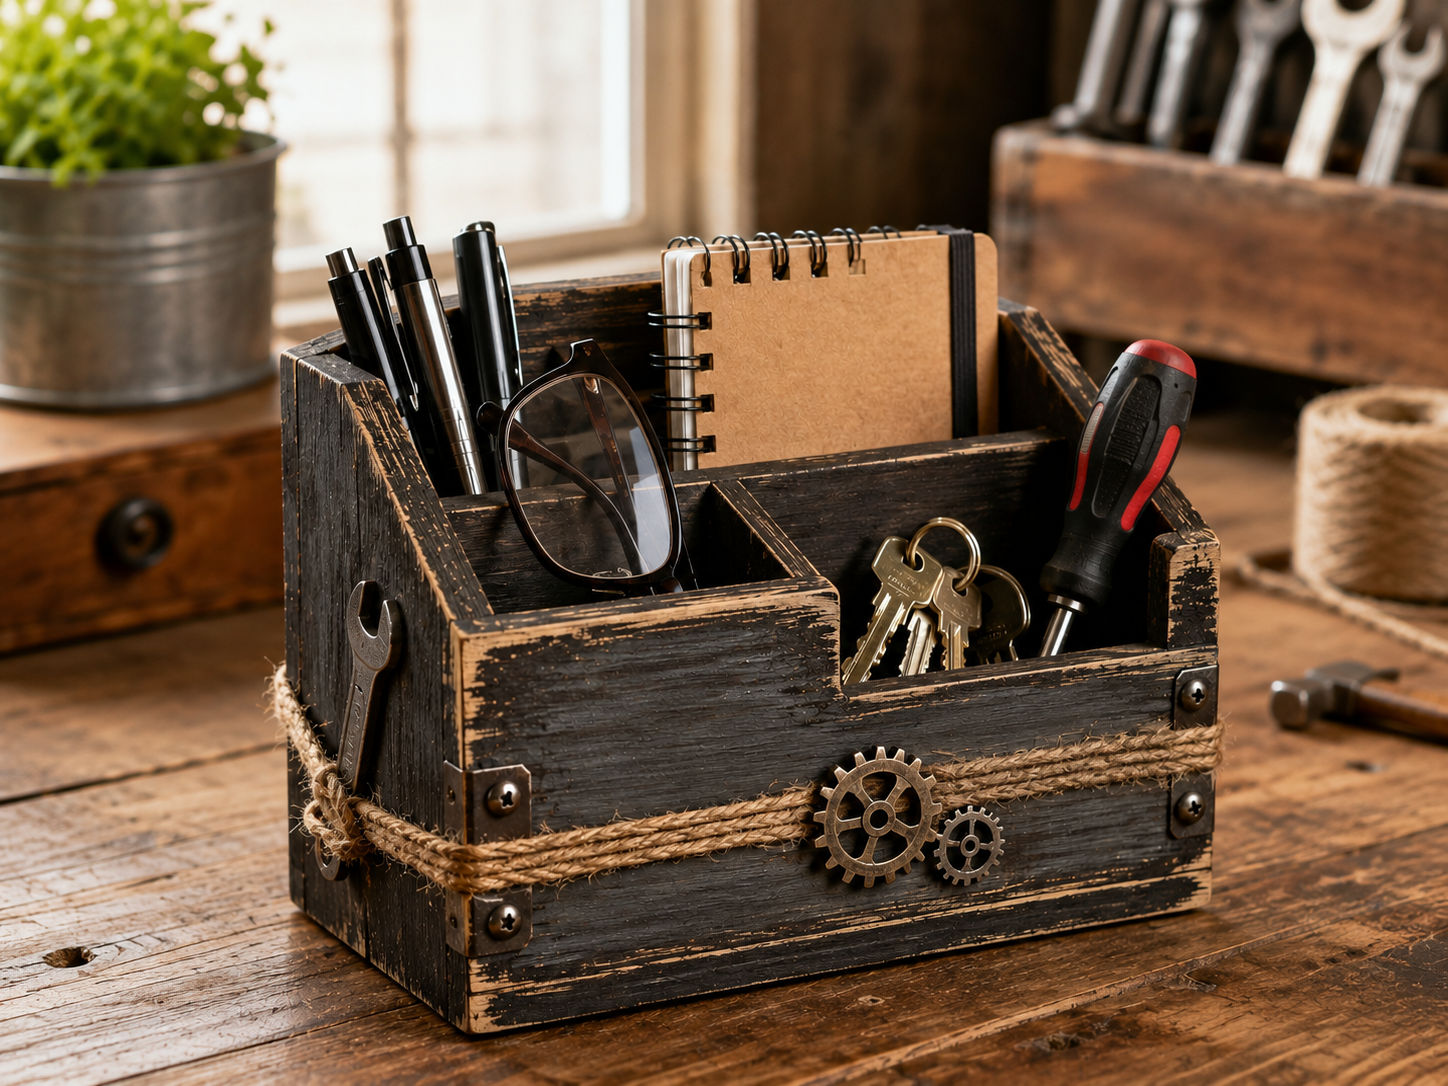
Okay, so my sweet husband’s desk was looking a little, well, *loved*, if you know what I mean. Pencils rolling around, papers everywhere, total chaos! I knew he needed something to keep all his bits and bobs in one spot, and that’s how I got the idea for this Rustic Dad’s Desk Organizer: A Workshop-Inspired Gift. It totally cleaned up his space and looks super cute too.
See also: Diy Fathers Day Rustic Mini Sign For Dads Garage
Theme: Farmhouse / Rustic
Materials Needed
- Small Wooden Desk Organizer (crate, box, or divided base)
- Dark Acrylic Paint (black, charcoal, or dark brown)
- Sponge Brush
- Medium-Grit Sandpaper
- Jute Twine
- Hot Glue Gun & Glue Sticks
- Assorted Faux Metal Embellishments (gears, mini tools like wrenches, screw/bolt accents, corner hardware)
- Protective Workspace Cover (drop cloth or newspaper)
📋 Love staying organized while crafting? Check out our printable planners & craft designs at CraftersDT on Etsy and use code CRAFT20 for 20% off your entire order!
Why This Craft Works
This little organizer is just perfect for any dad, husband, or even grandpa who needs a little help keeping their desk or workspace tidy. It fits right in with that cozy Farmhouse / Rustic style that’s so popular, so it won’t look out of place in a home office or even a garage workshop. He can use it for pens, sticky notes, small tools, or whatever tiny treasures he collects.
📱 Free to Download
Join 50,000+ crafters already using Craftino
Browse 83+ Farmhouse / Rustic ideas and thousands more in the app
✓ Save crafts & browse fully offline
✓ Download printable PDF guides for every project
✓ Step-by-step photo tutorials, nothing left out
✓ 1,000+ craft projects with new ones added every week

The best part? This craft is seriously budget-friendly. I made mine using mostly Dollar Tree supplies, so the whole project comes in at under $5, depending on what you already have at home. You just can’t beat that for a handmade gift!
This Organizing & Storage project is super easy, even if you’re new to crafting. It took me about 30-45 minutes from start to finish, not counting drying time. It’s perfect for beginners, busy moms looking for a quick gift, or anyone who wants a charming Farmhouse / Rustic touch for their home without a lot of fuss.
Step-by-Step Instructions for Rustic Dad’s Desk Organizer: A Workshop-Inspired Gift
Alright, crafters, are you ready to get your hands a little bit dirty and make something awesome? This Rustic Dad’s Desk Organizer project is honestly one of the quickest and most satisfying crafts I’ve done lately. It’s so simple, you’ll be done creating this perfect Organizing & Storage piece before you know it. It’s perfect for beginners, and I promise you’ll have a blast putting it together.
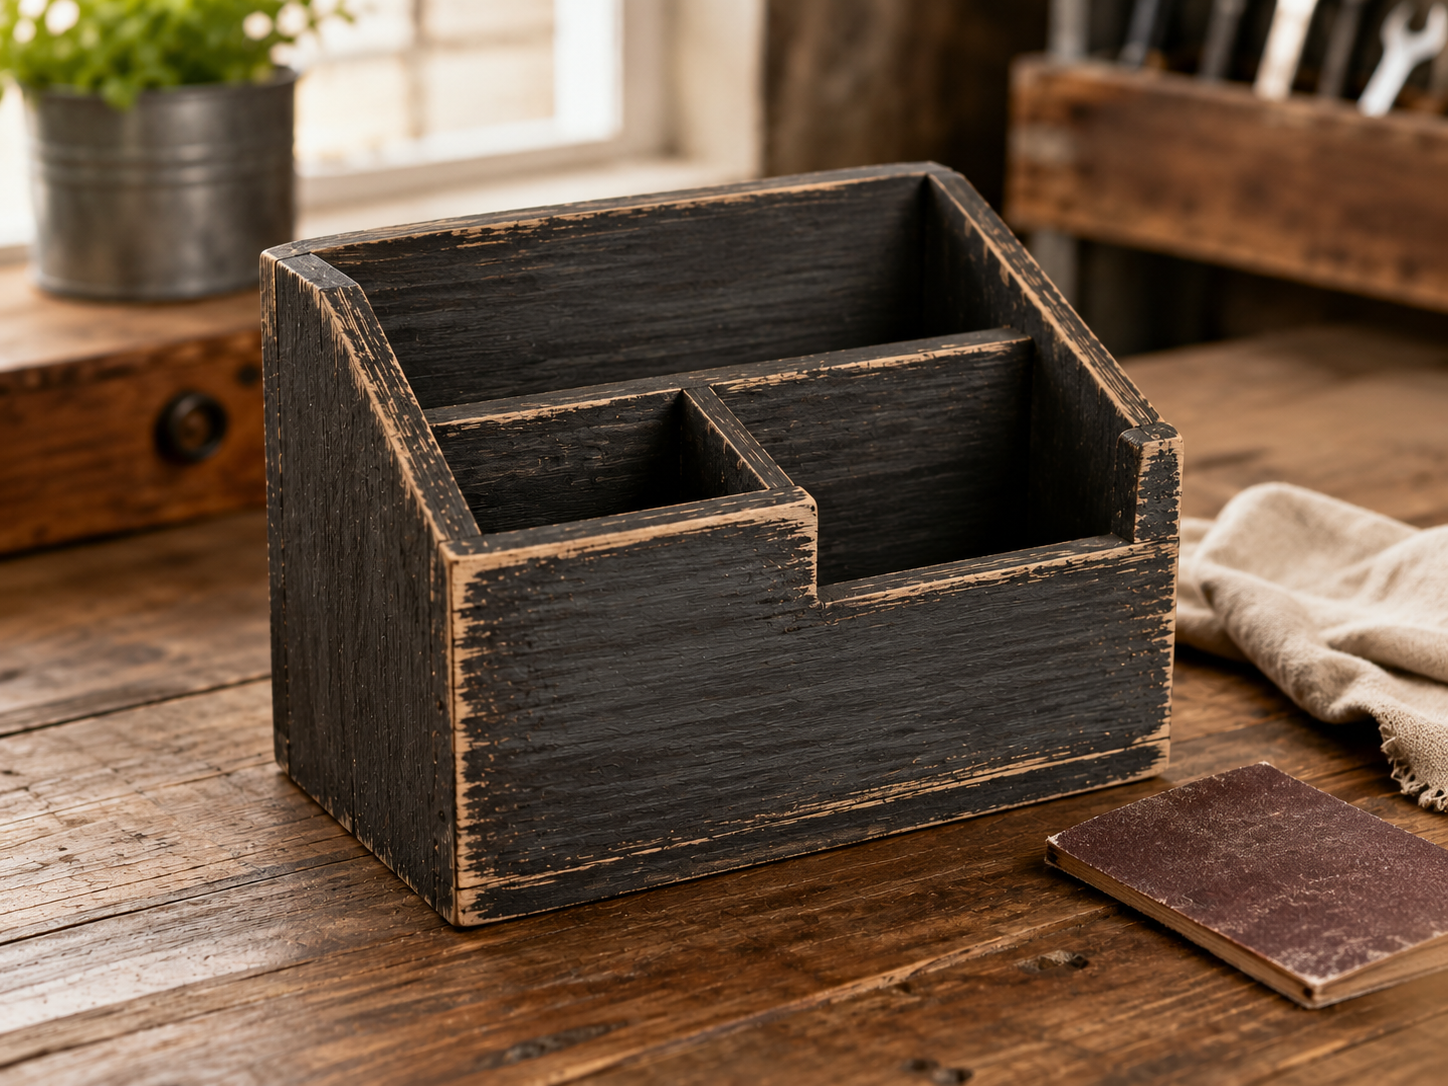
Step 1: Paint the Wooden Base
Begin by setting up your workspace with a protective cover. Using a sponge brush, apply an even coat of your chosen dark brown, charcoal, or black acrylic paint to the entire wooden organizer, ensuring thorough coverage of all surfaces. Allow the paint to dry completely before proceeding.

💡 Pro Tip: For best results and a durable finish, apply two thin coats rather than one thick coat. Let each coat dry for at least 30-60 minutes, or until touch-dry, before applying the next to prevent tackiness and ensure even drying.
Step 2: Distress for a Worn Look
Once the paint is completely dry, take a piece of medium-grit sandpaper (around 120-180 grit) and gently sand the edges, corners, and any raised areas of the organizer. This technique will reveal the natural wood underneath, creating a distressed, worn, and workshop-inspired aesthetic. After sanding, wipe away any loose sanding dust with a dry cloth.
💡 Pro Tip: Start with light pressure and gradually increase as needed. Over-sanding can remove too much paint, so aim for a subtle, aged effect. Concentrate on areas that would naturally show wear and tear, like the edges and corners, for the most realistic look.
🗓️ Keep all your craft projects on track! Explore our printable planners & templates at CraftersDT on Etsy and use code CRAFT20 for 20% off!
Step 3: Add Rustic Twine Detail
Take your jute twine and wrap it horizontally around the front or sides of the organizer. You can choose to do a single wrap or multiple wraps for a thicker, more prominent detail. Secure the ends of the twine, and any overlapping sections, with small, precise dots of hot glue on the back or less visible areas. Optionally, tie a simple knot or bow.
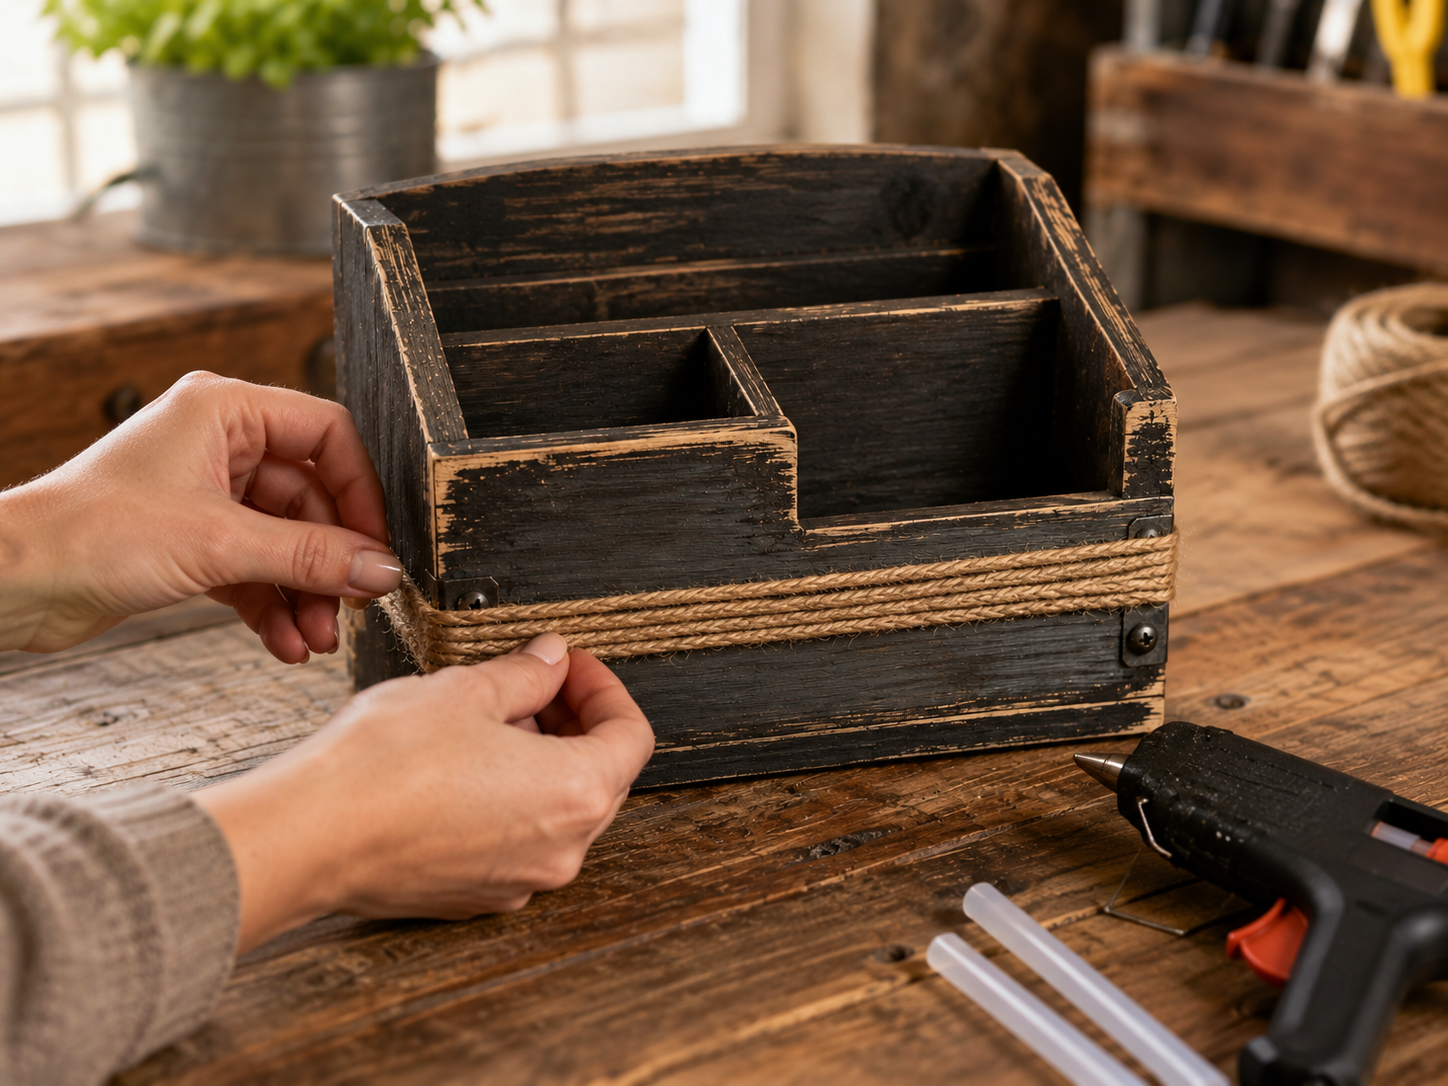
💡 Pro Tip: Apply hot glue sparingly and precisely to avoid visible blobs, as they can detract from the rustic aesthetic. Hold the twine firmly in place for a few seconds as the glue cools. For added security, you can place a tiny dot of glue every few inches along the back side of the twine wrap.
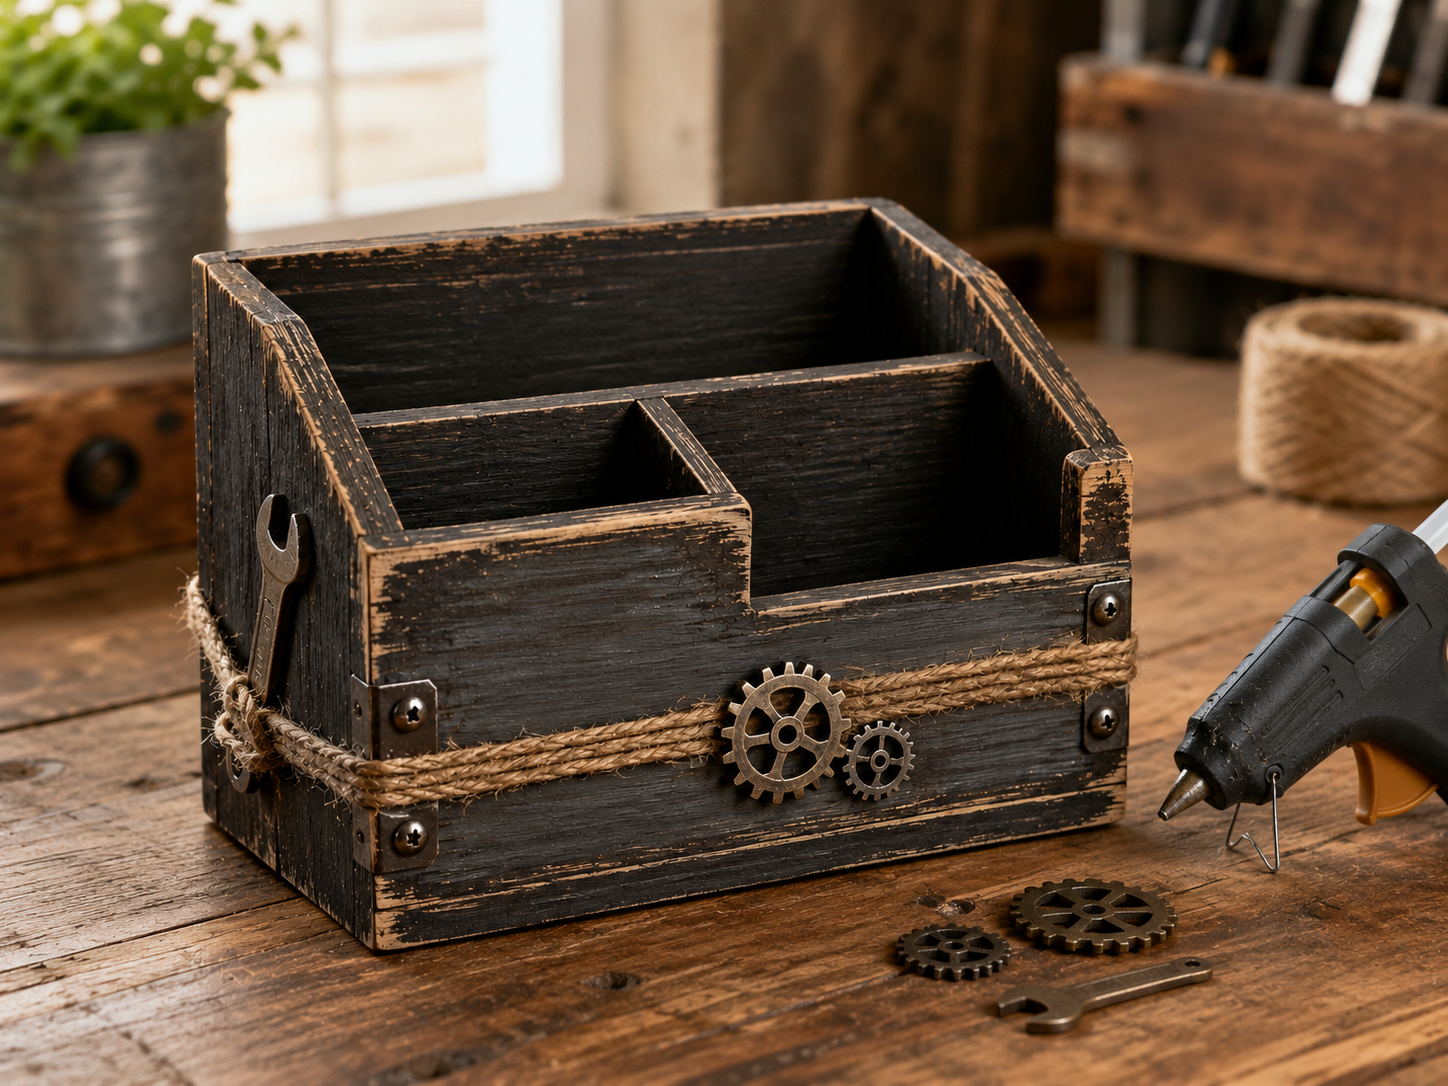
Step 4: Embellish with Industrial Accents
Now it’s time to add the industrial-style embellishments. Arrange your faux metal gears, mini tool shapes (like a wrench or screwdriver), screw or bolt accents, and optional metal corner stickers or craft hardware onto the front and sides of the organizer. Once you are satisfied with the placement and design, secure each piece firmly in place using hot glue.
💡 Pro Tip: Before applying glue, lay out all your embellishments to visualize the final design. Take a quick photo to remember your preferred arrangement. When gluing smaller items, use a low-temp hot glue gun if possible to avoid damaging delicate embellishments or burning your fingers.
📱 Free to Download
Join 50,000+ crafters already using Craftino
Browse 62+ Farmhouse / Rustic ideas and thousands more in the app
✓ Save crafts & browse fully offline
✓ Download printable PDF guides for every project
✓ Step-by-step photo tutorials, nothing left out
✓ 1,000+ craft projects with new ones added every week
Step 5: Finalize & Fill
Allow all the hot glue to fully cool and set, which typically takes only a few minutes. Your rugged ‘Dad’s Desk Organizer’ is now complete and ready for gifting! Place useful items inside, such as pens, a small notebook, reading glasses, keys, remote controls, or a small screwdriver, making it a perfectly practical and personal addition to his desk, garage shelf, or workbench.
💡 Pro Tip: To prevent any potential scratches to furniture, consider adding small felt pads to the bottom corners of the organizer. For an extra personal touch, you could hide a small, heartfelt note inside one of the compartments for Dad to discover.
Celebrate Your Rustic Dad’s Desk Organizer!
See? I told you it was easy! Now you have the cutest Rustic Dad’s Desk Organizer: A Workshop-Inspired Gift that looks like you spent a ton of money. Go ahead and gift it to your favorite guy, or keep it for yourself, no judgment here! Don’t forget to share your finished craft with me, I love seeing what you make!
📱 Free to Download
Join 50,000+ crafters already using Craftino
Browse 68+ Farmhouse / Rustic ideas and thousands more in the app
✓ Save crafts & browse fully offline
✓ Download printable PDF guides for every project
✓ Step-by-step photo tutorials, nothing left out
✓ 1,000+ craft projects with new ones added every week
Frequently Asked Questions
How much does it cost to make a DIY Rustic Dad’s Desk Organizer?
This Farmhouse / Rustic organizer costs about $3 to $5 to make, using mostly supplies from Dollar Tree. You might even have some of the craft basics, like glue or paint, already on hand.
How long does the Rustic Dad’s Desk Organizer DIY take?
You can put together this Organizing & Storage craft in about 30-45 minutes. This estimate does not include any drying time needed for paint or glue, which could add another 1-2 hours.
What Dollar Tree items are best for this workshop-inspired gift?
Look for small wooden crates (like the 5.5-inch ones), small metal buckets or tins, and maybe some wooden beads, twine, or small hooks. These are usually found in the craft or home decor aisles.
What kind of paint works best for a rustic look on this organizer?
Chalk paint or acrylic craft paint in colors like charcoal gray, cream, or brown will give it a perfect Farmhouse / Rustic distressed finish. You’ll probably only need about 2-3 ounces of paint for the whole project.
How durable is a DIY Rustic Dad’s Desk Organizer?
With a good strong craft glue (like E6000 or super glue) and a clear sealant spray, your Rustic Dad’s Desk Organizer should last for several years, even with daily use. Make sure all pieces are firmly attached.
Can I customize my Rustic Dad’s Desk Organizer for a unique touch?
Absolutely! You can add a personalized initial using a stencil, a small metal tag, or use different paint colors to match his office decor. Try adding a small piece of faux leather or a small hook for keys for an extra touch.
Discover the newest Dollar Tree arrivals for your next craft project here.
Leave a Reply