Ever walk into Dollar Tree just for one thing and leave with a whole cart of ‘I might need this later’ treasures? Same! That’s exactly how I ended up with all the goodies for this super cute Rustic Farmhouse Window Planter Shelf Decor. I just knew I could turn those simple finds into something truly special for my kitchen.
Theme: Farmhouse / Rustic
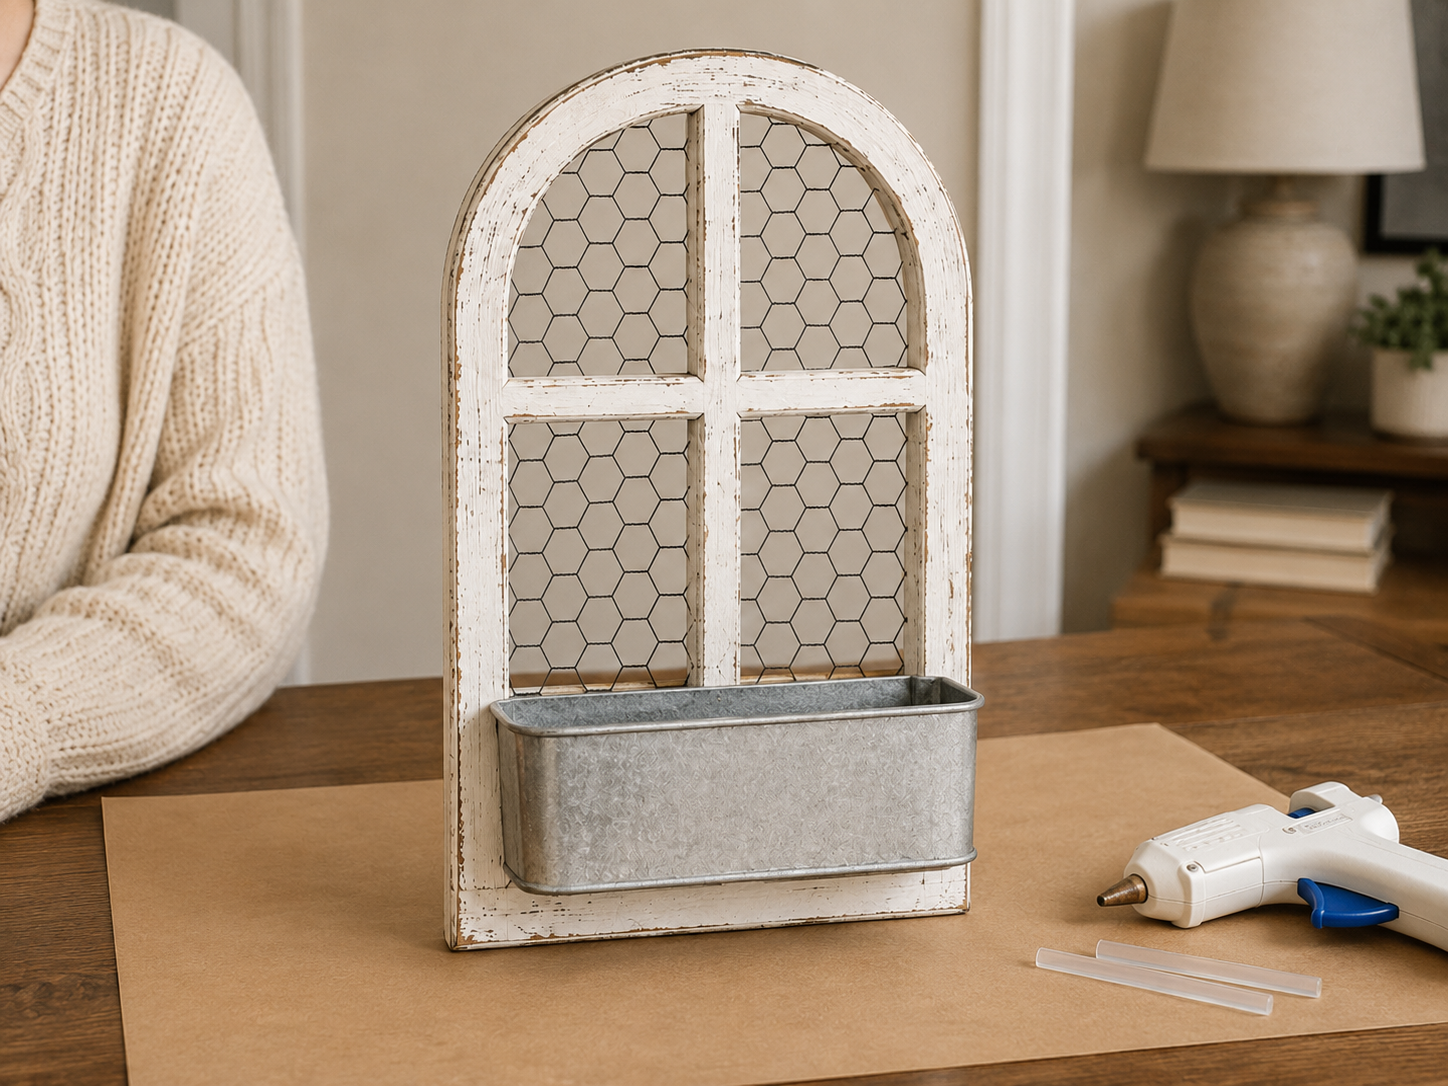
Materials Needed
- Arched Wooden Window Frame
- Chicken Wire Mesh
- Galvanized Metal Planter
- White & Brown Craft Paint (Chalk or Acrylic)
- Faux Eucalyptus & Filler Stems
- Natural Wood Beads & Jute Twine
- Hot Glue Gun & Sticks
- Basic Craft Tools (scissors, wire cutters, paintbrush)
Why This Craft Works
This little Rustic Farmhouse Window Planter Shelf Decor is perfect for adding that cozy, lived-in feel to any room. I made one for my farmhouse kitchen to hold some small herbs, but it would also look amazing in a bathroom with tiny succulents or even as a unique Mother’s Day gift for a fellow plant lover. It’s such a sweet piece of Home Decor that brings a touch of the outdoors inside.
And guess what? Creating this charming piece of Farmhouse / Rustic decor won’t break the bank at all. Thanks to my Dollar Tree hauls, all the supplies for this project ran me about $11-14 total. You really can make something beautiful and custom without spending a fortune, which is my favorite kind of DIY!
Don’t worry if you’re new to crafting, because this project is super easy peasy, lemon squeezy! From start to finish, the entire Rustic Farmhouse Window Planter Shelf Decor took me about 30-45 minutes to put together. It’s perfect for beginners, a quick weekend project, or even a fun craft night with friends.
Step-by-Step Instructions for Rustic Farmhouse Window Planter Shelf Decor
Alright crafters, are you ready to get your hands dirty and make some magic? This Rustic Farmhouse Window Planter Shelf Decor project is seriously so much fun and unbelievably simple. You’ll be amazed at how quickly those Dollar Tree finds turn into a beautiful piece of Farmhouse / Rustic Home Decor. Let’s grab our supplies and get started, you’re going to love it!
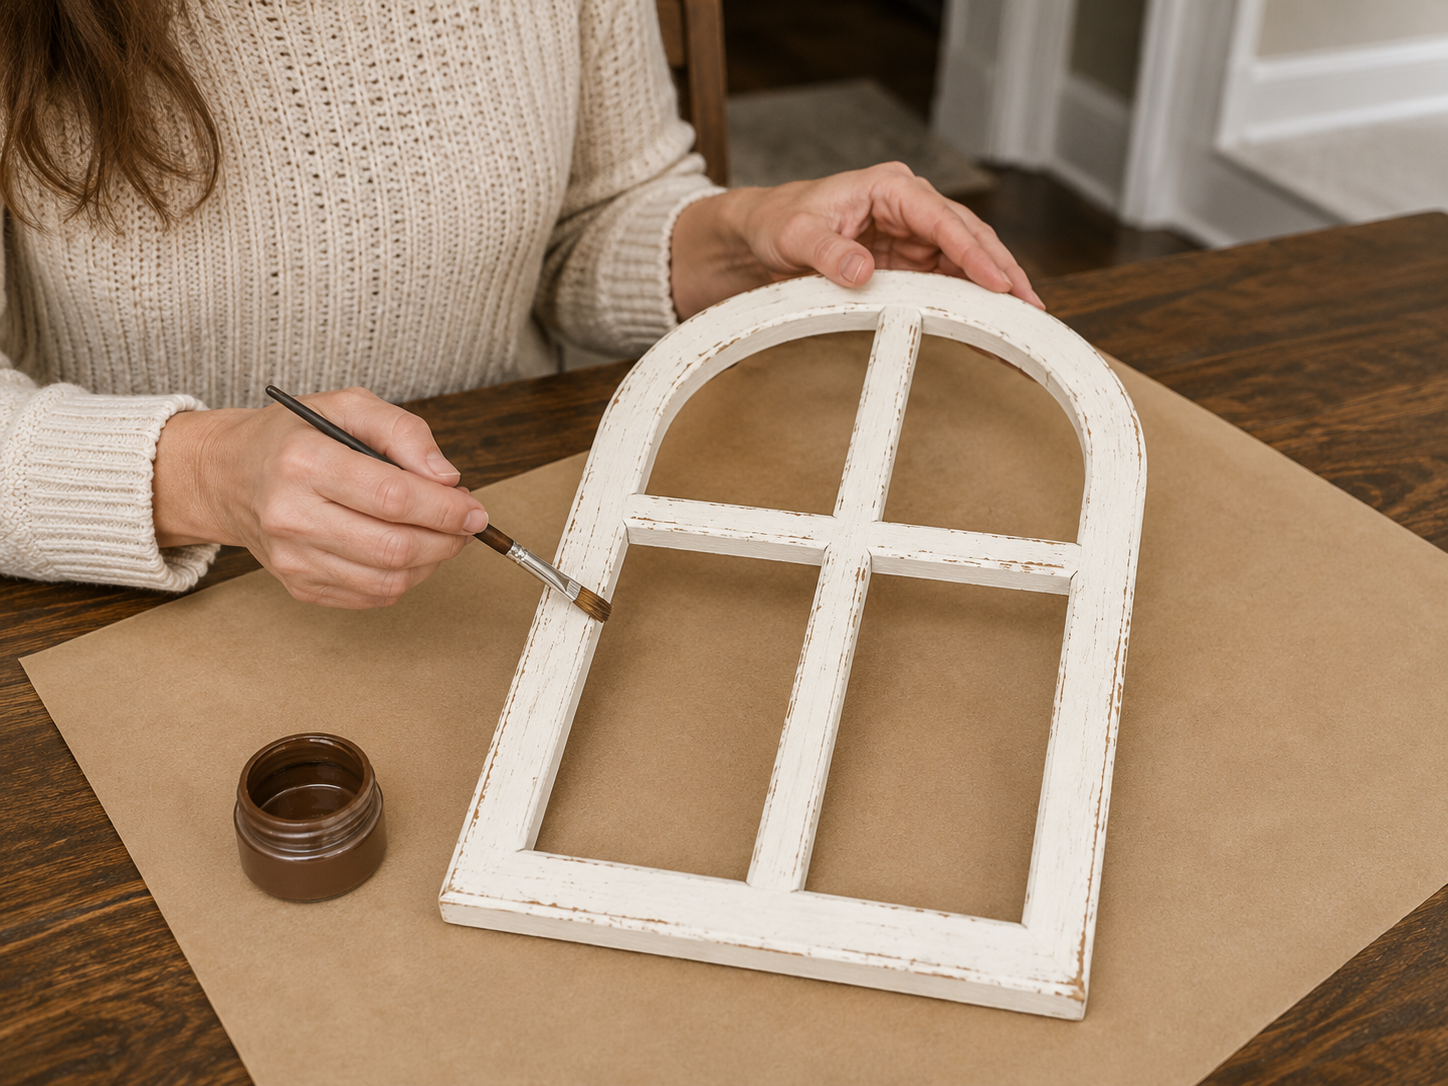
Step 1: Paint & Distress the Frame
Begin by preparing your arched wooden window frame. Apply two thin, even coats of cream chalk paint or white acrylic paint, allowing each coat to dry completely. Once dry, use fine-grit sandpaper or a dry brush technique with a small amount of brown acrylic paint to lightly distress the edges and raised areas of the frame. This technique creates an aged, farmhouse look by revealing hints of the natural wood or a darker undertone beneath the white paint.
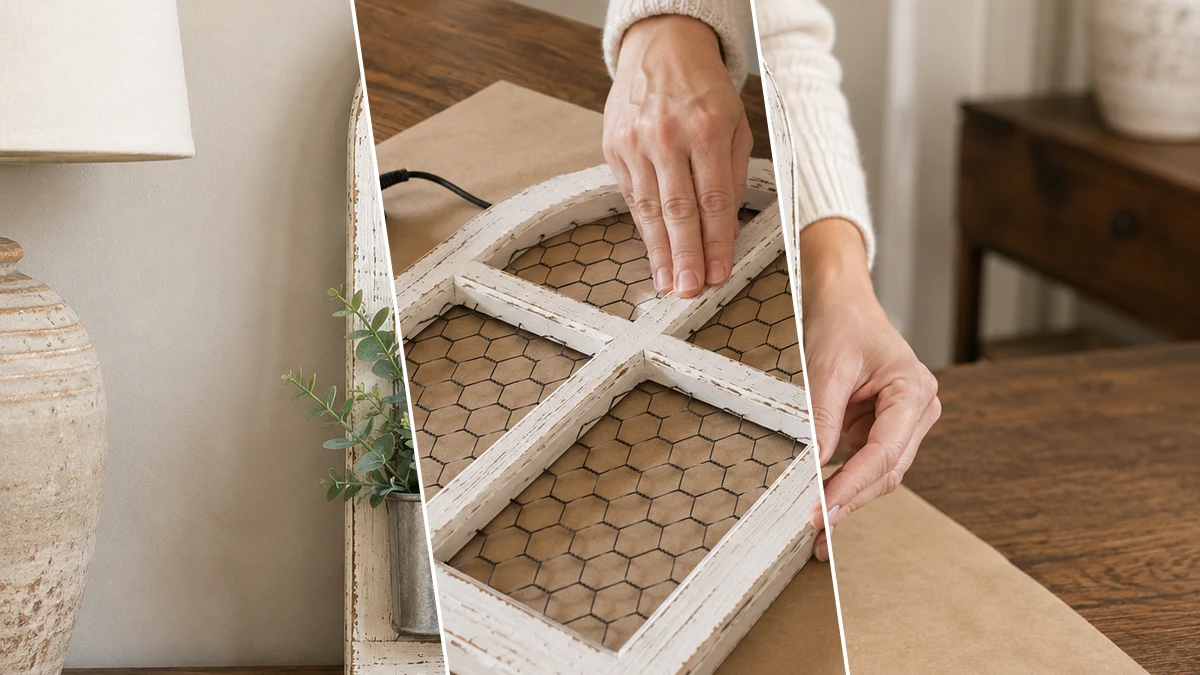
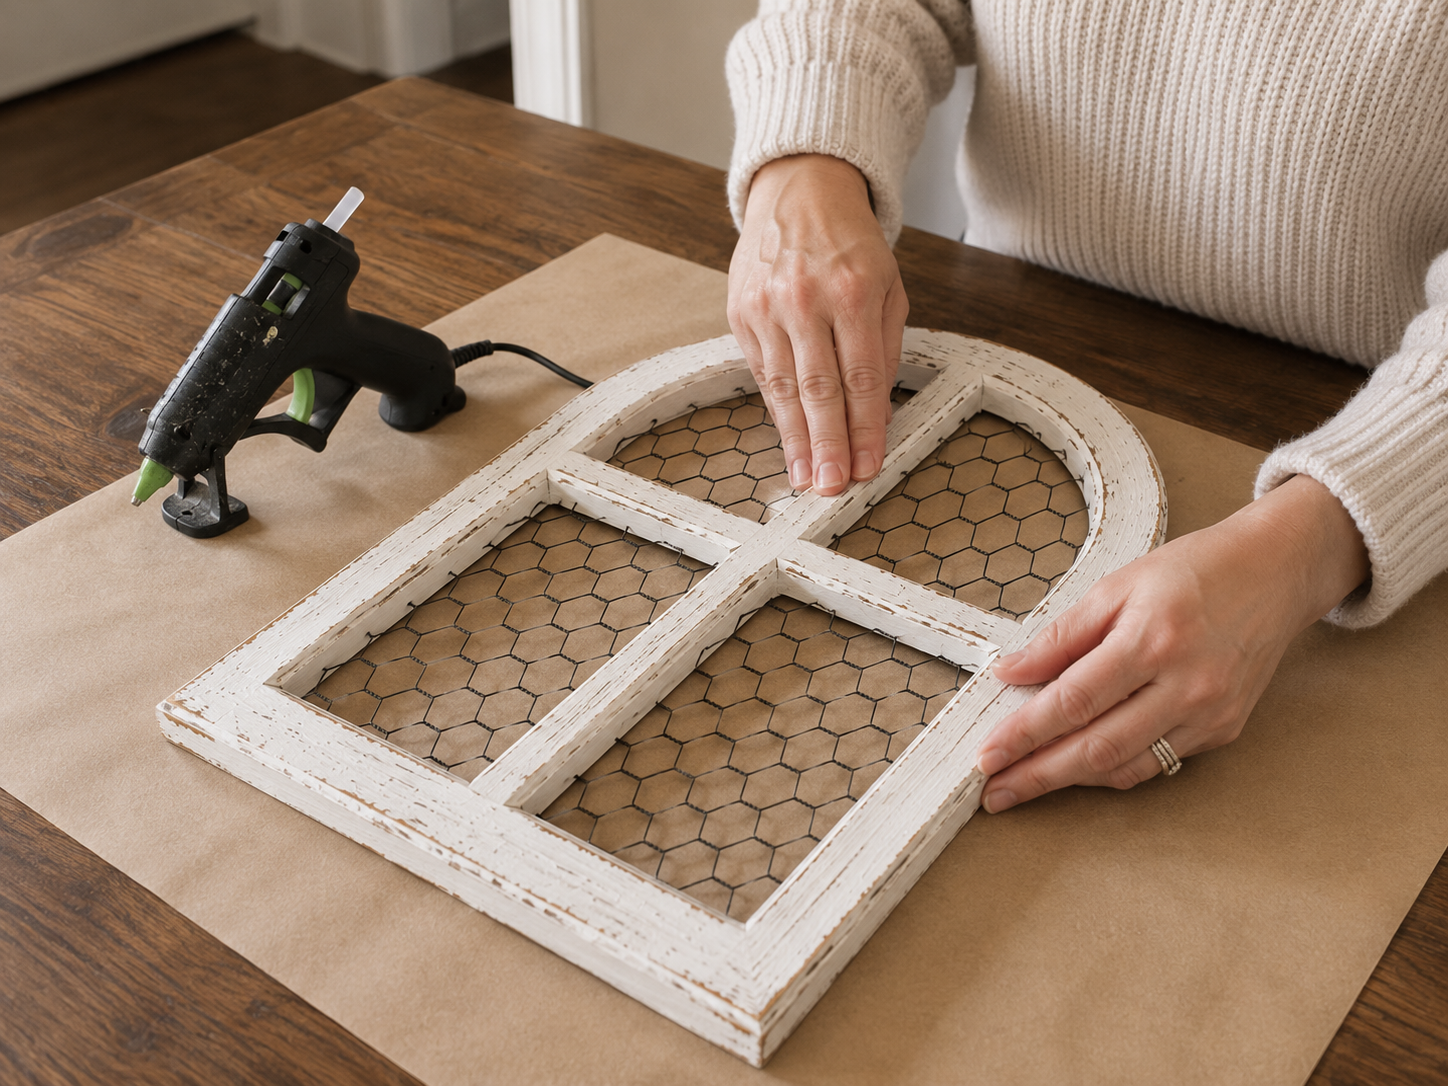
Step 2: Add Chicken Wire Backing
Carefully measure and cut a piece of thin chicken wire mesh or black craft wire mesh to fit precisely behind the open sections of your distressed window frame. Ensure the mesh is large enough to cover all openings but doesn’t overlap the frame’s outer edges excessively. Using a hot glue gun, apply a thin bead of glue along the back edges of the window frame’s openings and carefully press the cut mesh into place. Work in sections to ensure the mesh is taut and securely adhered without bulging. The hexagonal wire pattern should be clearly visible through the window sections.
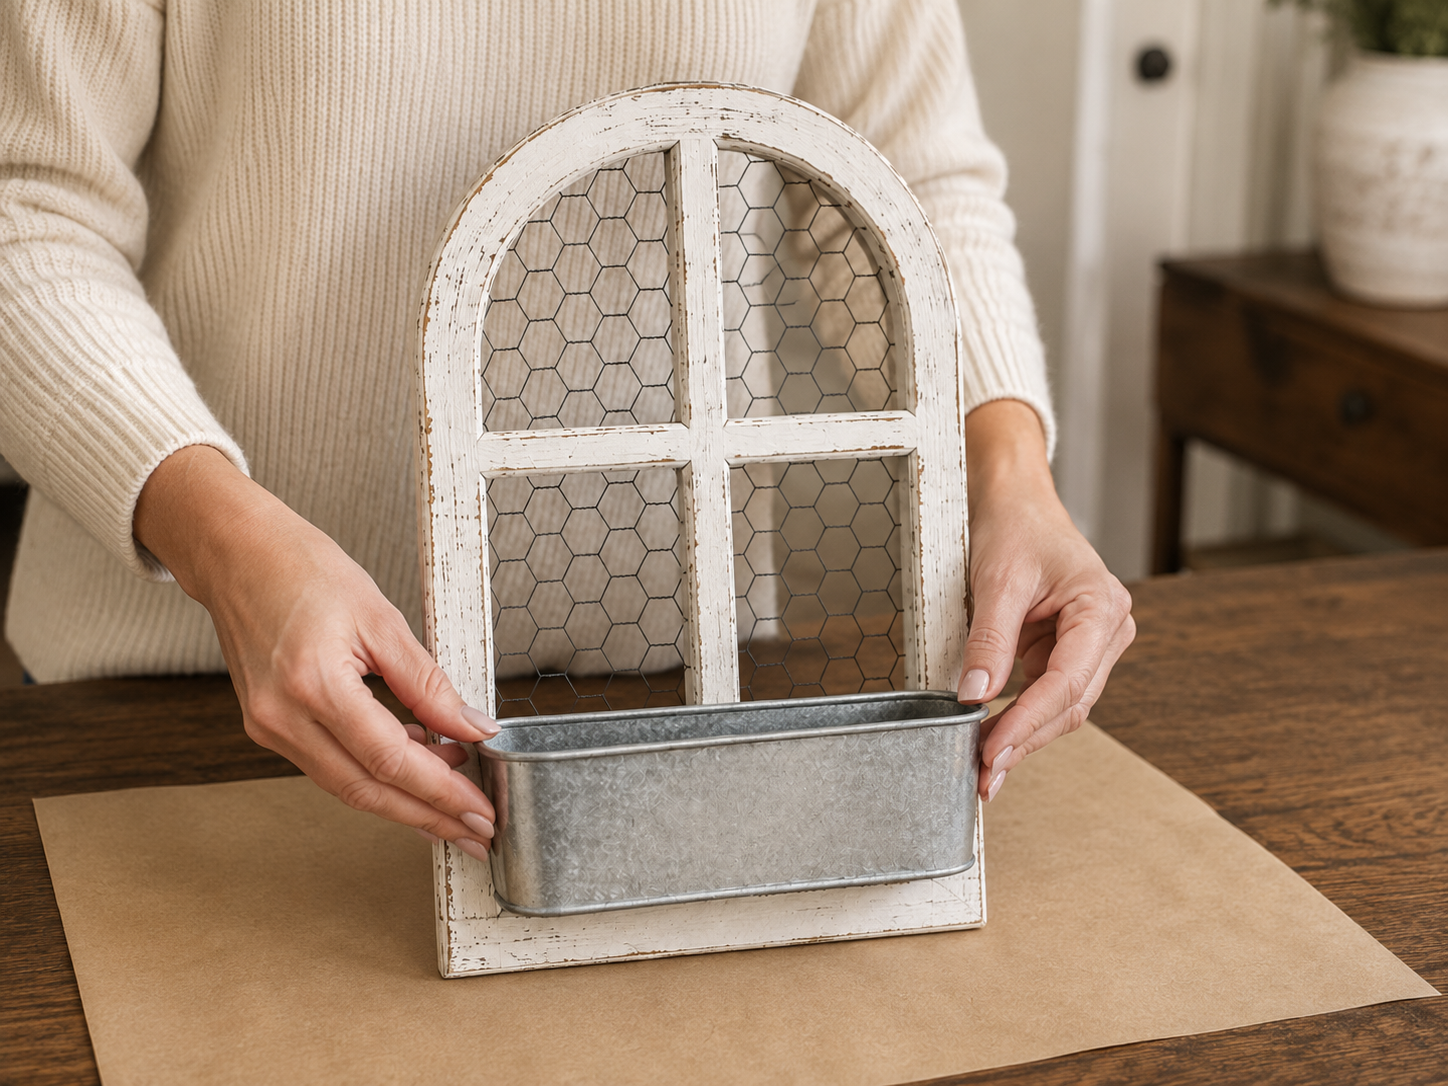
Step 3: Position the Metal Planter
Take your small galvanized metal planter and carefully position it across the lower front section of the window frame. Center it horizontally and ensure it sits straight and level. The planter should cover only the bottom portion of the window frame, leaving the arched shape and the chicken wire visible above it. Hold it in place to visualize the final look before securing it permanently. This step is crucial for achieving the desired aesthetic balance.
Step 4: Secure the Planter Pocket
Once you’re satisfied with the planter’s positioning, apply generous amounts of hot glue to the back of the planter where it meets the window frame. Press the planter firmly against the frame and hold it in place until the glue cools and sets. Ensure it is very secure and stable, as it will hold the faux greenery. If necessary, add extra glue to the inner seams for added strength. The empty metal pocket should be clearly visible and ready for floral arrangements.
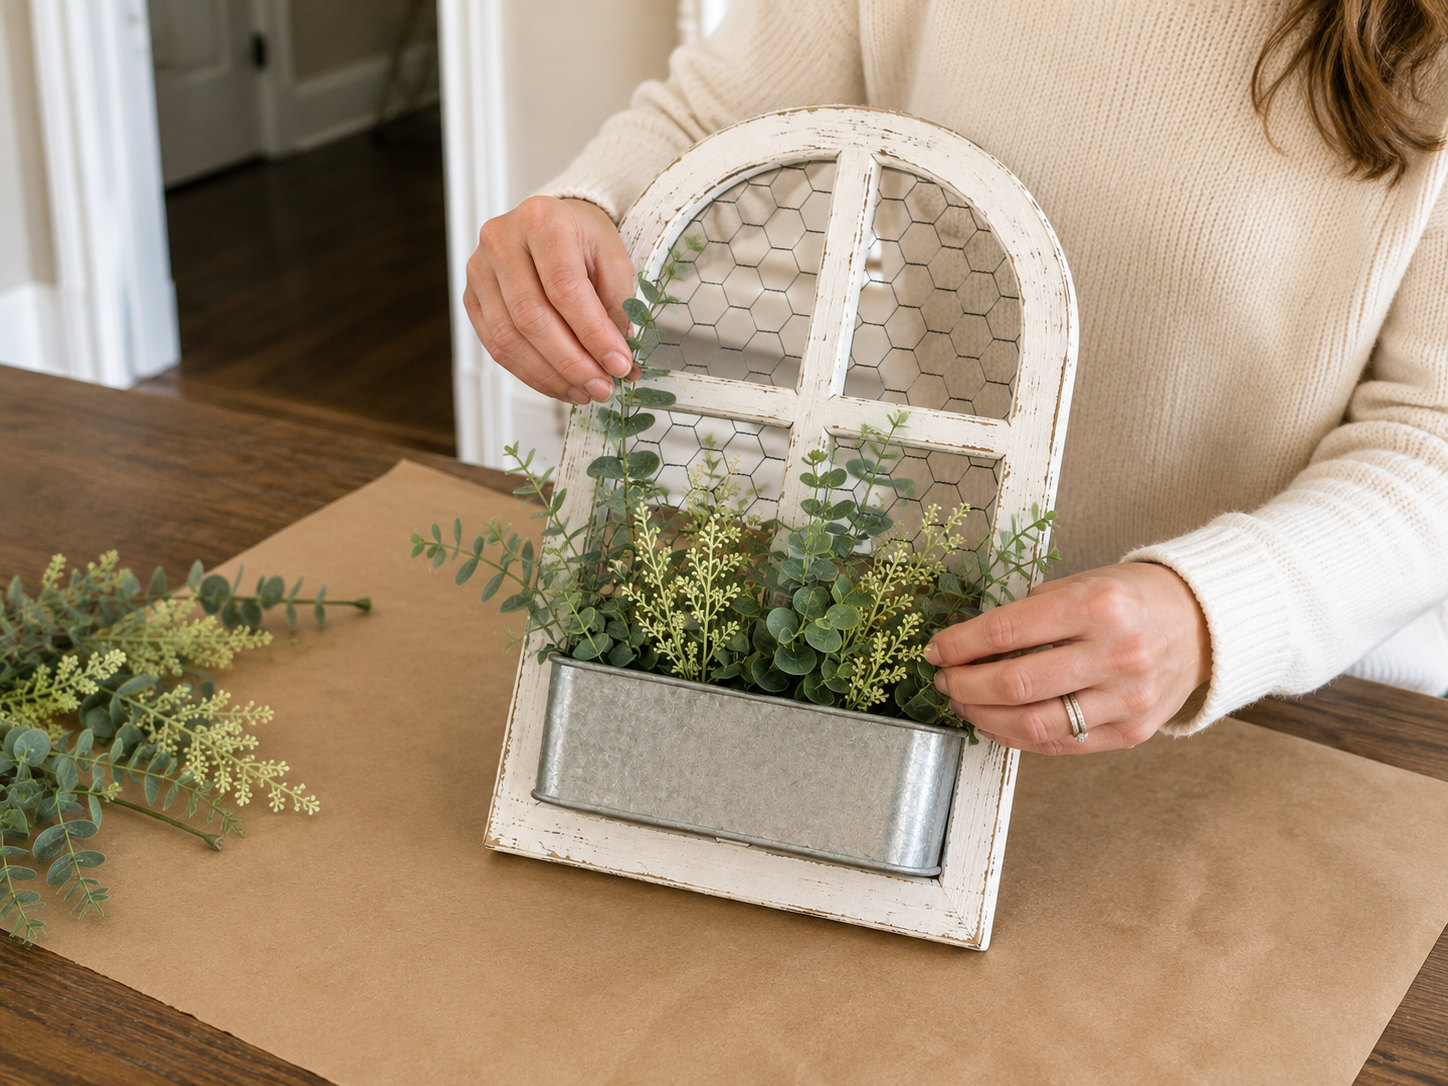
Step 5: Arrange Faux Greenery
Begin by trimming your faux eucalyptus stems to varying lengths suitable for the planter. Start by placing the eucalyptus stems into the planter, creating a soft, airy green base that provides texture without being too dense. Next, trim your small cream filler stems and carefully arrange them mostly towards the center of the planter, nestled among the eucalyptus. This adds height and a delicate pop of color. Keep the arrangement controlled, airy, and balanced, ensuring it doesn’t overpower the window frame or block too much of the chicken wire from view.
📱 Craftino App
Make more crafts like this
1,000+ Farmhouse / Rustic ideas with photo guides & Pro Tips
✓ Step-by-step photo tutorials, nothing left out
✓ Pro Tips for every step
✓ Save crafts & browse fully offline
✓ New ideas added every week

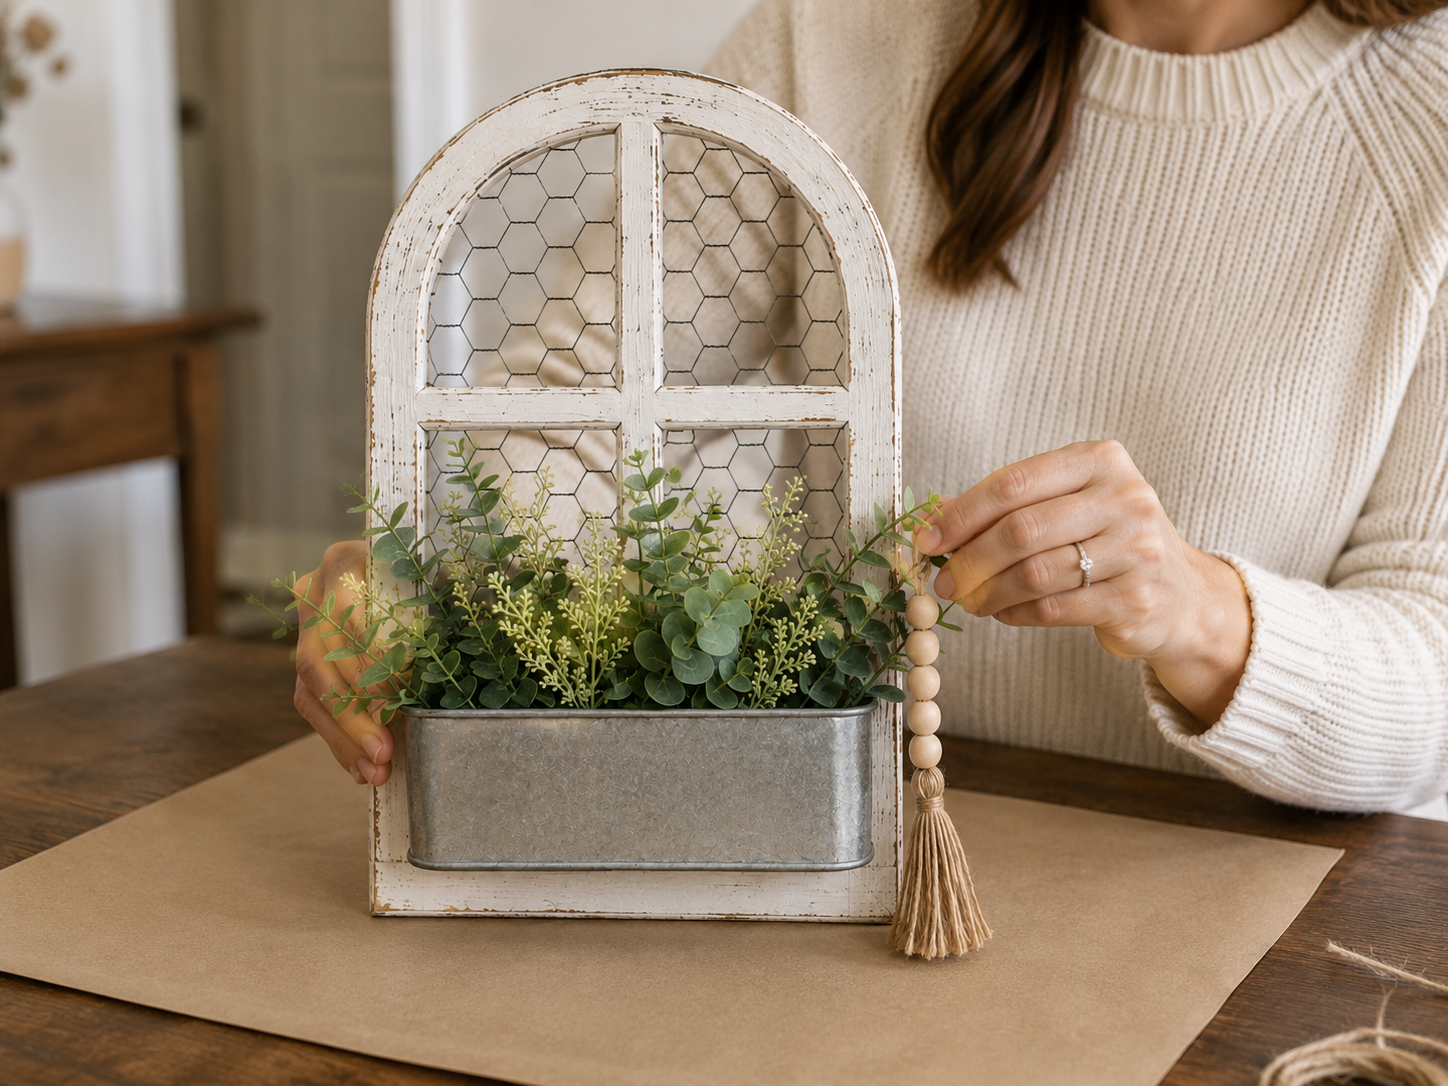
Step 6: Create & Attach Bead Tassel
To create the farmhouse bead tassel, cut a length of jute twine. Thread several natural wood beads onto the twine, leaving enough twine at the bottom to form a tassel. For the tassel itself, wrap jute twine repeatedly around a few fingers (or a small piece of cardboard) to create a loop, then tie it securely at one end and cut the loops at the other to form the fringe. Attach this jute tassel below the wood beads. Then, tie or hot glue the top loop of the beaded tassel to the right side of the window frame or the planter’s edge so it hangs naturally beside the metal planter, adding a subtle rustic accent.
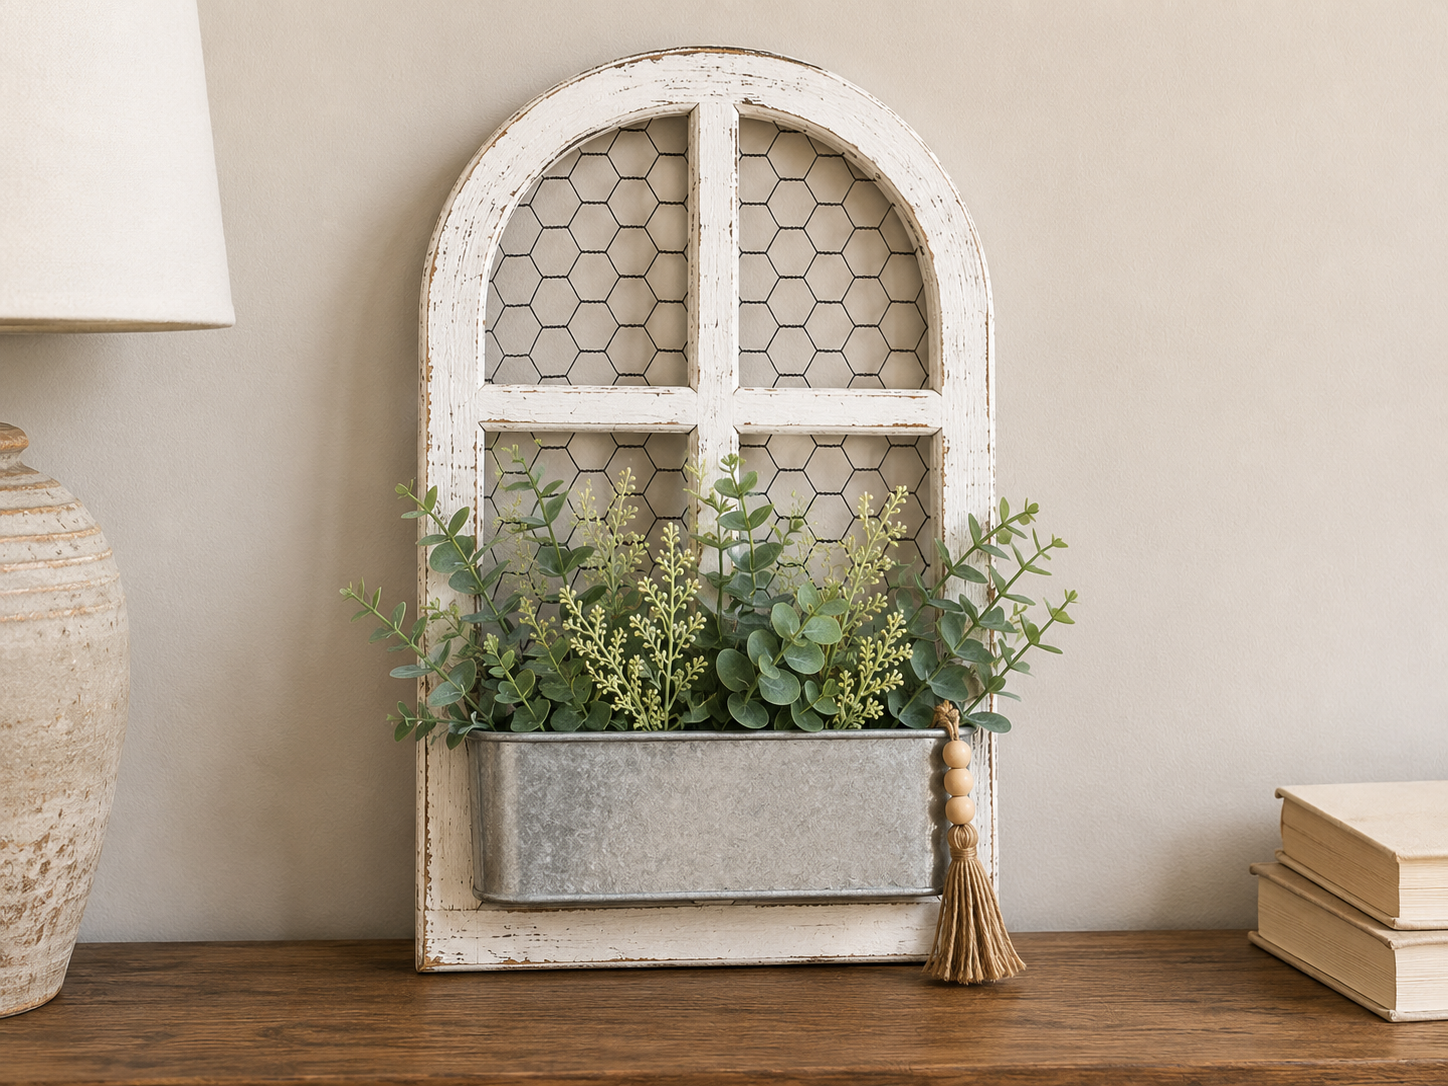
Step 7: Display Your Craft
Take a moment to inspect your finished rustic farmhouse window planter. Adjust the greenery if needed, ensuring the planter is still secure. Your tabletop decor piece is now ready to be displayed! Place it on a wooden shelf, a console table in your entryway, or any surface where it can add a touch of warmth and rustic charm to your home decor. Enjoy your beautiful, handmade creation!
See also: Dollar Tree Planters Craft Ideas
📋 Love staying organized while crafting? Check out our printable planners & craft designs at CraftersDT on Etsy and use code CRAFT20 for 20% off your entire order!
Your Rustic Farmhouse Window Planter Shelf Decor Is Done!
Voila! Look at that gorgeous Rustic Farmhouse Window Planter Shelf Decor you just made! It looks absolutely adorable hanging in my kitchen and adds such a lovely touch. Don’t forget to share your finished project with me, or try painting yours a different color for a fun twist!
📱 Craftino App
Make more crafts like this
1,000+ Farmhouse / Rustic ideas with photo guides & Pro Tips
✓ Step-by-step photo tutorials, nothing left out
✓ Pro Tips for every step
✓ Save crafts & browse fully offline
✓ New ideas added every week
Frequently Asked Questions
What is the total cost for the DIY Rustic Farmhouse Window Planter Shelf Decor?
The total cost for making the Rustic Farmhouse Window Planter Shelf Decor is typically around $11-14. This budget-friendly craft relies mostly on affordable supplies found at Dollar Tree, making it a great value for Home Decor.
How long does it take to complete the Rustic Farmhouse Window Planter Shelf project?
You can expect to complete the Rustic Farmhouse Window Planter Shelf Decor project in about 30-45 minutes from start to finish. This quick DIY makes it perfect for a last-minute gift or a speedy Farmhouse / Rustic home refresh.
Is the Rustic Farmhouse Window Planter Shelf Decor project suitable for beginners?
Yes, the Rustic Farmhouse Window Planter Shelf Decor project is very beginner-friendly and considered easy. It involves simple gluing and painting steps, making it perfect for anyone new to DIY Home Decor.
How many Dollar Tree picture frames are needed to build this Farmhouse Window Planter Shelf?
You will need four standard 8×10 inch Dollar Tree picture frames for the main structure of the Rustic Farmhouse Window Planter Shelf Decor. These frames form the ‘window’ structure and provide the base for your shelf.
What type of paint works best for achieving a Rustic Farmhouse look on this DIY shelf?
Chalk paint or acrylic craft paint in matte finishes works best for achieving a Rustic Farmhouse look on the Rustic Farmhouse Window Planter Shelf Decor. A light color like white, cream, or a soft gray from brands like Waverly or FolkArt gives that perfect distressed aesthetic.
Where can I find all the materials for the Rustic Farmhouse Window Planter Shelf Decor?
Most of the supplies for the Rustic Farmhouse Window Planter Shelf Decor, including the picture frames and small planters, are readily available at Dollar Tree. For items like paint and strong craft glue, you can also check craft stores like Hobby Lobby or Walmart.
Is the Rustic Farmhouse Window Planter Shelf Decor a good gift idea for special occasions?
Yes, the Rustic Farmhouse Window Planter Shelf Decor makes a wonderful and thoughtful gift for various occasions. It’s especially perfect for Mother’s Day, housewarmings, or as a unique birthday present for anyone who loves Farmhouse / Rustic Home Decor.
Can I customize the colors or style of my Rustic Farmhouse Window Planter Shelf Decor?
Absolutely, you can easily customize the Rustic Farmhouse Window Planter Shelf Decor to match your personal style. Try painting the frames a different color, like light blue or sage green, or add small decorative elements like faux flowers or mini signs to change its look.
Is the DIY Rustic Farmhouse Window Planter Shelf Decor suitable for outdoor use?
The Rustic Farmhouse Window Planter Shelf Decor is primarily designed for indoor use. If you wish to place it outdoors, you would need to seal all painted and glued surfaces with a waterproof sealant or clear coat to protect it from weather elements.
What is a common mistake to avoid when making the Rustic Farmhouse Window Planter Shelf?
A common mistake to avoid when making the Rustic Farmhouse Window Planter Shelf Decor is not allowing enough drying time for the glue and paint. Ensure each layer of paint is dry before applying the next, and let the glue cure for at least 24 hours for a strong, lasting hold.
Leave a Reply