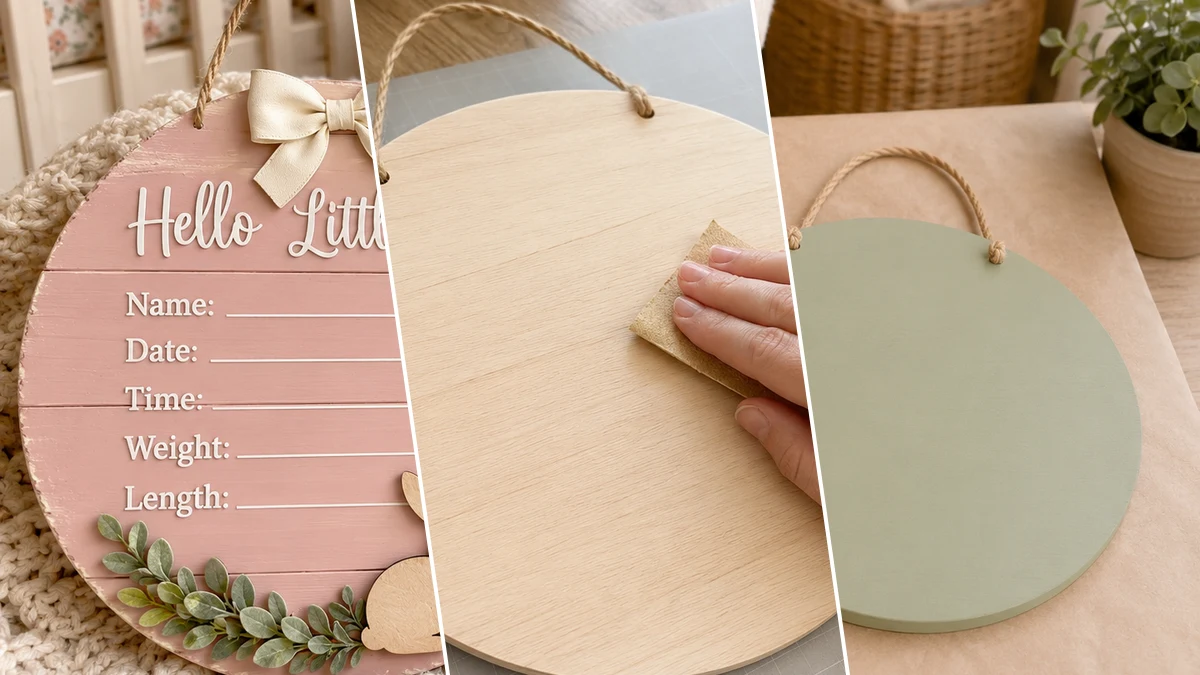
Ever walk into Dollar Tree just “for one thing” and come out with a whole cart full of craft supplies? Happens to me every time! My sister is having a baby soon, and I wanted to make something super special for her nursery without breaking the bank. That’s how I cooked up these adorable Sweet Nursery Style Dollar Tree Baby Announcement Signs.
Theme: Baby & Nursery
Materials Needed
- Round Wooden Plaques with Jute Hangers
- Pastel Acrylic Paints (Blush Pink, Soft Sage Green)
- White Vinyl Lettering or Printable Sticker Labels
- Assorted Wooden Animal Cutouts & Greenery
- Faux Leather or Fabric Bow
- Hot Glue Gun & Craft Glue
- Foam Brush & Fine-Grit Sandpaper
- Pencil, Ruler, Scissors
- Optional: Mod Podge or Clear Sealer
Why This Craft Works
These little signs are just perfect for adding a personal touch to a new baby’s nursery! You can use them to announce the baby’s name, their birth stats, or even just a cute saying. They look amazing on a shelf, hanging on a wall as part of a gallery, or even as a prop for a newborn photoshoot. It’s such a sweet way to celebrate a new arrival and make their space feel extra special in a Baby & Nursery theme.
What’s even better is how budget-friendly this project is! Using mostly supplies from Dollar Tree, this whole craft ran me about $11-14 total. You really can’t beat that price for a custom, handmade gift or decor piece. It just goes to show you don’t need to spend a fortune to create something beautiful and meaningful.
And don’t even get me started on how easy it is! I’d say this is definitely an Easy level craft, perfect for beginners or anyone who needs a quick project. From start to finish, the whole thing took me about 30-45 minutes to put together, not counting drying time. It’s great for a last-minute baby shower gift or when you just want a fun, quick DIY.
Step-by-Step Instructions for Sweet Nursery Style Dollar Tree Baby Announcement Signs
Alright, crafters, are you ready to get started? Making these Sweet Nursery Style Dollar Tree Baby Announcement Signs is so much fun and super simple, you’ll wonder why you didn’t try it sooner! It took me about 30-45 minutes to whip these up, making them perfect for beginners or even older kids who want to help make a gift for a new cousin or friend. Let’s gather our Dollar Tree goodies and make some magic!
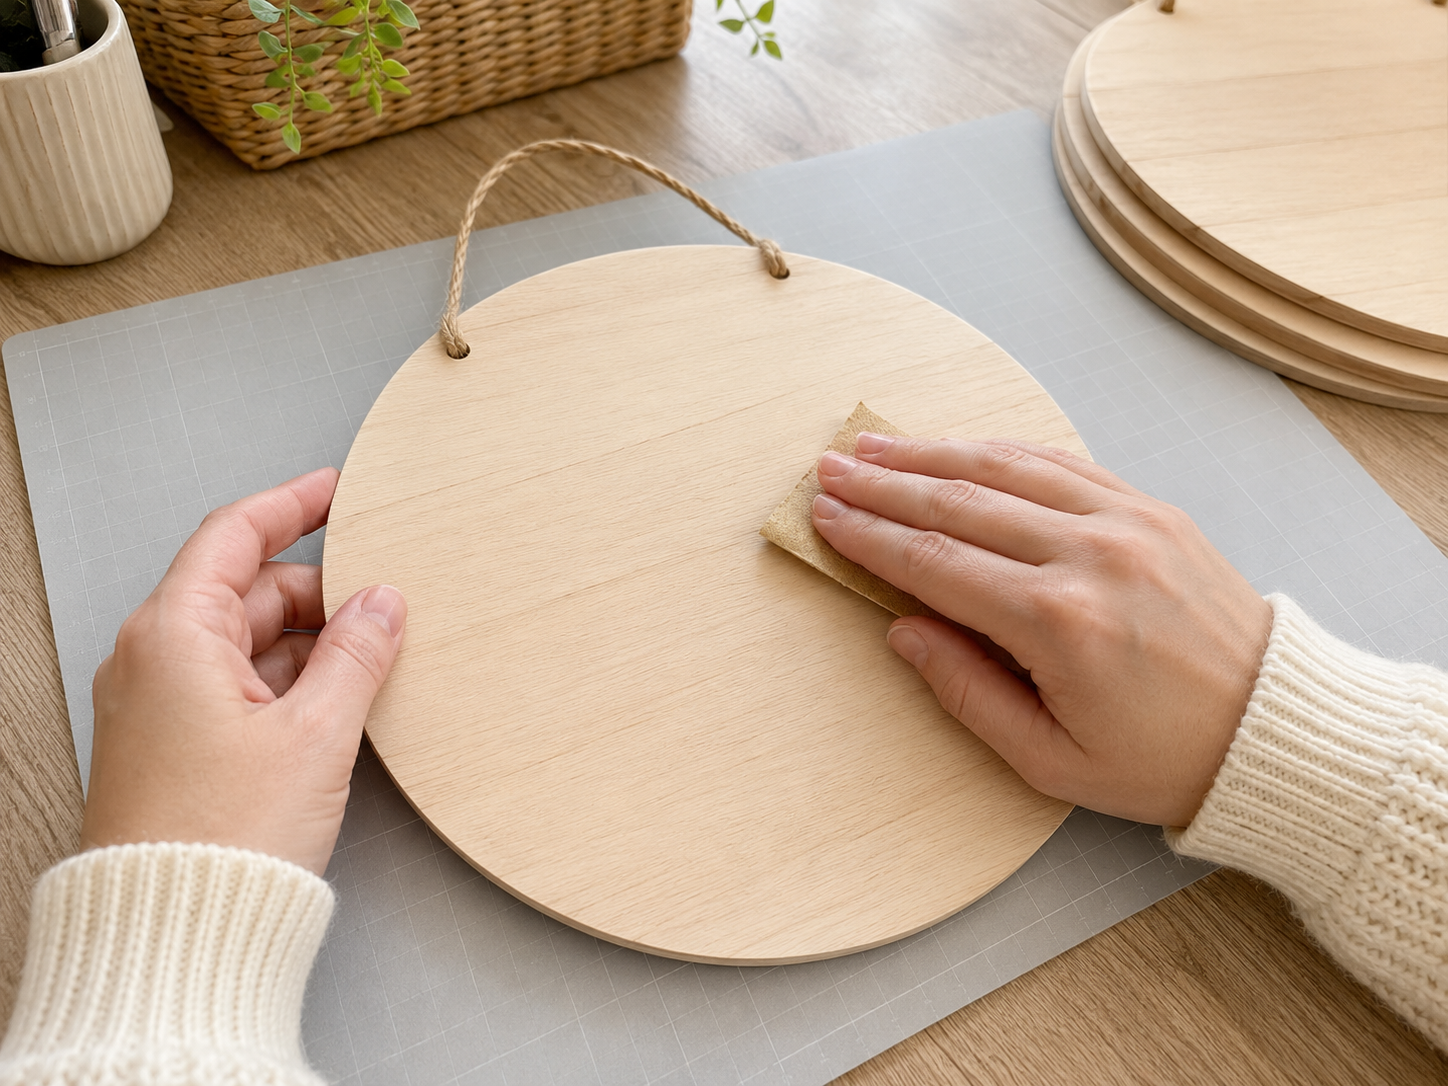
Step 1: Prepare Wooden Plaques
Begin by taking your two round wooden plaques. Use fine-grit sandpaper (around 180-220 grit) to lightly sand the entire surface of both plaques. This step is crucial for smoothing out any rough spots or splinters and creating a better, more receptive surface for the paint to adhere to. After sanding, wipe down the plaques with a clean, dry cloth to remove all dust and debris.
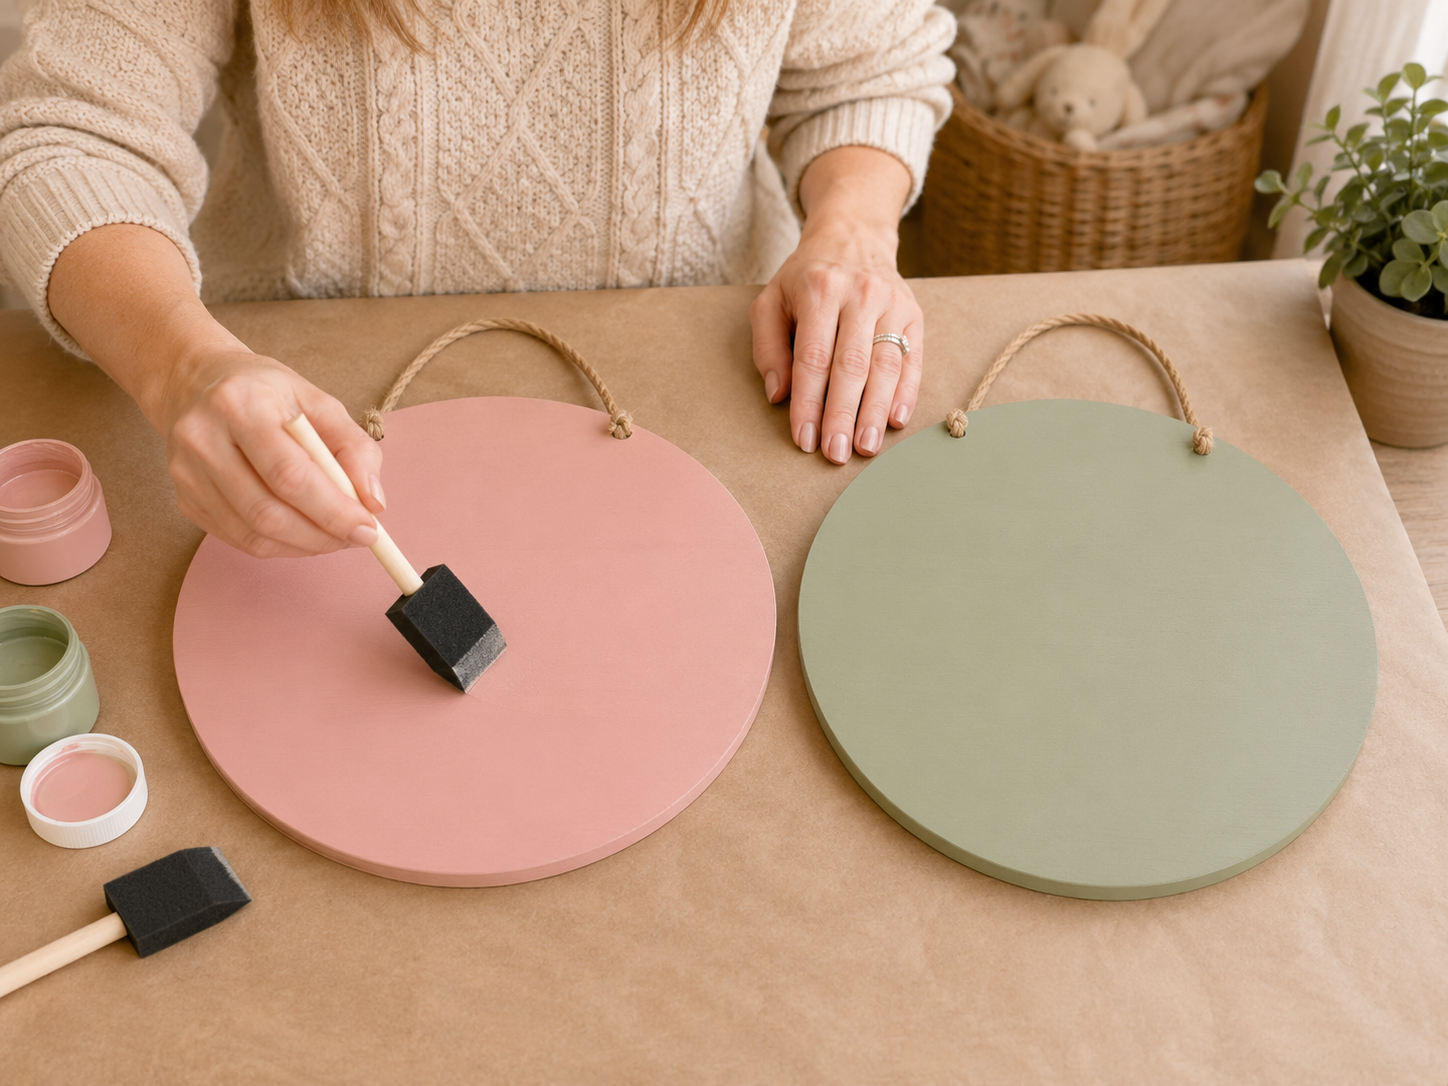
Step 2: Paint the Signs
Choose your pastel colors: blush pink for one sign and soft sage green for the other. Using a foam brush, apply a thin, even first coat of acrylic paint to each plaque. Work in one direction to minimize brush strokes. Allow the first coat to dry completely (approximately 20-30 minutes, or longer depending on humidity). Once dry, apply a second thin coat to ensure full coverage and a clean, matte finish. Let the second coat dry thoroughly.
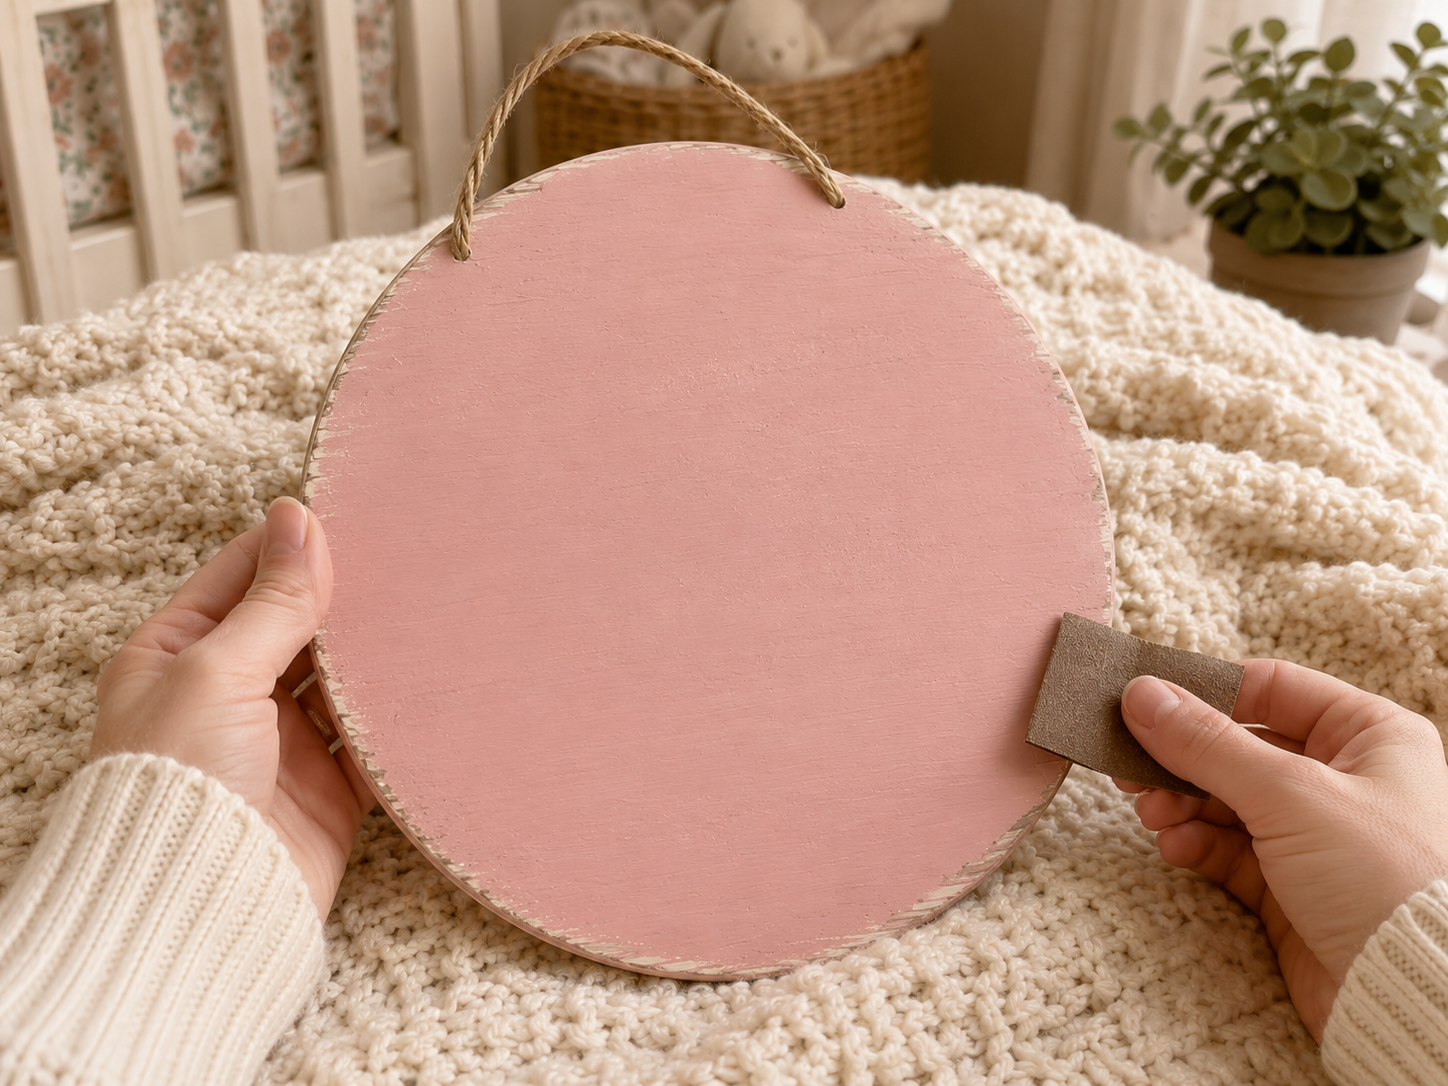
Step 3: Distress Edges (Optional)
For a gentle handmade farmhouse look, once the paint is completely dry, take your fine-grit sandpaper again. Lightly and gently rub the edges of both painted signs. The goal is to subtly remove a small amount of paint, allowing the natural wood to peek through. This creates a charming, worn, and rustic effect. Be careful not to sand too much; a little goes a long way.
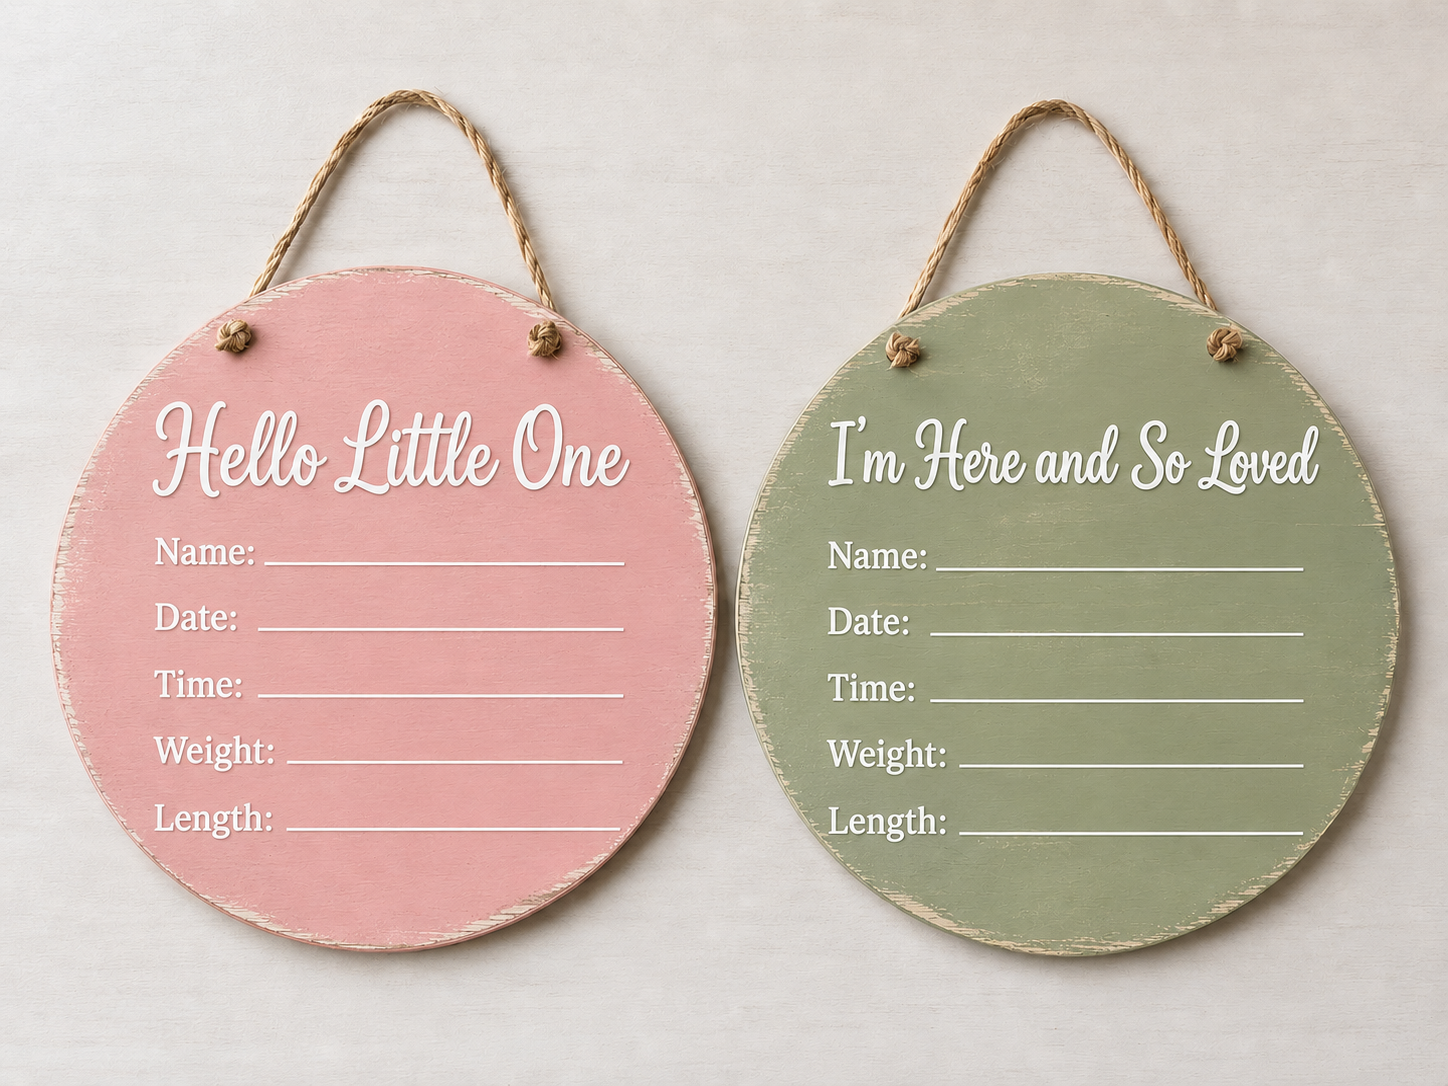
Step 4: Apply Lettering & Writing Lines
Using white vinyl lettering or printable sticker labels, apply your chosen phrases to the center of each sign. For the pink sign, use ‘Hello Little One,’ and for the sage green sign, use ‘I’m Here and So Loved.’ Below these phrases, apply vinyl lines or use a ruler and a fine-tip white paint pen to draw neat, straight lines for ‘NAME:’, ‘DATE:’, ‘TIME:’, ‘WEIGHT:’, and ‘LENGTH:’. Ensure the design is clean, readable, and not too crowded.
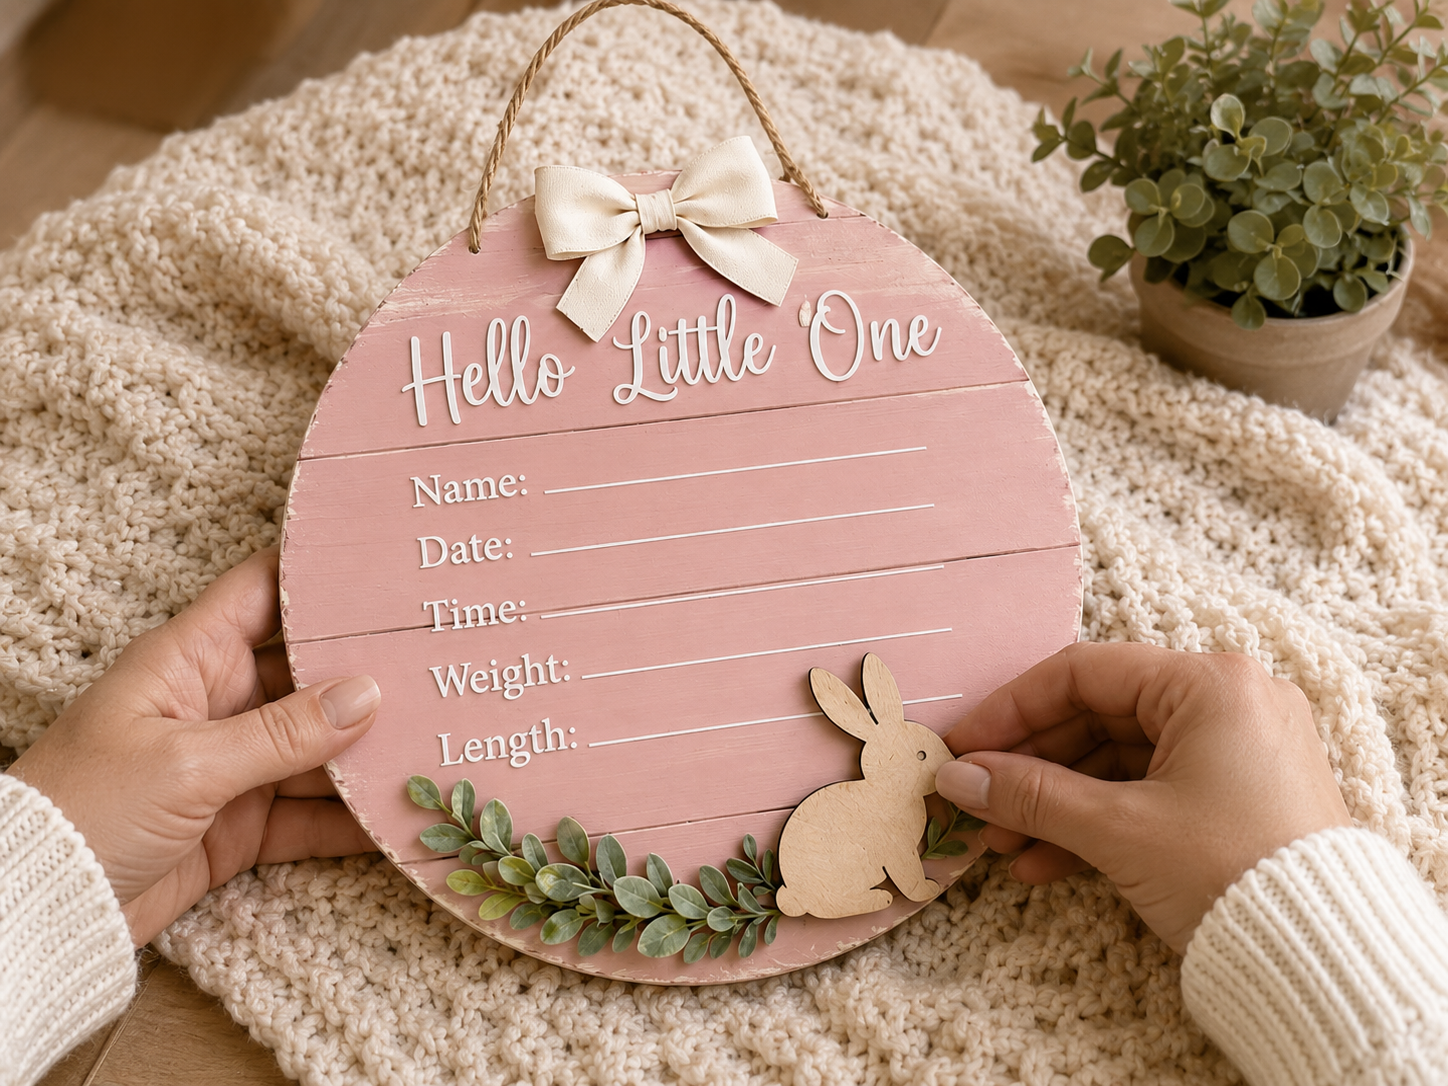
Step 5: Embellish the Pink Sign
Now it’s time to add the charming embellishments to your pink sign. Using a hot glue gun or strong craft glue, carefully attach the cream faux leather or fabric bow to the top center of the sign, just below the jute rope hanger. Next, arrange a small sprig of faux greenery along the bottom edge of the sign, creating a gentle arc, and secure it with glue. Finally, adhere the small wooden bunny cutout near the lower corner, slightly overlapping the greenery for a layered look.
📱 Craftino App
Make more crafts like this
1,000+ Baby & Nursery ideas with photo guides & Pro Tips
✓ Step-by-step photo tutorials, nothing left out
✓ Pro Tips for every step
✓ Save crafts & browse fully offline
✓ New ideas added every week

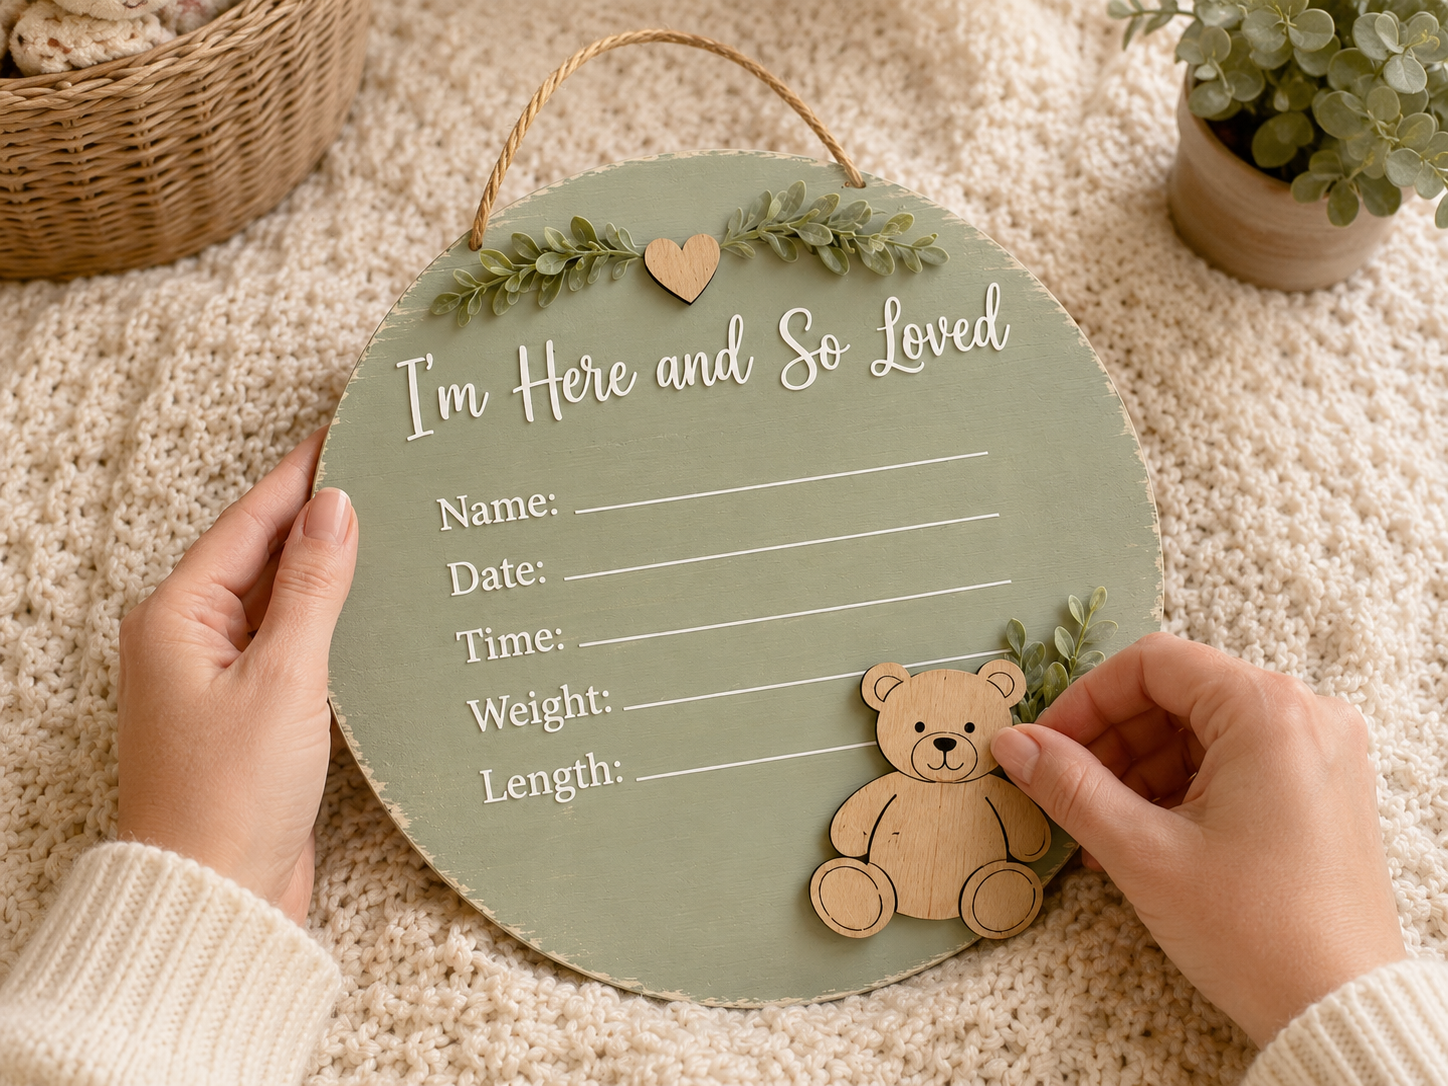
Step 6: Embellish the Sage Green Sign
Move on to decorating your sage green sign. Using hot glue or craft glue, attach small greenery sprigs near the top of the sign, framing the ‘I’m Here and So Loved’ phrase. Next, carefully glue a tiny wooden heart accent below the greenery. Finally, adhere the wooden teddy bear cutout near the lower corner. You can position a small greenery sprig slightly behind the teddy bear to make it appear as if it’s sitting in a little patch of greenery.
Step 7: Optional Sealing for Durability
For added protection and durability, you can apply a thin, even coat of Mod Podge (matte finish recommended) or a clear matte craft sealer over the entire painted and decorated surface of both signs. This will help protect the paint and vinyl lettering from scuffs, fingerprints, and moisture, making the signs last longer. Allow the sealer to dry completely according to product instructions.

Step 8: Style & Display
Once your baby announcement signs are completely dry and cured, they are ready to be cherished! Use them as a sweet hospital door hanger, a unique photo prop for newborn pictures, or a charming decorative accent in the nursery. They also make a heartfelt, handmade gift for expectant parents. The jute rope hangers allow for easy display in various settings.

See also: Dollar Tree Buffalo Check Gather Sign Diy
📋 Love staying organized while crafting? Check out our printable planners & craft designs at CraftersDT on Etsy and use code CRAFT20 for 20% off your entire order!
Your Sweet Nursery Style Baby Signs Are Done!
Woohoo, you did it! Your Sweet Nursery Style Dollar Tree Baby Announcement Signs look absolutely precious. Pop them on a nursery shelf, hang them on the wall, or wrap them up for a thoughtful baby shower gift. I bet yours turned out amazing, and I’d love to see your unique spin on them!
📱 Craftino App
Make more crafts like this
1,000+ Baby & Nursery ideas with photo guides & Pro Tips
✓ Step-by-step photo tutorials, nothing left out
✓ Pro Tips for every step
✓ Save crafts & browse fully offline
✓ New ideas added every week
Frequently Asked Questions
What is the total cost to make the Sweet Nursery Style Dollar Tree Baby Announcement Signs?
The total cost to make the Sweet Nursery Style Dollar Tree Baby Announcement Signs is approximately $11-14. This budget-friendly project primarily uses items from Dollar Tree, making it an affordable option for Baby & Nursery decor.
How long does it take to complete the DIY Dollar Tree Baby Announcement Signs craft?
It takes approximately 30-45 minutes to complete the DIY Dollar Tree Baby Announcement Signs craft, not including paint or glue drying time. This makes it an easy and quick project for any crafter.
What skill level is required for creating these Sweet Nursery Style Baby Announcement Signs?
Creating these Sweet Nursery Style Baby Announcement Signs is an Easy skill level craft. It’s perfect for beginners, requires no special tools, and is a great project for anyone looking to make a personalized Baby & Nursery item.
What type of paint works best for the Dollar Tree Baby Announcement Signs?
Acrylic craft paint works best for the Dollar Tree Baby Announcement Signs. Dollar Tree sells small bottles of acrylic paint in various colors, which adhere well to the wood signs and dry quickly.
Where can I find the supplies for these budget-friendly Baby & Nursery signs?
You can find almost all the supplies for these budget-friendly Baby & Nursery signs at Dollar Tree. Look for small wood signs, letter stickers, paint, and any embellishments like ribbon or faux flowers.
Can I customize the colors and themes of the Sweet Nursery Style Baby Announcement Signs?
Yes, you can absolutely customize the colors and themes of the Sweet Nursery Style Baby Announcement Signs. Choose acrylic paint colors and sticker fonts that match the specific Baby & Nursery decor or baby shower theme, like pastel pinks, blues, or gender-neutral greens.
Are these Dollar Tree Baby Announcement Signs suitable as a baby shower gift?
Yes, these Dollar Tree Baby Announcement Signs are perfectly suitable as a thoughtful and personalized baby shower gift. They are handmade, budget-friendly, and can be customized with the baby’s name or birth stats, making them a unique present for the Baby & Nursery.
How many wood signs are typically needed for a set of Sweet Nursery Style Baby Announcement Signs?
For a basic set of Sweet Nursery Style Baby Announcement Signs, you typically need 2-3 small wood signs. This allows for one sign for the baby’s name and another for birth stats or a cute phrase, all available at Dollar Tree.
What is a common mistake to avoid when making these DIY Baby & Nursery signs?
A common mistake to avoid when making these DIY Baby & Nursery signs is not allowing enough drying time between paint coats or before applying stickers. Ensure each coat of paint is fully dry, usually 15-20 minutes, to prevent smudging or peeling, especially with Dollar Tree paints.
Find more baby & nursery craft ideas & supplies at Dollar Tree.
Leave a Reply