
Okay, so who else walks into Dollar Tree just to grab one thing and leaves with a whole cart full of craft supplies? Yep, that’s me, every single time! That’s exactly how this super cute Vibrant Cascading Spring Door Swag idea popped into my head, and honestly, I just had to make it for our front porch. It instantly brightened up our whole Home Decor for Spring!
See also: Diy Dollar Tree Easter Wreath Simple And Budget Friendly
Theme: Spring & Garden
Materials Needed
- Elongated Wire Wreath Frame or Teardrop Swag Base
- Assorted Faux Greenery Bushes/Picks (e.g., Fern, Eucalyptus)
- Assorted Wired Ribbons (e.g., polka dot, floral, solid colors)
- Floral Wire
- Wire Cutters
- Hot Glue Gun & Glue Sticks
- Door Hanger (optional)
📋 Love staying organized while crafting? Check out our printable planners & craft designs at CraftersDT on Etsy and use code CRAFT20 for 20% off your entire order!
Step-by-Step Instructions for Vibrant Cascading Spring Door Swag
Get ready, crafters, because you are going to LOVE how simple and fun this project is! Seriously, you don’t need any fancy skills to make this beautiful Vibrant Cascading Spring Door Swag. I whipped mine up in less than an hour while my little ones were napping, so it’s perfect for beginners or even a fun afternoon craft with older kids. Let’s get crafting and bring some happy Spring & Garden vibes to your home!
📱 Free to Download
Join 50,000+ crafters already using Craftino
You’re still missing out?
✓ Save crafts & browse fully offline
✓ Download printable PDF guides for every project
✓ Step-by-step photo tutorials, nothing left out
✓ 1,000+ craft projects with new ones added every week
Step 1: Prepare the Swag Base
If using plain floral wire, bend it into an elongated oval or teardrop shape, approximately 24-30 inches long, ensuring it’s sturdy enough to support the greenery. If you have a pre-made teardrop or swag base, you can skip shaping and proceed.
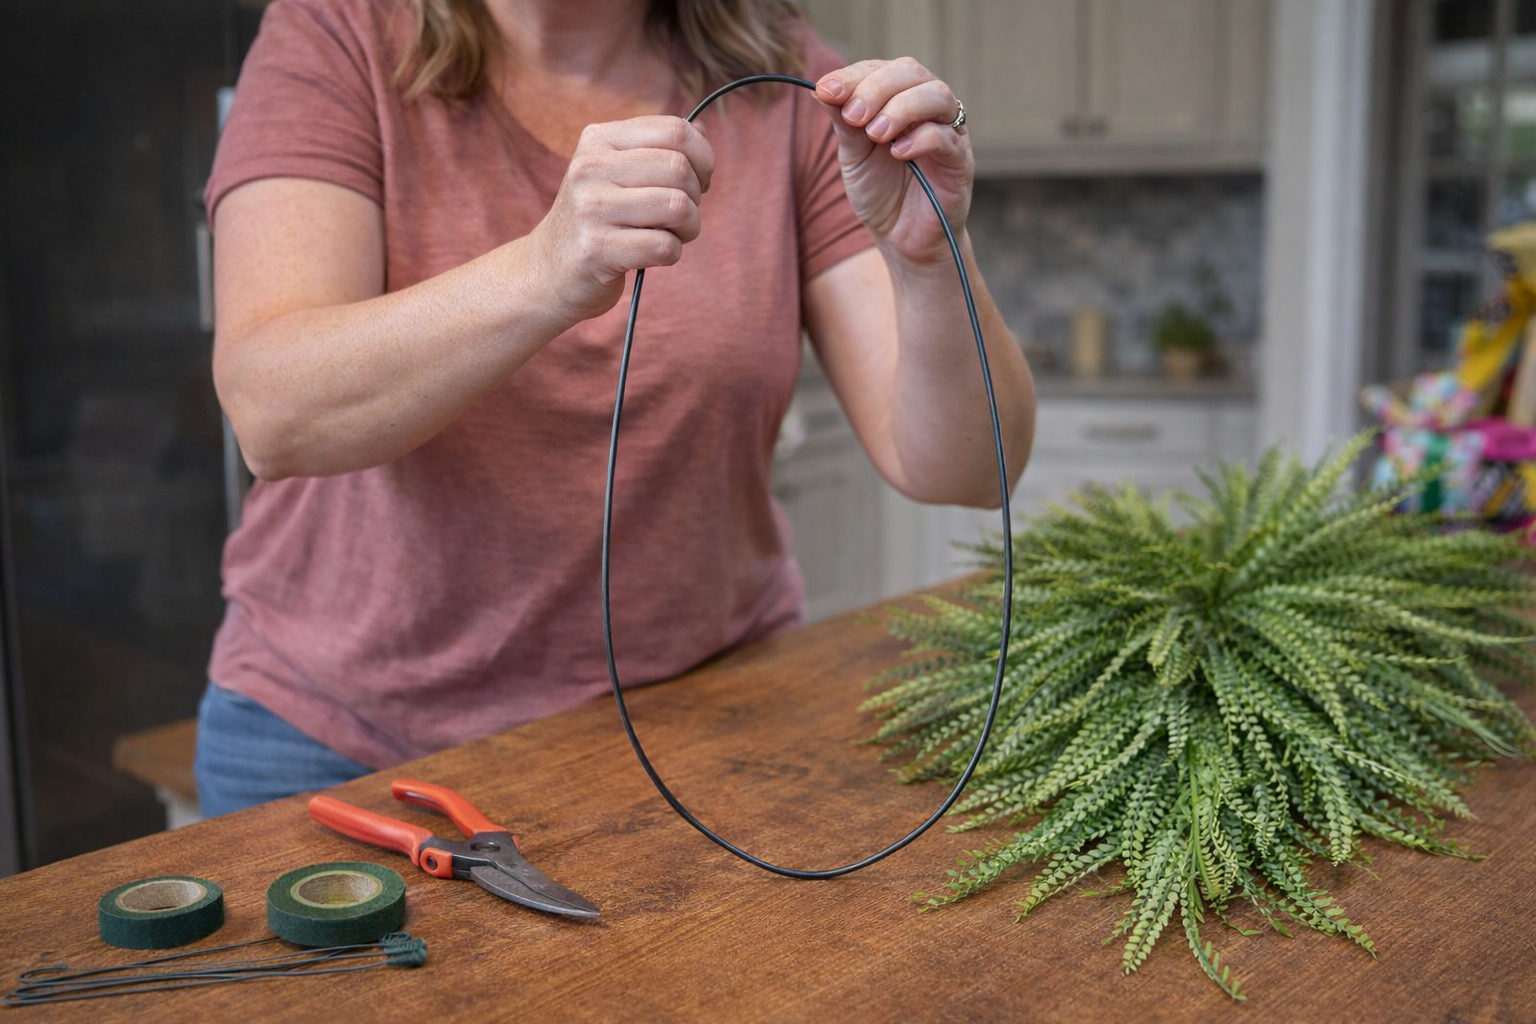
💡 Pro Tip: For optimal visual balance, aim for your finished swag to be roughly one-third to one-half the width of your door. This helps determine the initial size of your base.
Step 2: Establish Greenery Outline
Begin by attaching your longest faux greenery sprigs to the bottom of the base, pointing downwards to define the swag’s length. Work your way up the base, securing each piece with floral wire or a dab of hot glue, ensuring initial coverage of the frame.
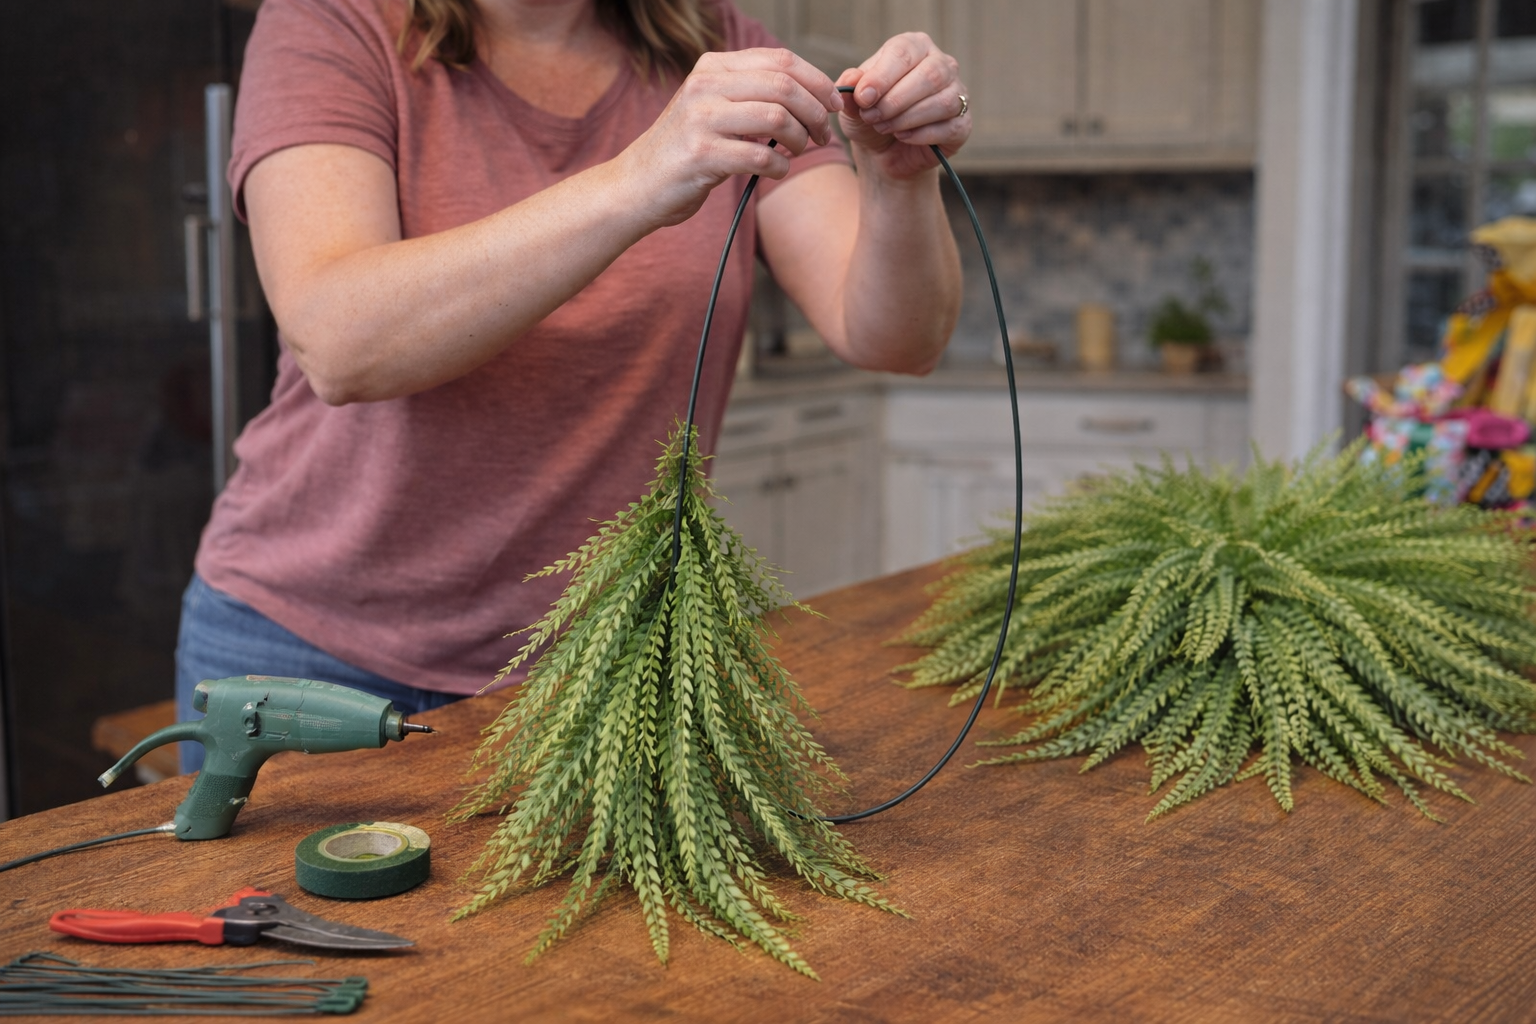
💡 Pro Tip: Always start from the bottom and work your way up when adding greenery. This allows for natural overlapping and helps create a realistic, flowing cascade.
🗓️ Keep all your craft projects on track! Explore our printable planners & templates at CraftersDT on Etsy and use code CRAFT20 for 20% off!
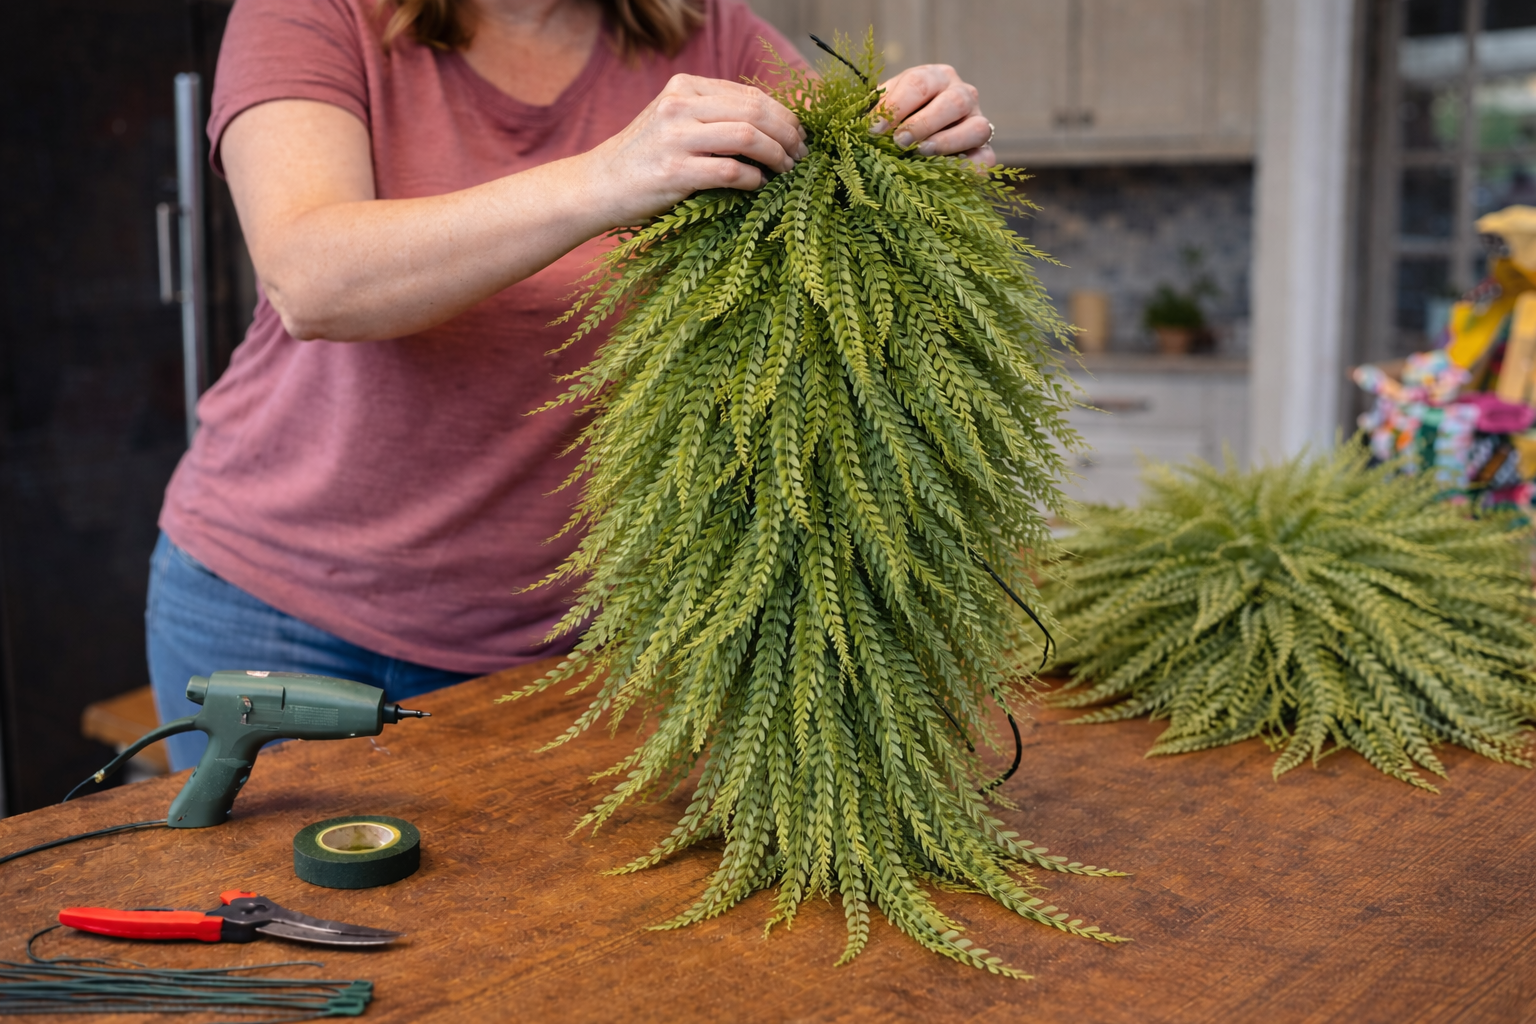
Step 3: Build Greenery Volume
Continue adding more greenery, layering sprigs from the outside edges towards the center. Overlap pieces generously to build fullness and completely hide the base. Ensure there are no visible gaps when viewed from the front.
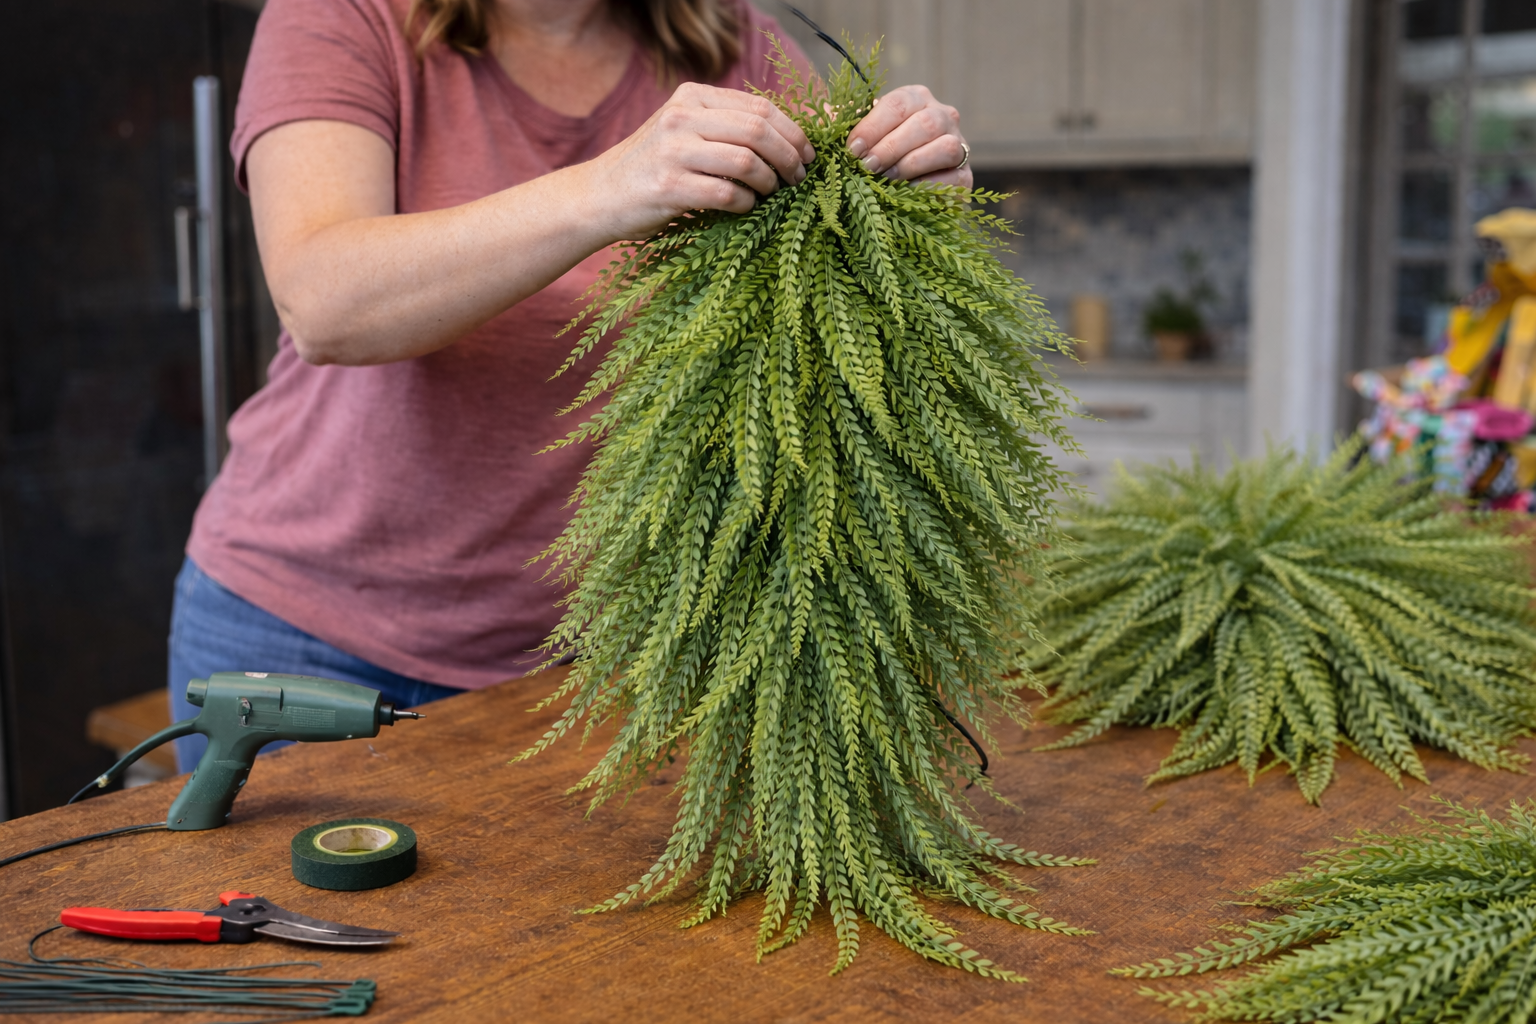
💡 Pro Tip: Vary the angle and direction of your greenery sprigs slightly to avoid a flat appearance. This technique adds depth and makes the swag look more organic and natural.
Step 4: Create Cascading Flow
Gently bend and manipulate the greenery sprigs to enhance the downward flow, ensuring most pieces sweep in the same direction. Allow some longer pieces to trail gracefully from the bottom for a dramatic cascading effect.
💡 Pro Tip: Step back frequently to assess the overall shape and balance. Use wire cutters to trim any overly stiff or unruly pieces that disrupt the natural flow or appear out of place.
Step 5: Craft the Multi-Ribbon Bow
Select your assortment of wired ribbons. Create several loops for each ribbon, layering different patterns and colors to form a large, full bow. Pinch the center of the loops together and secure tightly with floral wire, then fluff out all the loops.
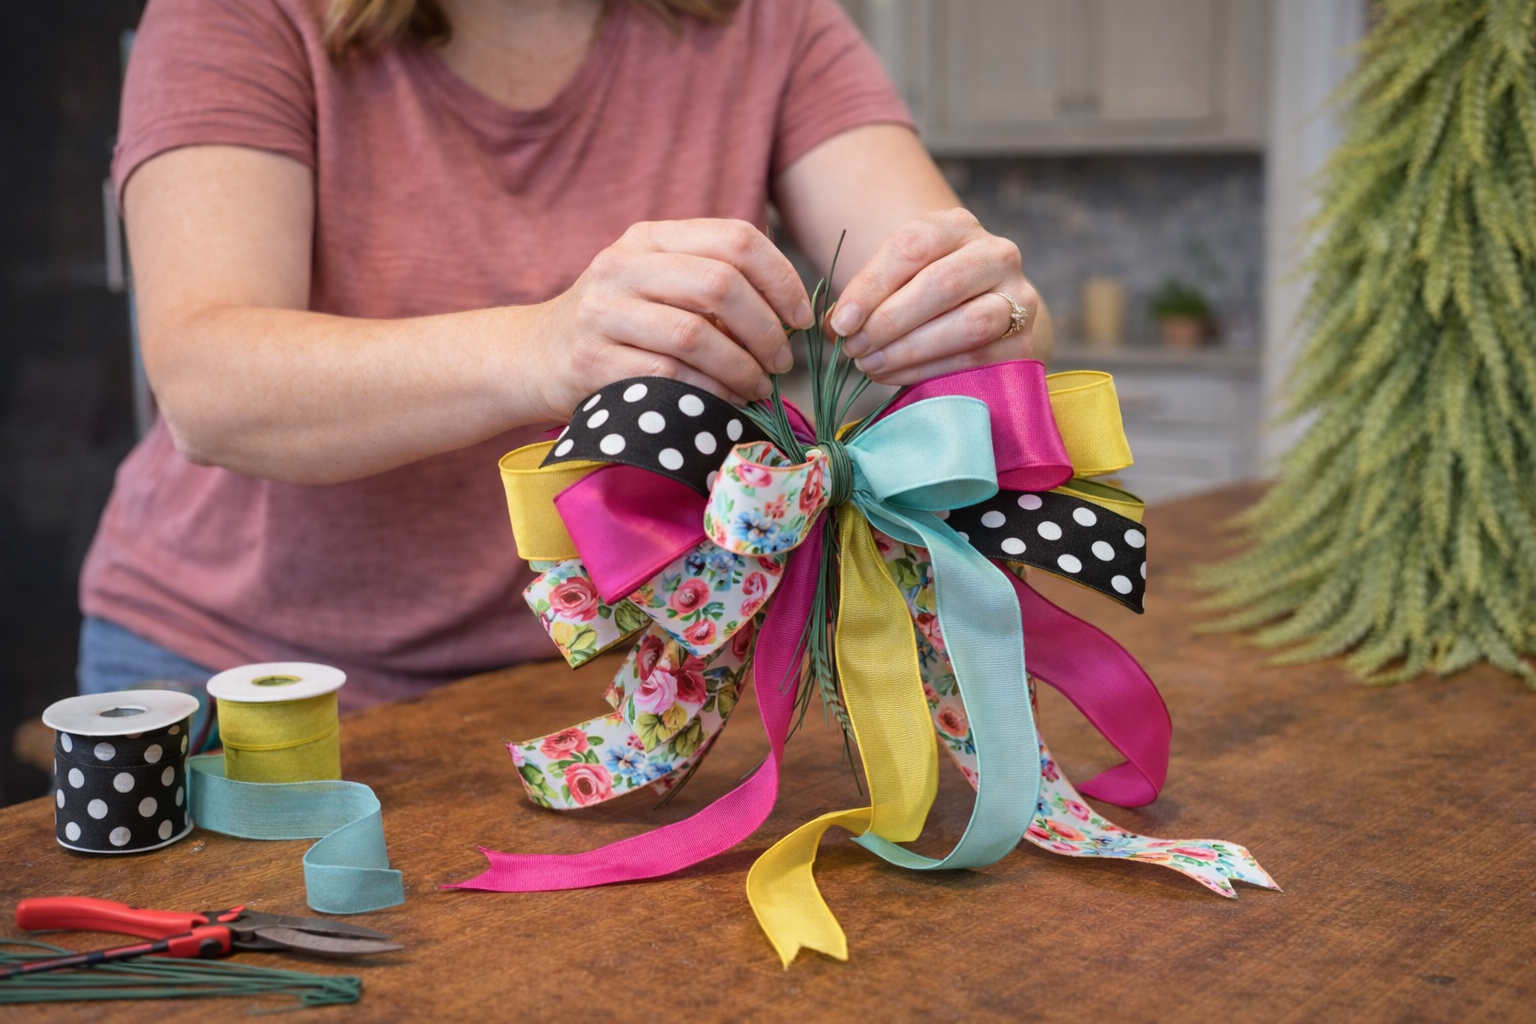
💡 Pro Tip: Using wired ribbon is essential for a shapely bow; it allows you to manipulate and maintain the loops’ volume. For a professional look, cut the ends of your ribbon tails in an inverted ‘V’ or dovetail shape.
Step 6: Attach the Decorative Bow
Position your finished multi-ribbon bow at the top center of your greenery swag. Use the excess floral wire from the bow’s center to securely attach it to the swag base. Thread the wire through the greenery and around the base, twisting it tightly on the back.
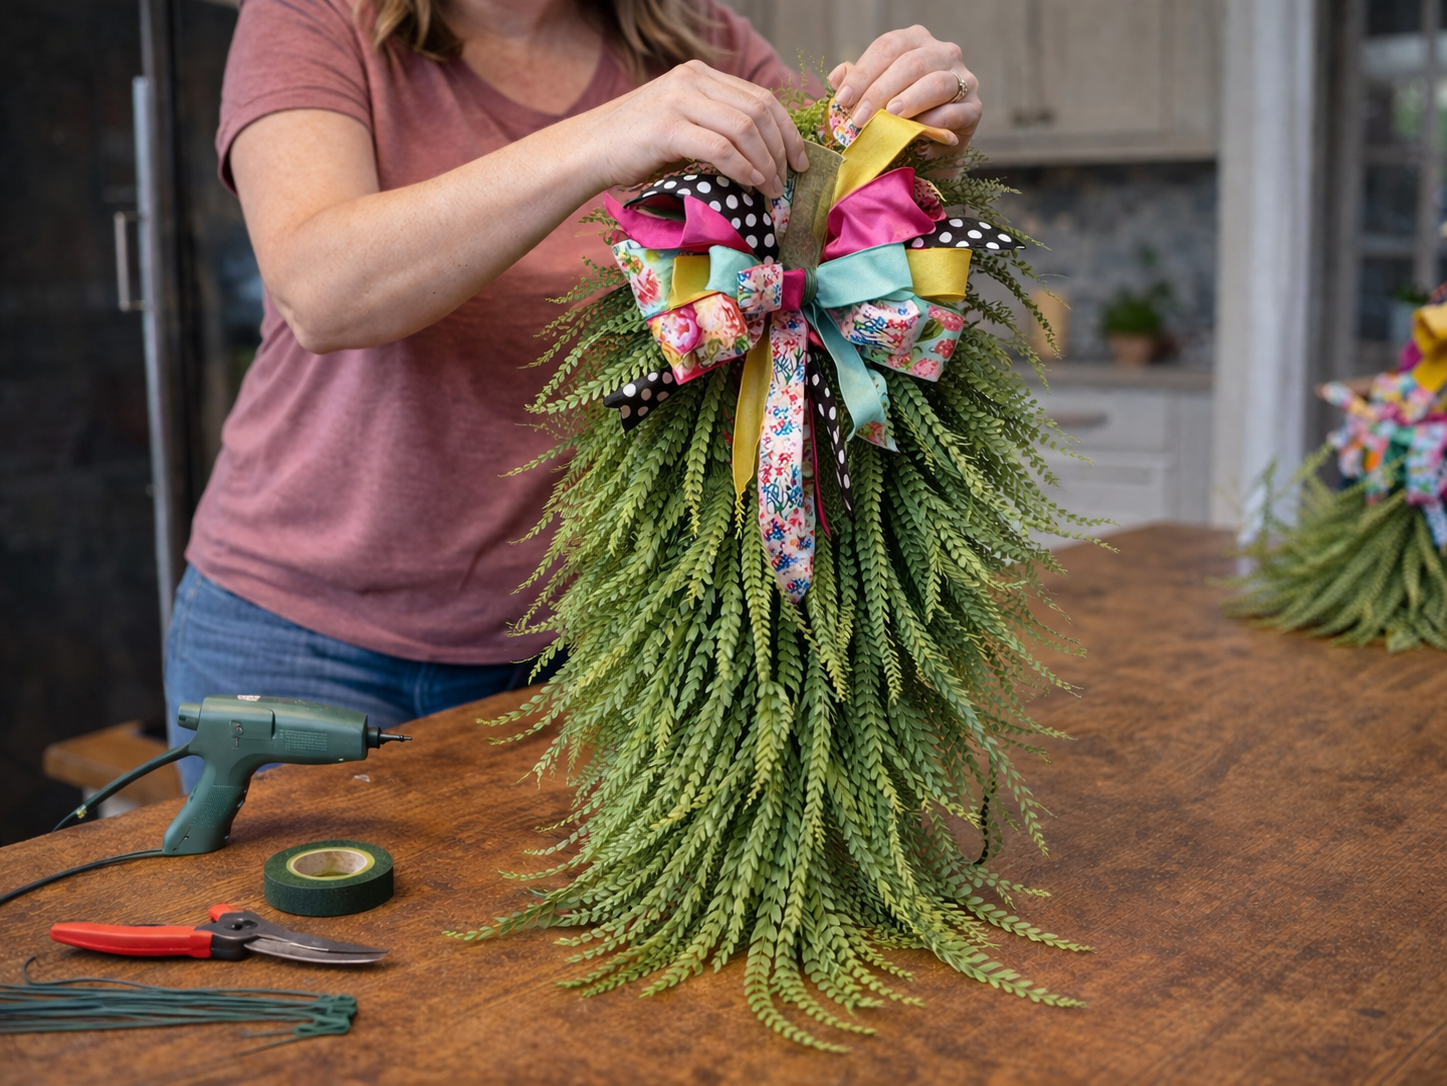
💡 Pro Tip: Ensure the bow is very securely fastened to prevent it from shifting or detaching, especially if your swag will be exposed to outdoor elements like wind or rain.
Step 7: Arrange Tails & Final Adjustments
Allow the ribbon tails from the bow to drape naturally down the front of the greenery. You can gently curl or shape them for added flair. Take a final look at the entire swag, making any minor adjustments to the greenery or bow loops to achieve perfect balance and aesthetic appeal.
💡 Pro Tip: If any ribbon tails are particularly unruly or you want them to stay perfectly in place, use a small dab of hot glue to adhere them discreetly to the underlying greenery.
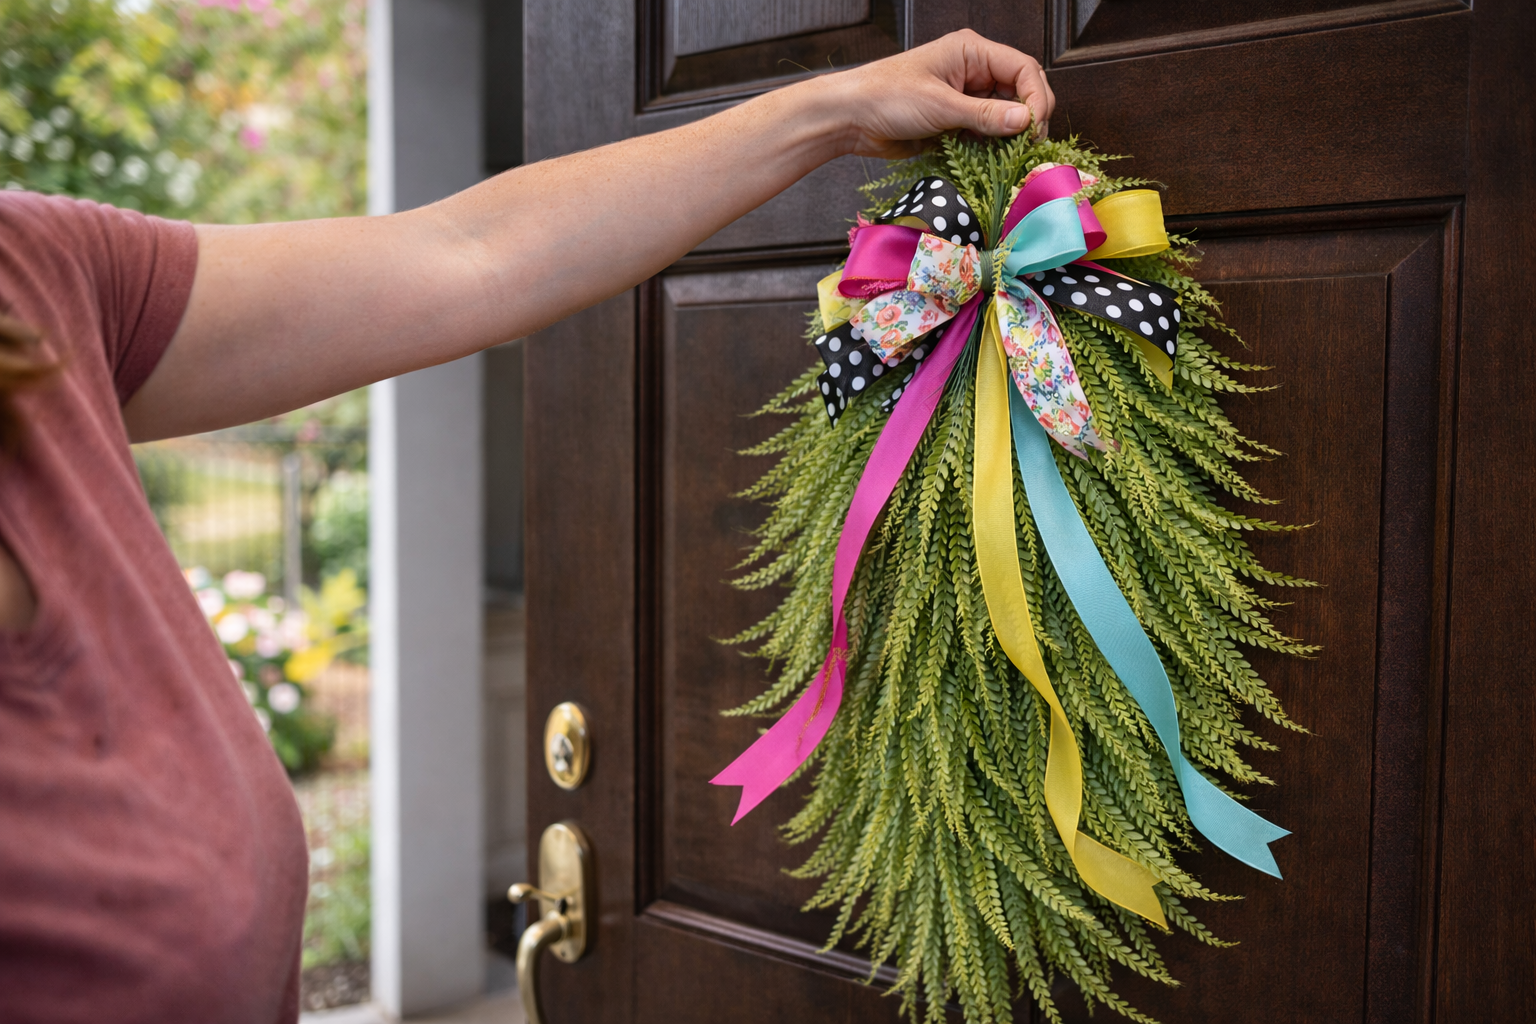
Your Gorgeous Spring Swag Awaits!
Look at you, crafter! Your Vibrant Cascading Spring Door Swag is all done and looking absolutely amazing. Hang it on your front door, a blank wall, or even gift it to a friend who needs a little burst of Spring & Garden cheer. Don’t forget to share a picture of your beautiful creation, or tell me if you tried a different color combo!
📱 Free to Download
Craftino, The #1 Craft App
✓ Save crafts & browse fully offline
✓ Download printable PDF guides for every project
✓ Step-by-step photo tutorials, nothing left out
✓ 1,000+ craft projects with new ones added every week
Frequently Asked Questions
How hard is it to make this Vibrant Cascading Spring Door Swag?
This DIY project is super easy and great for beginners! If you can use a hot glue gun, you can definitely make this beautiful Spring Door Swag.
What kind of materials do I need for this Spring Door Swag?
You’ll mostly need some pretty faux flowers, greenery, a few ribbons, and a base like a wire wreath form or even a sturdy piece of cardboard cut to shape. Most of it can be found at your local dollar store!
Can I make this Home Decor project in under an hour?
Absolutely! Most crafters can put together this Vibrant Cascading Spring Door Swag in about 30-45 minutes, making it a quick and rewarding craft.
What other places can I use my Vibrant Cascading Spring Door Swag?
Besides your front door, this lovely Home Decor piece would look great on a mantel, a bedroom wall, or as a centerpiece on a long table for a Spring & Garden party.
Get inspired with daily seasonal ideas on the Dollar Tree Craft Blog.
Inspiration / Credit: Candy Bingham
Leave a Reply