
Okay, so I was strolling through the Dollar Tree the other day, just grabbing a few things (or ten, let’s be real!), and I spotted these cute little watering cans. Immediately, my brain started buzzing with Spring & Garden ideas! I just knew I could whip up a super sweet Charming Farmhouse Garden Watering Can Arrangement for my porch, and guess what? You can too!
See also: Charming Farmhouse Blush Floral Jar For Mothers Day
Theme: Spring & Garden
Materials Needed
- Small Galvanized Metal Watering Can
- Assorted Faux Wildflowers & Greenery (e.g., daisies, lavender, small yellow blooms)
- Floral Foam Block
- Wooden Bead Garland (with optional jute tassel)
- Burlap Ribbon
- Decorative Faux Butterflies
- Hot Glue Gun & Glue Sticks
- Scissors or Wire Cutters
📋 Love staying organized while crafting? Check out our printable planners & craft designs at CraftersDT on Etsy and use code CRAFT20 for 20% off your entire order!
Why This Craft Works
This little beauty is perfect for adding a touch of Spring & Garden cheer just about anywhere! I love putting mine on my kitchen counter, by the front door to greet guests, or even as a cute centerpiece on my patio table. It’s also such a sweet, thoughtful Home Decor gift for a neighbor or a teacher, especially with Mother’s Day coming up.
📱 Free to Download
Join 50,000+ crafters already using Craftino
Browse 89+ Spring & Garden ideas and thousands more in the app
✓ Save crafts & browse fully offline
✓ Download printable PDF guides for every project
✓ Step-by-step photo tutorials, nothing left out
✓ 1,000+ craft projects with new ones added every week

And the best part? This Charming Farmhouse Garden Watering Can Arrangement is seriously budget-friendly. I grabbed almost everything I needed from Dollar Tree, so the whole thing cost me about $4, maybe $5 if I splurged on an extra floral pick. You just can’t beat that for some adorable Home Decor!
You guys, this project is super easy, I promise! It probably took me about 20-25 minutes from start to finish, and I was even sipping my coffee while I made it. It’s totally perfect for beginners, or if you need a quick craft to do with the kids, or even a last-minute little gift.
Step-by-Step Instructions for Charming Farmhouse Garden Watering Can Arrangement
Alright, my fellow crafters, are you ready to get your hands a little bit gluey and make something absolutely adorable? This Charming Farmhouse Garden Watering Can Arrangement is so much fun to put together, you won’t believe how quickly it comes to life. It’s a fantastic Home Decor project for anyone, even if you’ve never crafted before, and it’s going to add such a happy touch of Spring & Garden vibes to your space!
Step 1: Secure Floral Foam Base
Begin by selecting a floral foam block and trimming it to fit snugly inside the opening of your metal watering can. The goal is a secure fit that prevents wobbling, ensuring a stable foundation for your floral arrangement. If the foam block is slightly loose, a small dab of hot glue can secure it to the bottom or inner sides of the can, though a tight friction fit is often sufficient.
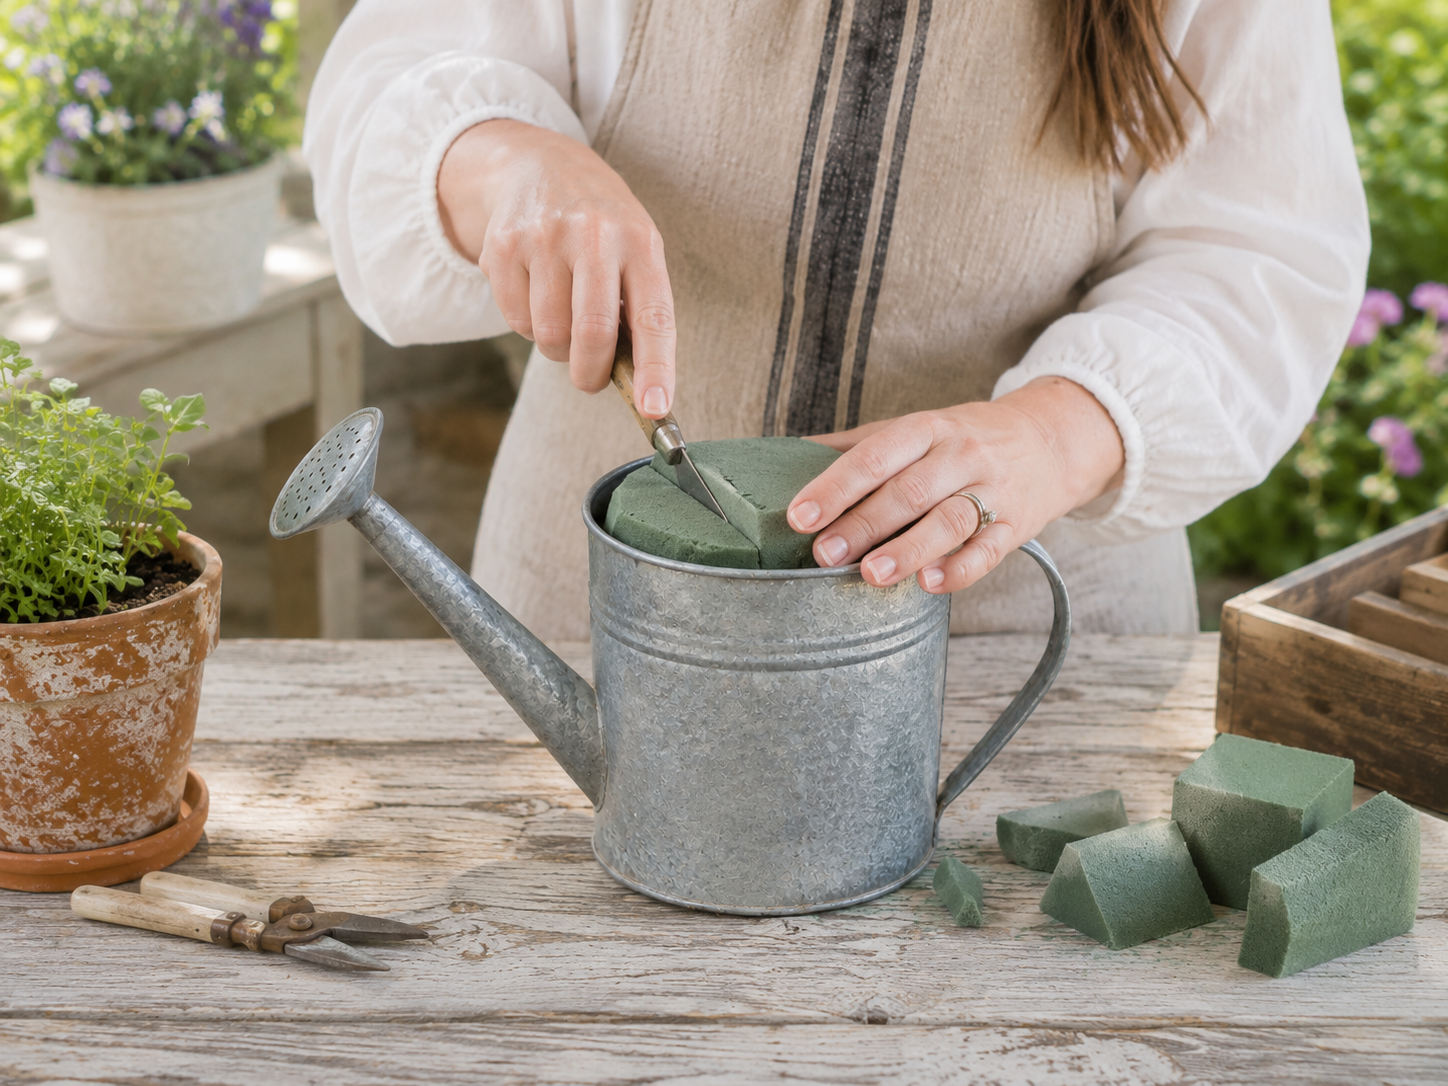
💡 Pro Tip: For optimal stability without permanent adhesion, cut the floral foam slightly larger than the watering can opening. Gently compress it as you insert it; the resulting friction will hold it firmly in place and allow for easy removal if you wish to refresh the arrangement later.
Step 2: Build Floral Height
Start constructing your floral arrangement by inserting the tallest faux flower stems, such as the lavender and large white daisies, into the floral foam. Focus on creating an appealing silhouette and establishing the desired height and overall shape of your bouquet. Position them primarily towards the center and back of the can for a natural, flowing look, using wire cutters to trim stems to varied lengths as needed.
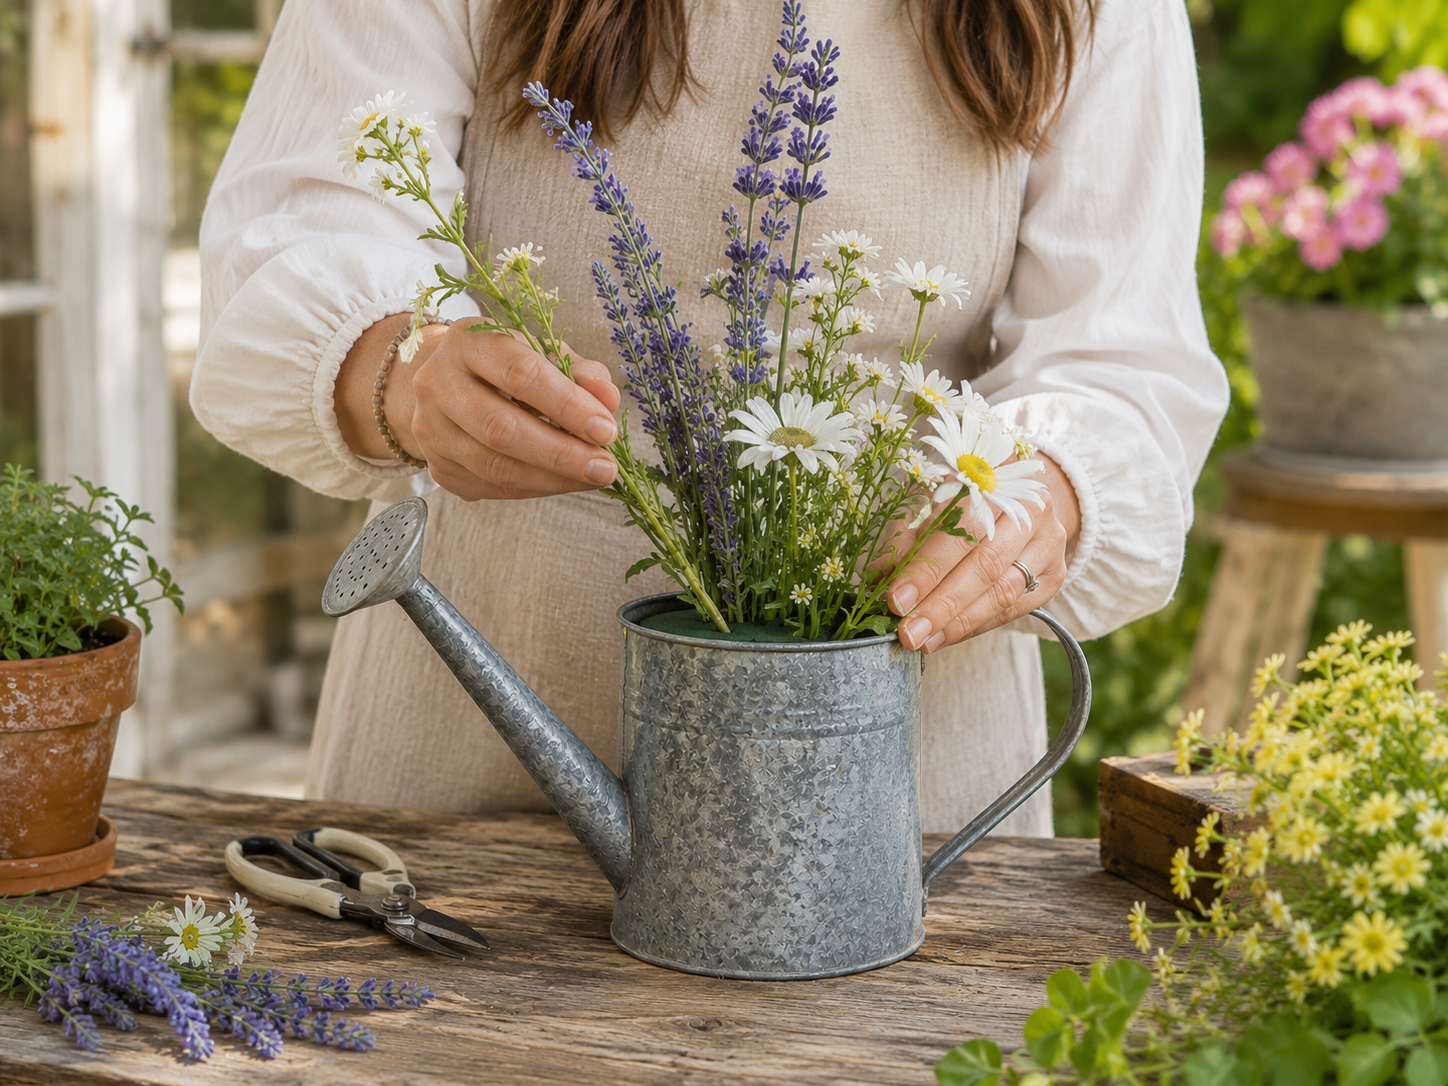
💡 Pro Tip: Varying the stem lengths is crucial for achieving a natural, organic appearance. Avoid cutting all stems to the same height; instead, create visual interest by having some taller elements and others slightly shorter. Begin with your tallest stems, then gradually fill in with progressively shorter ones.
🗓️ Keep all your craft projects on track! Explore our printable planners & templates at CraftersDT on Etsy and use code CRAFT20 for 20% off!
Step 3: Add Volume & Fullness
Once the taller stems define your arrangement’s shape, begin to fill in the middle and outer sections with the smaller yellow faux flowers and soft greenery. Work in layers, ensuring that all gaps are covered and the floral foam is completely hidden from view. Continuously rotate the watering can as you add stems to ensure an even distribution of colors and textures, aiming for a full, balanced, and natural-looking bouquet.
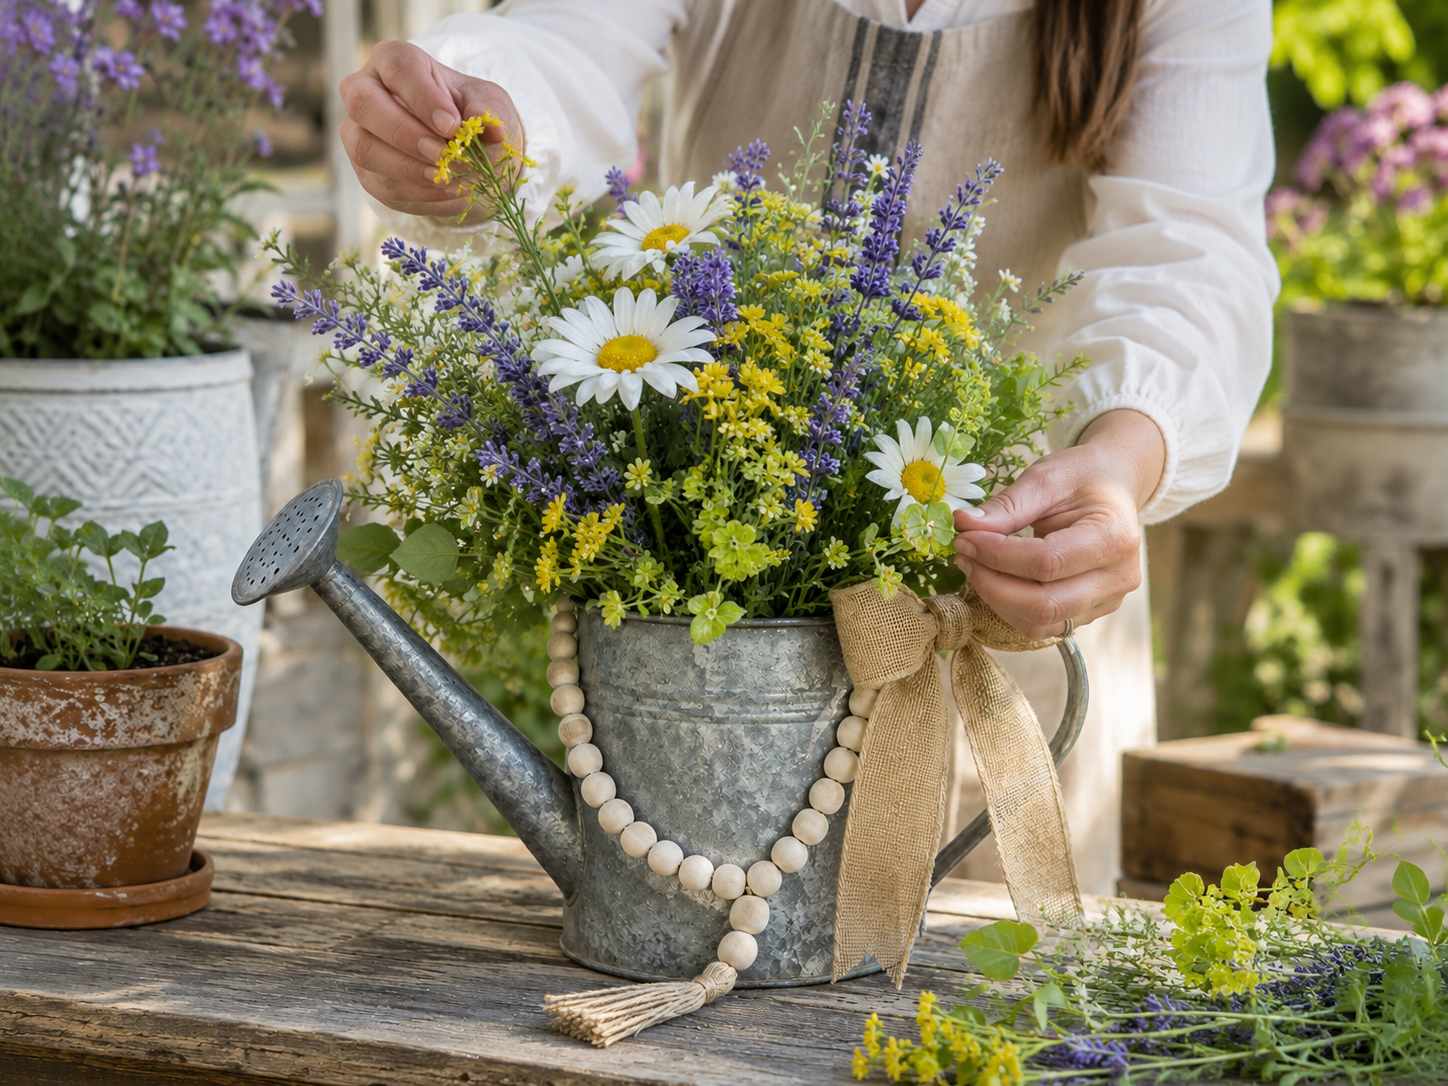
💡 Pro Tip: Regularly step back and assess your arrangement from all angles. This allows you to spot any empty spaces or areas that look unbalanced, helping you achieve a cohesive and abundant garden feel where every flower and leaf contributes to the overall aesthetic.
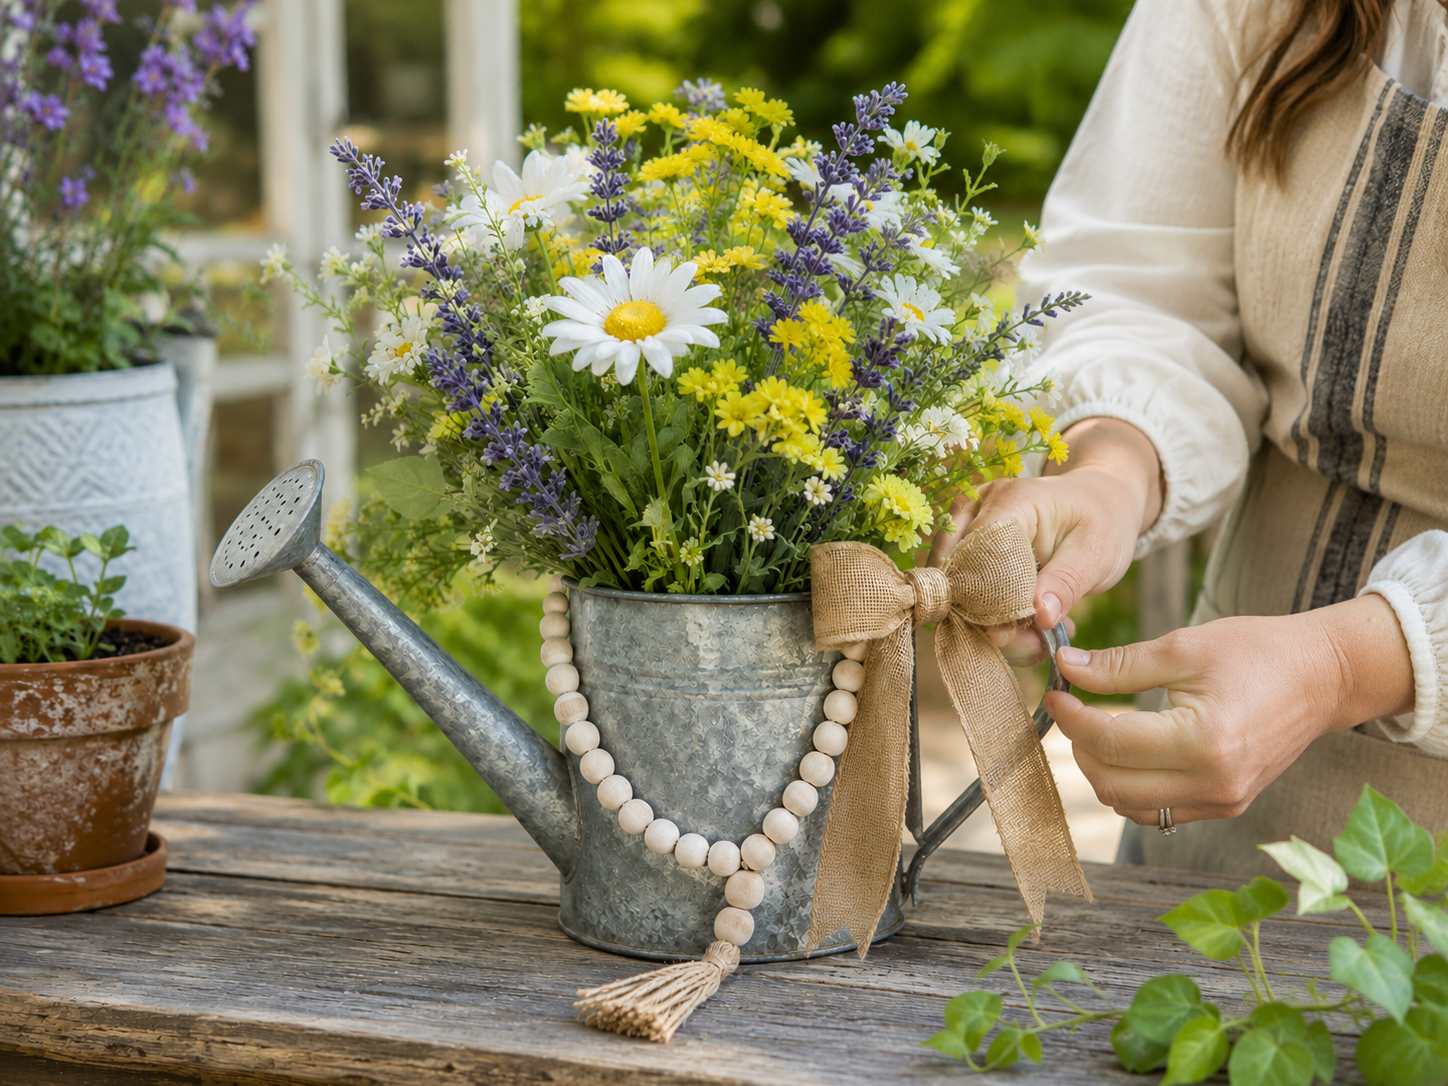
Step 4: Drape Rustic Bead Garland
Carefully drape the wooden bead garland around the front of the watering can. Position it to hang loosely, creating a gentle, organic curve that adds a cozy farmhouse touch. If your garland includes a jute tassel, ensure it hangs appealingly at the lowest point. While a loose drape is often preferred, a tiny dab of hot glue on the back (hidden from view) can secure the garland if it tends to slip or shift.
💡 Pro Tip: Experiment with different hanging points and drape styles for the garland to find the most aesthetically pleasing curve. A slight asymmetry can enhance the natural, rustic charm. If you decide to secure it with glue, use minimal hot glue on an inconspicuous part of the watering can to avoid visible residue.
Step 5: Add Burlap Bow
Take your burlap ribbon and tie it into a charming bow. You can tie it directly around the watering can’s handle or position it on the upper side of the can, where it best complements the floral arrangement and garland. Adjust the loops and tails until the bow looks full and symmetrical. If the bow doesn’t hold its shape or slips easily, secure it in place with a small amount of hot glue on the back, hidden from the front view.
💡 Pro Tip: For a perfectly shaped bow that’s easy to adjust and attach, consider tying your bow separately and then using a piece of floral wire or a small zip tie to secure its center. This allows you to fine-tune the bow’s shape before attaching it to the watering can with a single dot of hot glue.
📱 Free to Download
Join 50,000+ crafters already using Craftino
Browse 58+ Spring & Garden ideas and thousands more in the app
✓ Save crafts & browse fully offline
✓ Download printable PDF guides for every project
✓ Step-by-step photo tutorials, nothing left out
✓ 1,000+ craft projects with new ones added every week
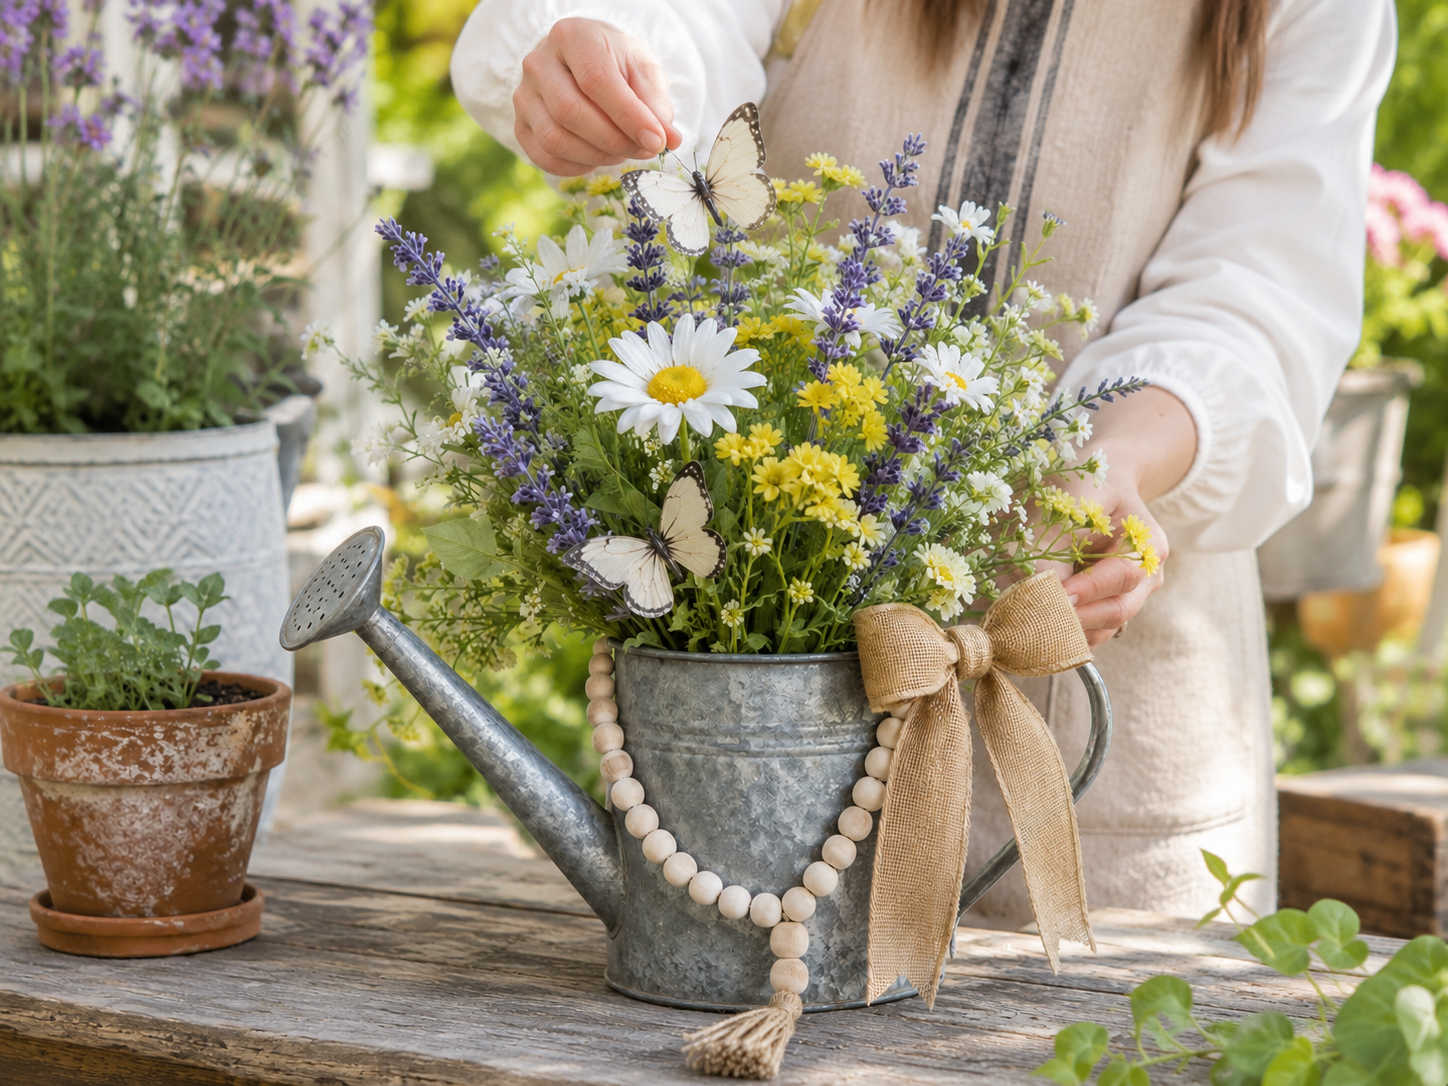
Step 6: Affix Whimsical Butterflies
For the final whimsical touch, gently attach one or two faux butterflies among the flowers. Position them lightly on leaves or flower petals, creating the illusion that they’ve just landed. Most decorative butterflies come with a small clip or wire for easy placement; if not, a tiny, discreet dot of hot glue can secure them. Ensure their placement looks natural and enhances the garden feel without overcrowding the bouquet.
💡 Pro Tip: For a more dynamic and realistic effect, place butterflies at varying heights and slightly off-center within the arrangement. Avoid symmetrical placement or positioning them in overly obvious spots, which can detract from their natural, delicate appearance. Think about how a real butterfly would naturally rest.
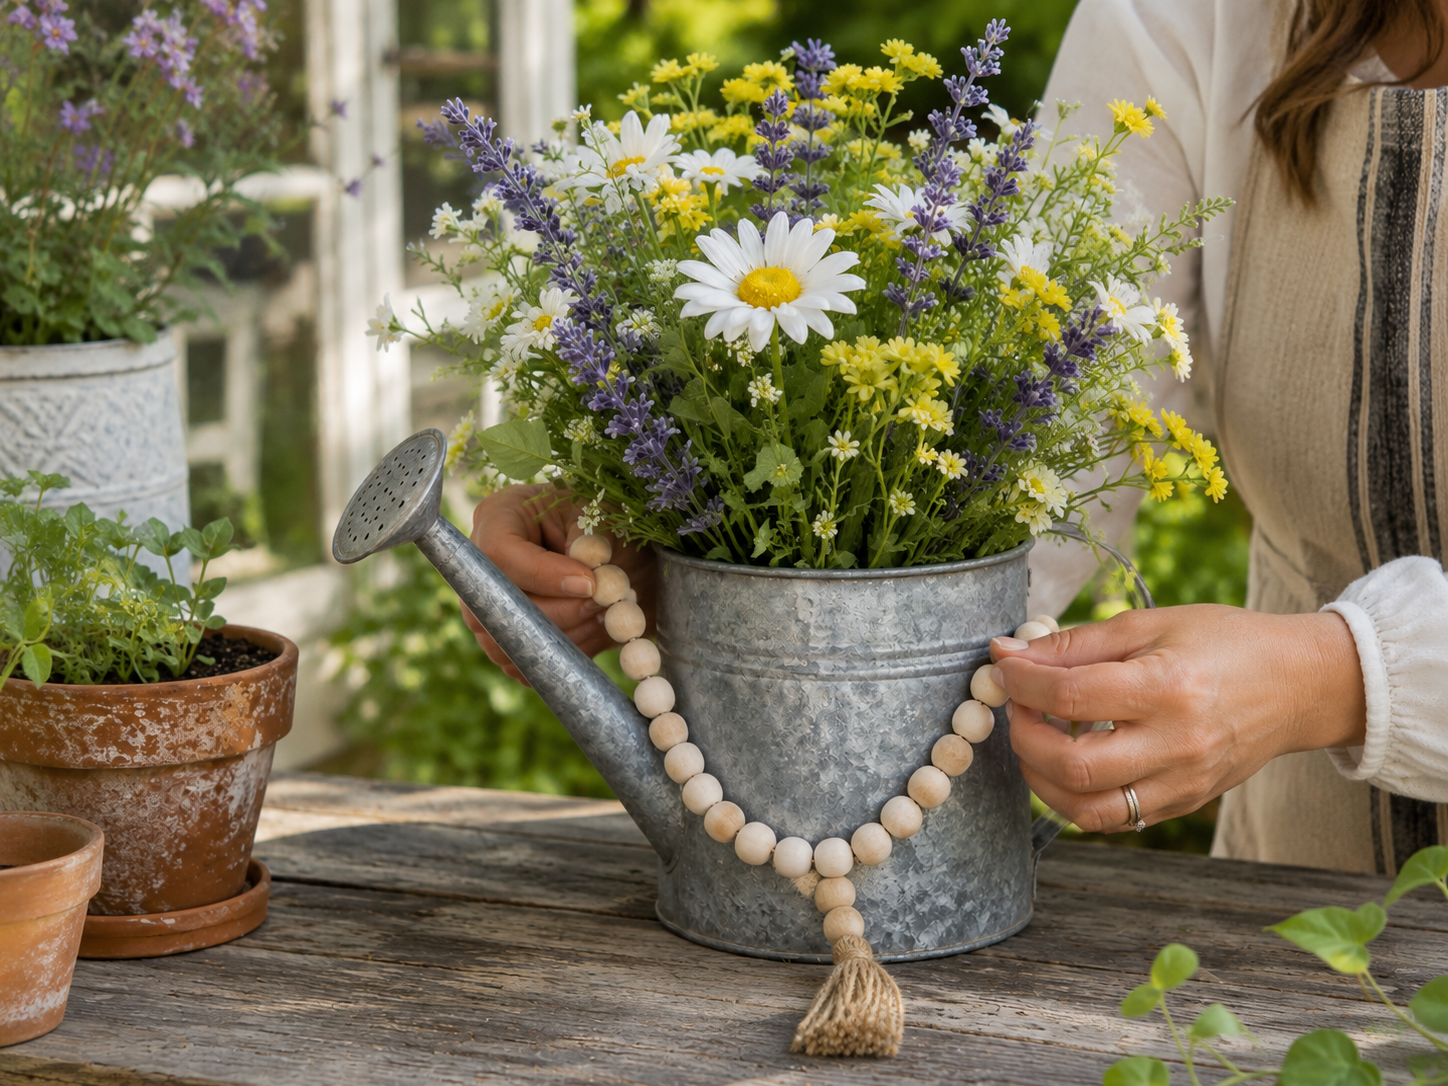
Your Charming Farmhouse Garden Watering Can Arrangement Blooms!
See? I told you it was easy peasy! Your new Charming Farmhouse Garden Watering Can Arrangement looks so fresh and pretty, doesn’t it? Go ahead and find the perfect spot for it, maybe on your entryway table or as a sunny accent in your kitchen, or even wrap it up for a sweet gift. I’d love to see how you made yours, so snap a pic and share it with me!
📱 Free to Download
Join 50,000+ crafters already using Craftino
Browse 86+ Spring & Garden ideas and thousands more in the app
✓ Save crafts & browse fully offline
✓ Download printable PDF guides for every project
✓ Step-by-step photo tutorials, nothing left out
✓ 1,000+ craft projects with new ones added every week
Frequently Asked Questions
How much does it cost to make the DIY Charming Farmhouse Garden Watering Can Arrangement from Dollar Tree?
You can usually make this entire Charming Farmhouse Garden Watering Can Arrangement for under $5, especially if you get most of your supplies like the can, floral foam, and flowers from Dollar Tree.
What type of glue works best for this Spring & Garden Home Decor craft?
A hot glue gun is your best friend for this project! It sets super fast and holds everything securely in place. You’ll probably use about 3-4 glue sticks for the whole arrangement.
How many faux flowers or greenery stems do I need for a good-sized watering can arrangement?
For a standard Dollar Tree watering can, I usually grab about 3-4 larger floral picks or 5-6 smaller stems, plus 1-2 greenery bunches to fill it out nicely.
Is the Charming Farmhouse Garden Watering Can Arrangement suitable for outdoor display?
It can be displayed outdoors in a covered area, like a porch, but direct sun and rain might fade the faux flowers over about 6-12 months. For longer life, keep it mostly indoors or rotate it.
How long does it take to make this easy DIY Spring & Garden craft?
This is a super quick project! Most people can put together their Charming Farmhouse Garden Watering Can Arrangement in about 20-30 minutes, even if you’re a beginner crafter.
Can I customize my Dollar Tree watering can arrangement for different seasons?
Absolutely! Just swap out the Spring & Garden flowers for fall leaves and pumpkins, or winter berries and evergreens. The watering can itself makes a great base for any season.
Discover the newest Dollar Tree arrivals for your next craft project here.
Leave a Reply