Ever walk into Dollar Tree just to grab a couple of things and leave with a whole cart full of craft supplies? Same, friend, same! That’s exactly how this super cute Elegant Coastal Candle Holder: Dollar Tree Chic idea popped into my head. I just knew I had to make something special for summer, and this DIY totally delivers those breezy beachy vibes.
See also: Dollar Tree Coastal Summer Lantern Easy Beachy Charm
Theme: Summer & Beach
Materials Needed
- Clear Glass Cylinder Vase
- Thick Jute Rope & Nautical Twine
- Assorted Seashells & Starfish Decorations
- White Decorative Sand
- Light Blue Pillar or LED Candle
- Small Wooden Beads
- Hot Glue Gun & Glue Sticks
- Scissors
📋 Love staying organized while crafting? Check out our printable planners & craft designs at CraftersDT on Etsy and use code CRAFT20 for 20% off your entire order!
Why This Craft Works
This little candle holder is absolutely perfect for bringing that Summer & Beach vibe right into your home. Imagine it glowing softly on your patio table during a backyard BBQ, or maybe as a sweet centerpiece for a casual summer dinner party. It also looks amazing sitting on a bathroom counter or a bedroom dresser, just adding that touch of breezy Home Decor.
📱 Free to Download
Join 50,000+ crafters already using Craftino
Browse 100+ Summer & Beach ideas and thousands more in the app
✓ Save crafts & browse fully offline
✓ Download printable PDF guides for every project
✓ Step-by-step photo tutorials, nothing left out
✓ 1,000+ craft projects with new ones added every week

The best part? This craft is seriously budget-friendly. We’re talking about $3-4 total if you grab all your supplies from Dollar Tree, maybe even less if you already have some of the basics like glue at home. You just can’t beat that for such a pretty piece of Home Decor!
This project is super easy, I promise! You can whip up this Elegant Coastal Candle Holder: Dollar Tree Chic in about 20-30 minutes, tops. It’s perfect for beginners, busy moms looking for a quick craft, or even if you want to get the kids involved for a fun Summer & Beach activity.
Step-by-Step Instructions for Elegant Coastal Candle Holder: Dollar Tree Chic
Okay, are you ready to get crafting? This Elegant Coastal Candle Holder: Dollar Tree Chic is seriously one of the quickest and most satisfying DIYs I’ve done lately. I had mine finished in about 20 minutes, and it was so much fun! It’s super beginner-friendly, so don’t be shy, let’s make some gorgeous Summer & Beach Home Decor together.
Step 1: Gather Your Coastal Craft Supplies
Begin by collecting all your Dollar Tree materials, ensuring you have a clean workspace and all tools readily accessible. This initial organization makes the crafting process smooth and enjoyable, allowing you to focus on creativity.
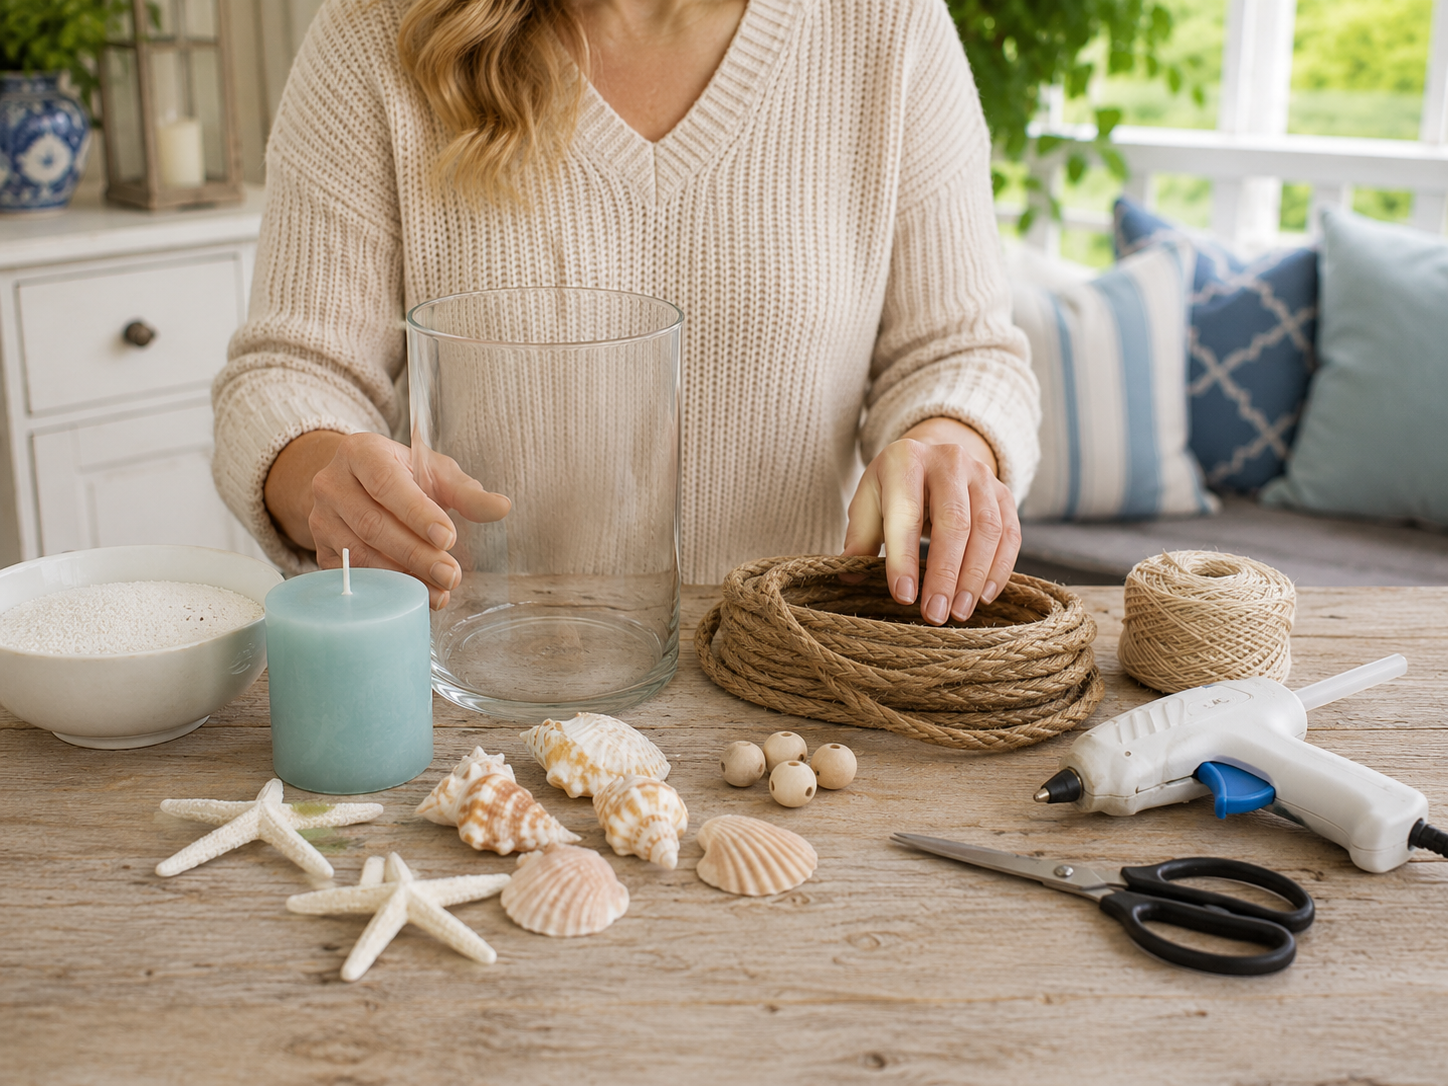
💡 Pro Tip: Always check your hot glue gun is preheating well in advance so it’s ready when you need it, preventing delays and ensuring strong, immediate bonds. Lay out all items to confirm you have everything before starting.
Step 2: Clean and Prepare the Vase
Start by thoroughly cleaning your clear glass cylinder vase. Use a glass cleaner or isopropyl alcohol and a lint-free cloth to remove any dust, fingerprints, or manufacturing residues. A pristine, clean surface ensures optimal adhesion for the hot glue and a sparkling, high-end finish for your centerpiece.
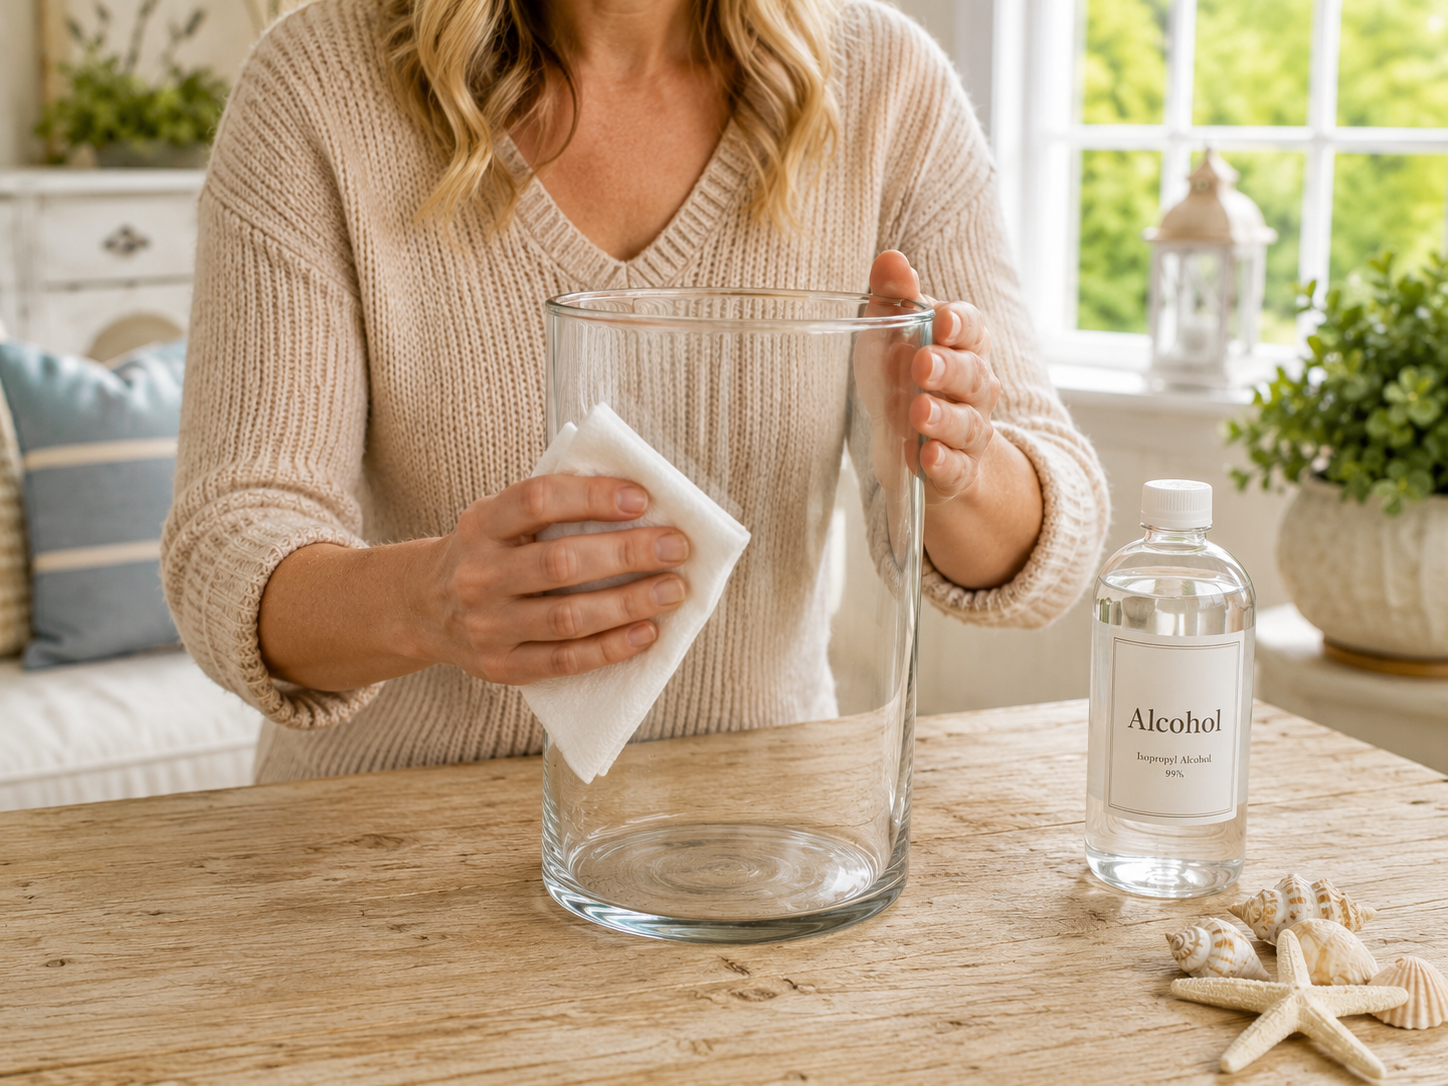
💡 Pro Tip: For streak-free glass, wipe in one direction and avoid circular motions. Wear clean gloves or avoid touching the areas where glue will be applied after cleaning to prevent transferring oils from your skin.
🗓️ Keep all your craft projects on track! Explore our printable planners & templates at CraftersDT on Etsy and use code CRAFT20 for 20% off!
Step 3: Wrap the Jute Rope Rim
Take your thick jute rope and begin wrapping it snugly around the top rim of the glass vase. Apply a small bead of hot glue to secure the start of the rope on the back of the vase. Continue wrapping the rope in tight, even rows, applying more hot glue periodically (every 1-2 wraps) to ensure it adheres securely and creates a smooth, continuous border. Wrap approximately 3-5 rows, depending on the rope thickness and your desired look.
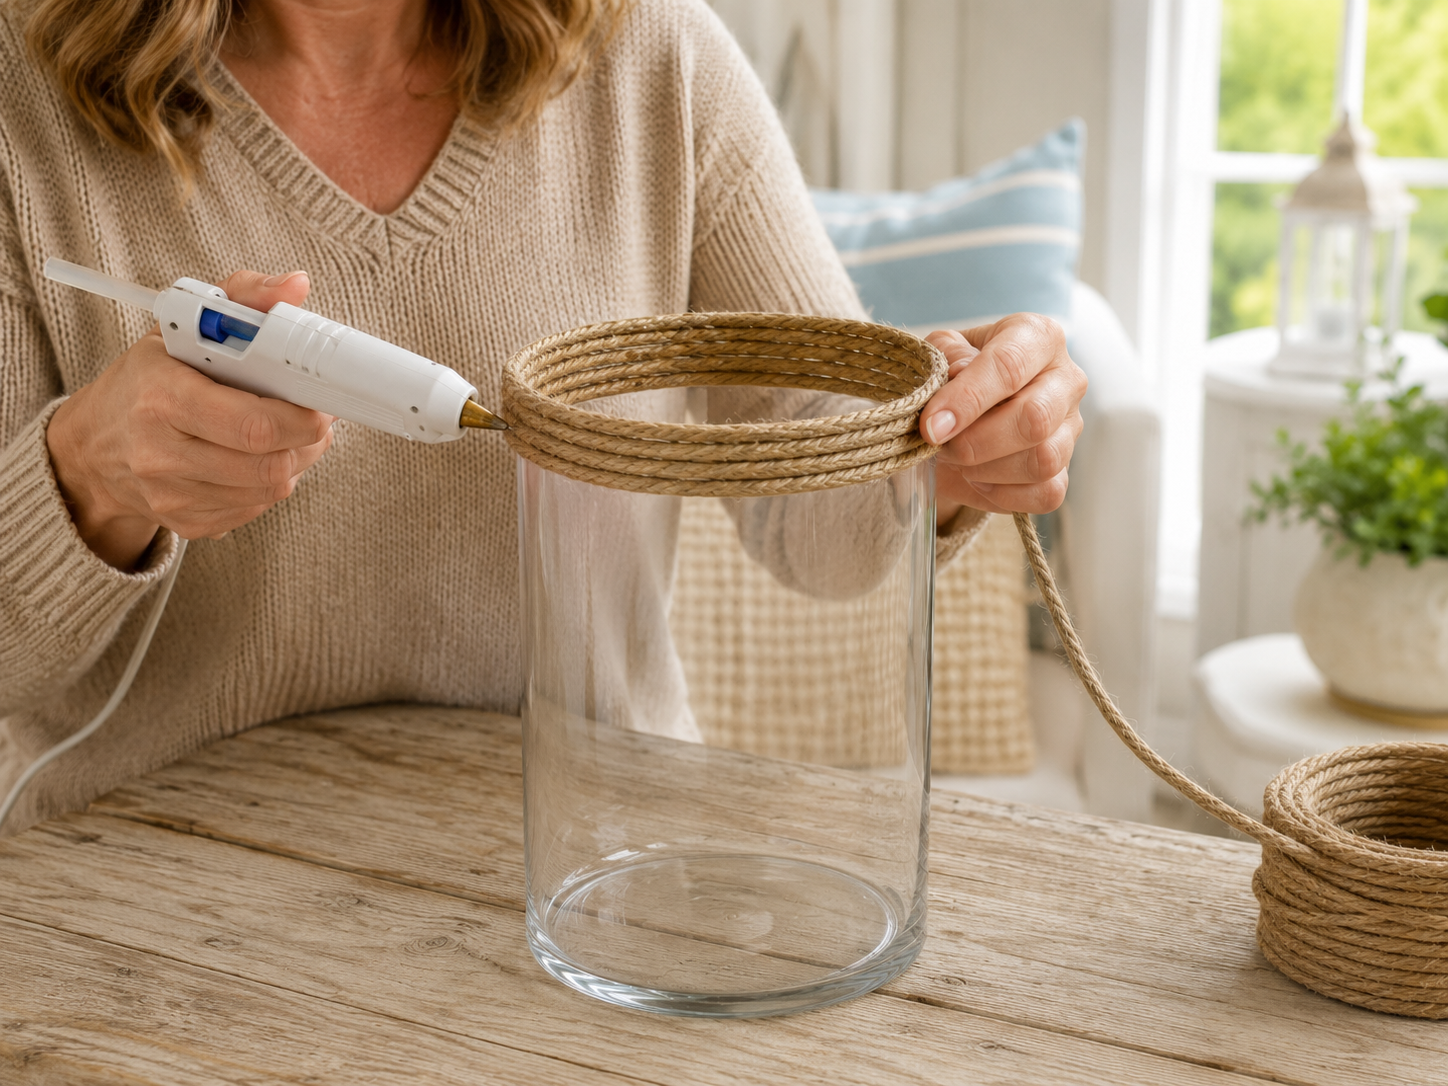
💡 Pro Tip: Work in small sections (3-4 inches) when applying hot glue to avoid it cooling and hardening before you can press the rope firmly into place. Maintain consistent tension while wrapping to prevent gaps or unevenness, and try to make your glue seams invisible by placing them at the back of the vase.
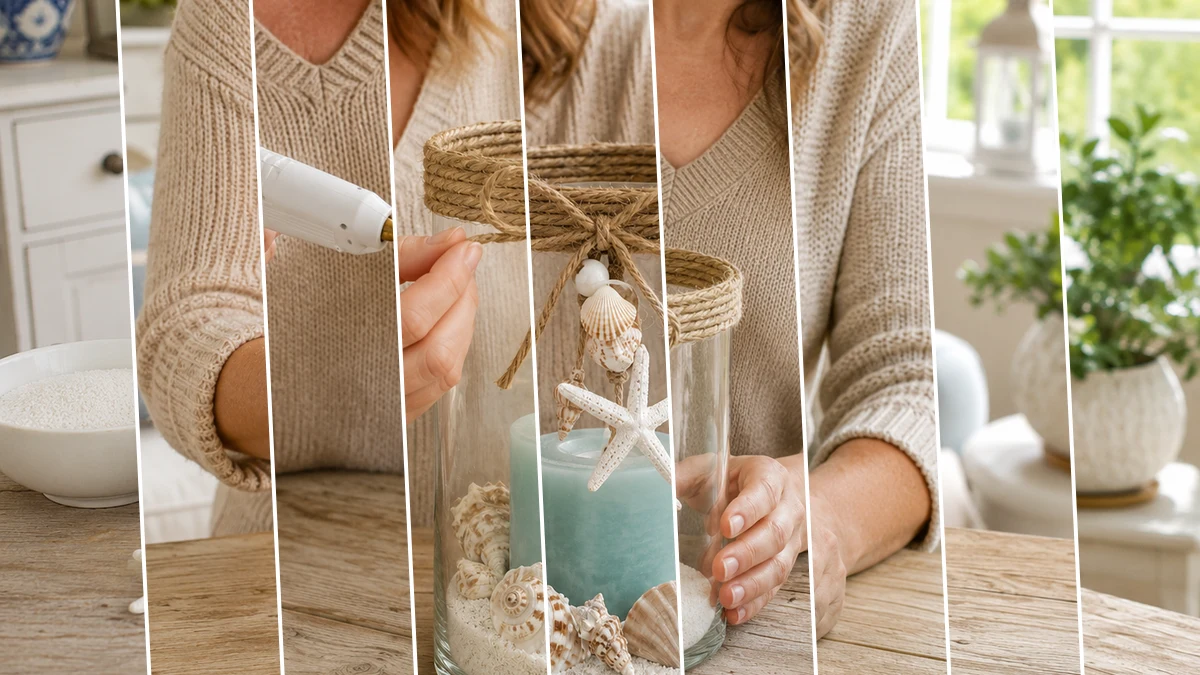
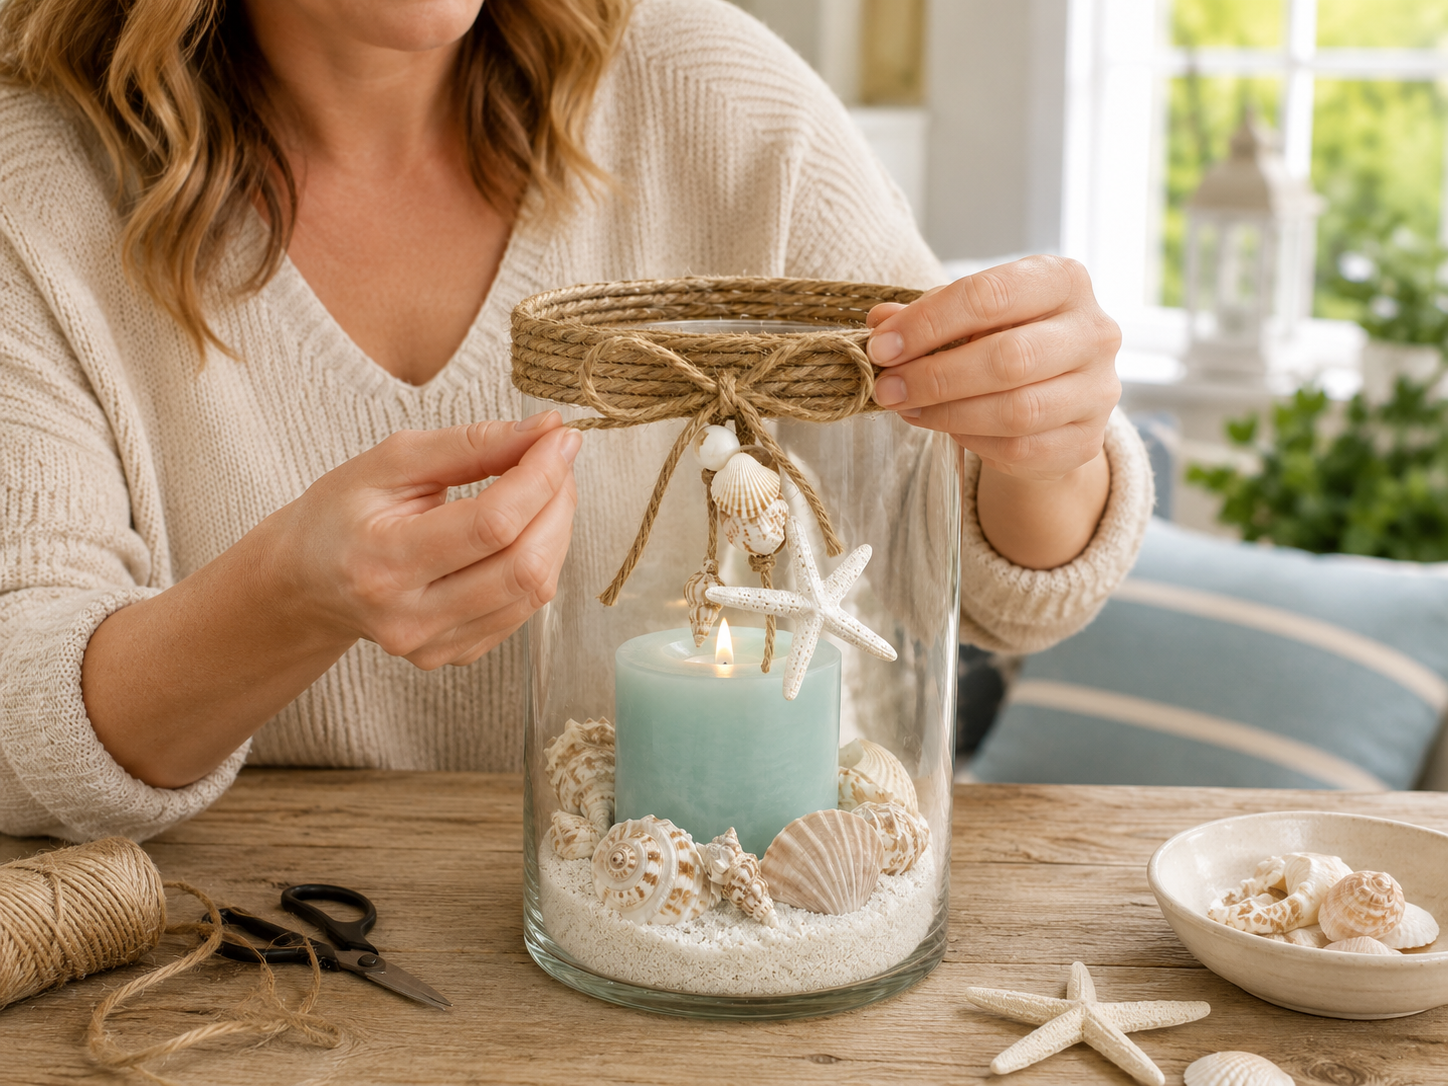
Step 4: Create and Attach the Jute Bow
Cut a generous length of jute rope and tie a neat, full bow. Adjust the loops and tails until the bow looks balanced and aesthetically pleasing. Position this bow at the front center of the vase, just below the wrapped rope rim. Secure the bow firmly to the vase using hot glue, ensuring it is centered and holds its shape well.
💡 Pro Tip: To make a sturdy bow that maintains its shape, create multiple loops (e.g., a double or triple loop bow) before tying the knot. A small dab of hot glue at the center back of the bow can help secure the loops together before you attach the entire bow to the vase. Trim excess rope ends neatly at an angle.
Step 5: Assemble and Hang the Shell Charm
Take a piece of nautical twine (about 10-12 inches). Thread a few small wooden beads, assorted small seashells (you may need to find shells with natural holes or carefully drill tiny holes), and a mini starfish onto the twine to create an attractive hanging charm. Once assembled to your liking, secure the top end of the twine under the jute bow with a small amount of hot glue so the charm hangs gracefully over the glass, adding a delicate coastal accent.
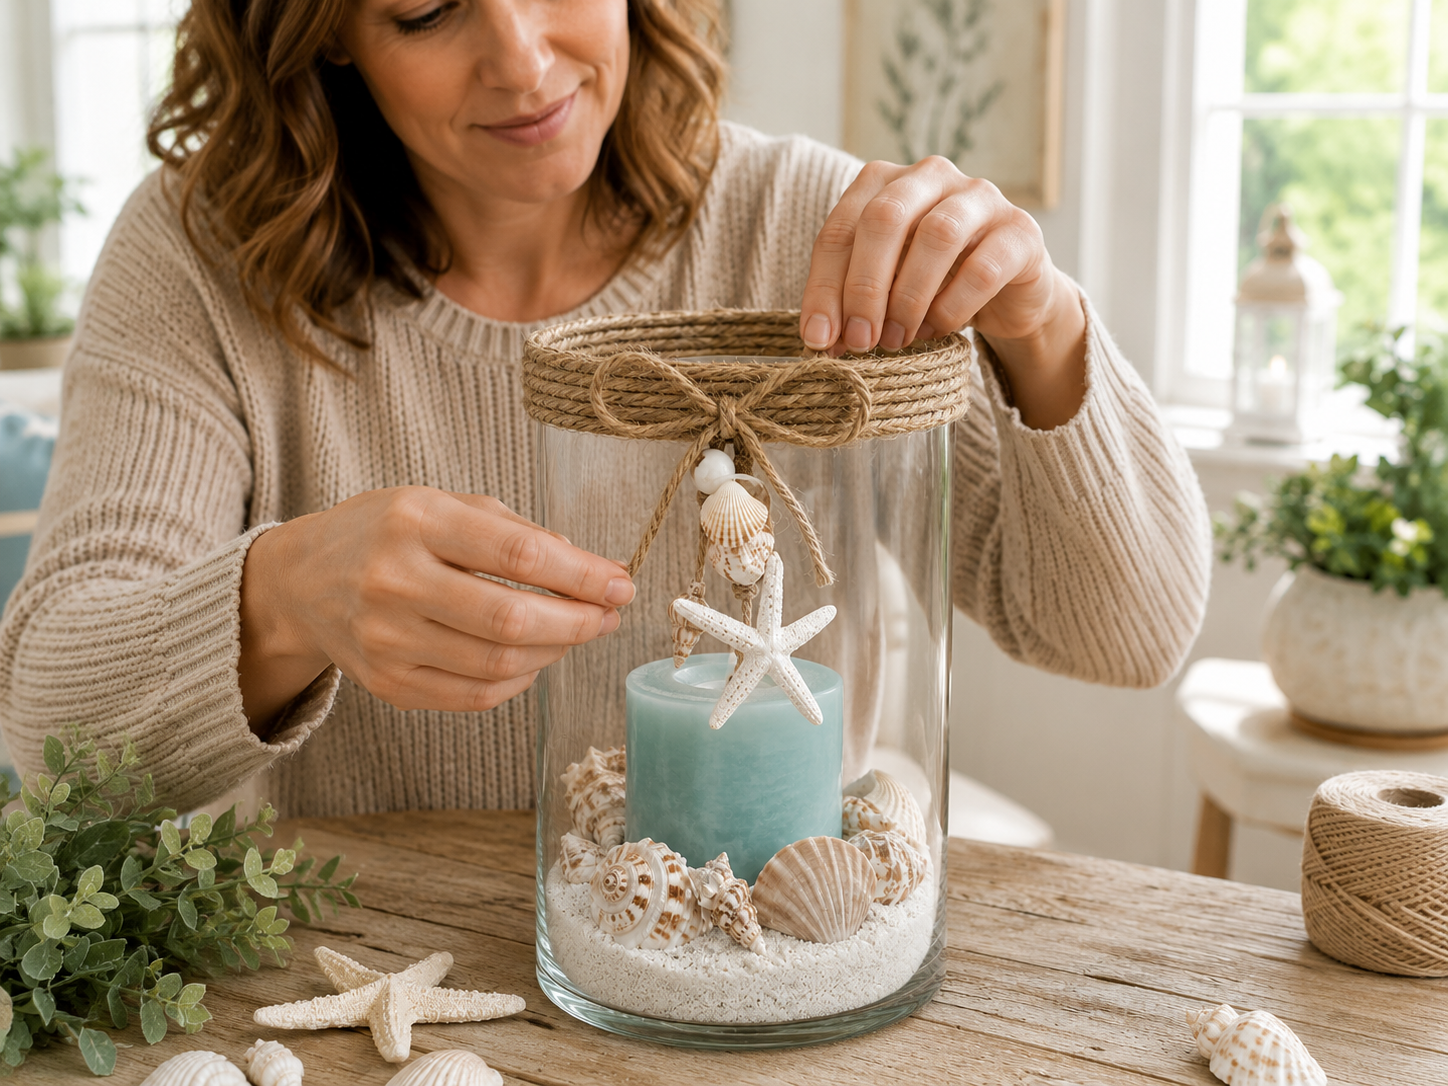
💡 Pro Tip: For shells without natural holes, you can carefully drill a small hole using a Dremel tool with a tiny bit (always wear safety glasses!). Alternatively, for lightweight shells, you can use a strong clear craft adhesive like E6000 to attach the twine directly to the back of the shell. Ensure the charm hangs at an appealing length, generally not touching the sand inside.
Step 6: Add Decorative Sand
Carefully pour a layer of white decorative sand into the bottom of the vase, creating a smooth, even base for your candle and seashells. Aim for a depth of 1-2 inches, or to your desired level, ensuring it looks natural and proportionate within the vase. The white sand provides a perfect ‘beach’ foundation.
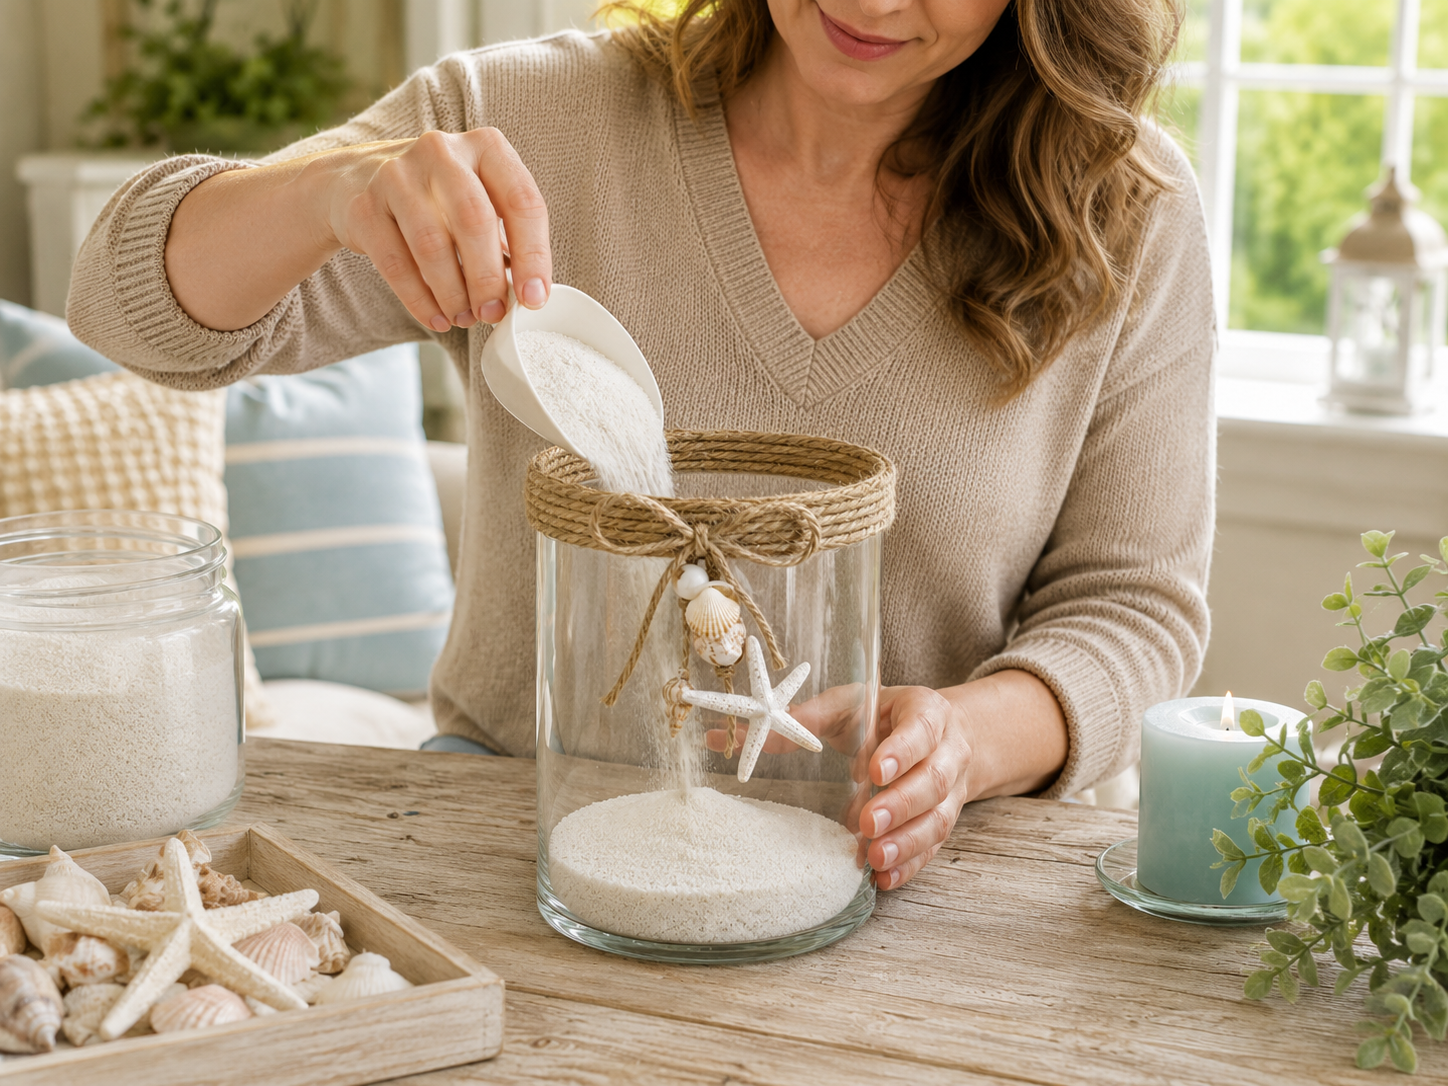
💡 Pro Tip: To pour the sand neatly and avoid spilling, create a funnel by rolling a piece of paper into a cone or use an actual kitchen funnel. Gently tap the bottom of the vase on your workspace to help settle the sand evenly and create a flat surface.
Step 7: Place the Pillar Candle
Gently nestle the light blue pillar candle or LED candle into the center of the decorative sand. Push it down slightly to ensure it sits firmly and level. The candle should be precisely centered within the vase, leaving enough space around it for the seashells to be artfully arranged.
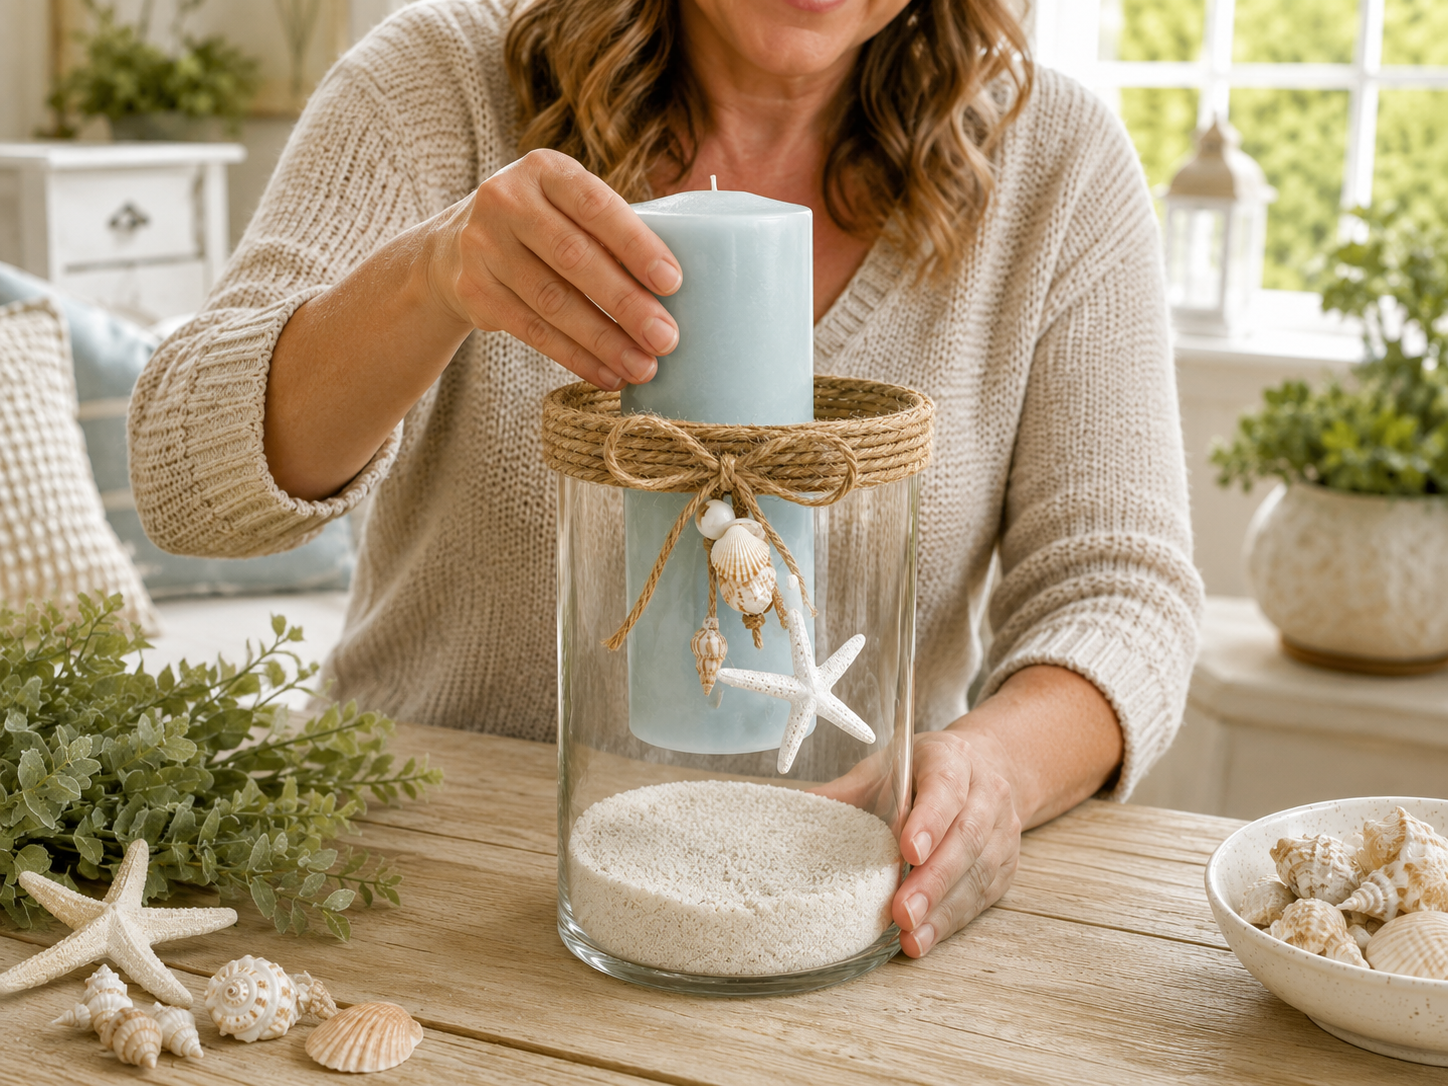
💡 Pro Tip: If using a real pillar candle, ensure it’s positioned away from the glass sides by at least an inch to prevent excessive heat buildup or potential glass damage. For LED candles, consider placing it on a small, hidden coaster if the base isn’t completely flat, and ensure the battery compartment is easily accessible for future changes.
Step 8: Arrange Seashells and Starfish
Artistically arrange an assortment of seashells and small starfish around the base of the candle within the sand. Distribute them naturally, varying sizes and shapes to create an organic, beach-inspired display. Avoid overcrowding the vase; aim for a balanced and visually pleasing composition that enhances the coastal theme.
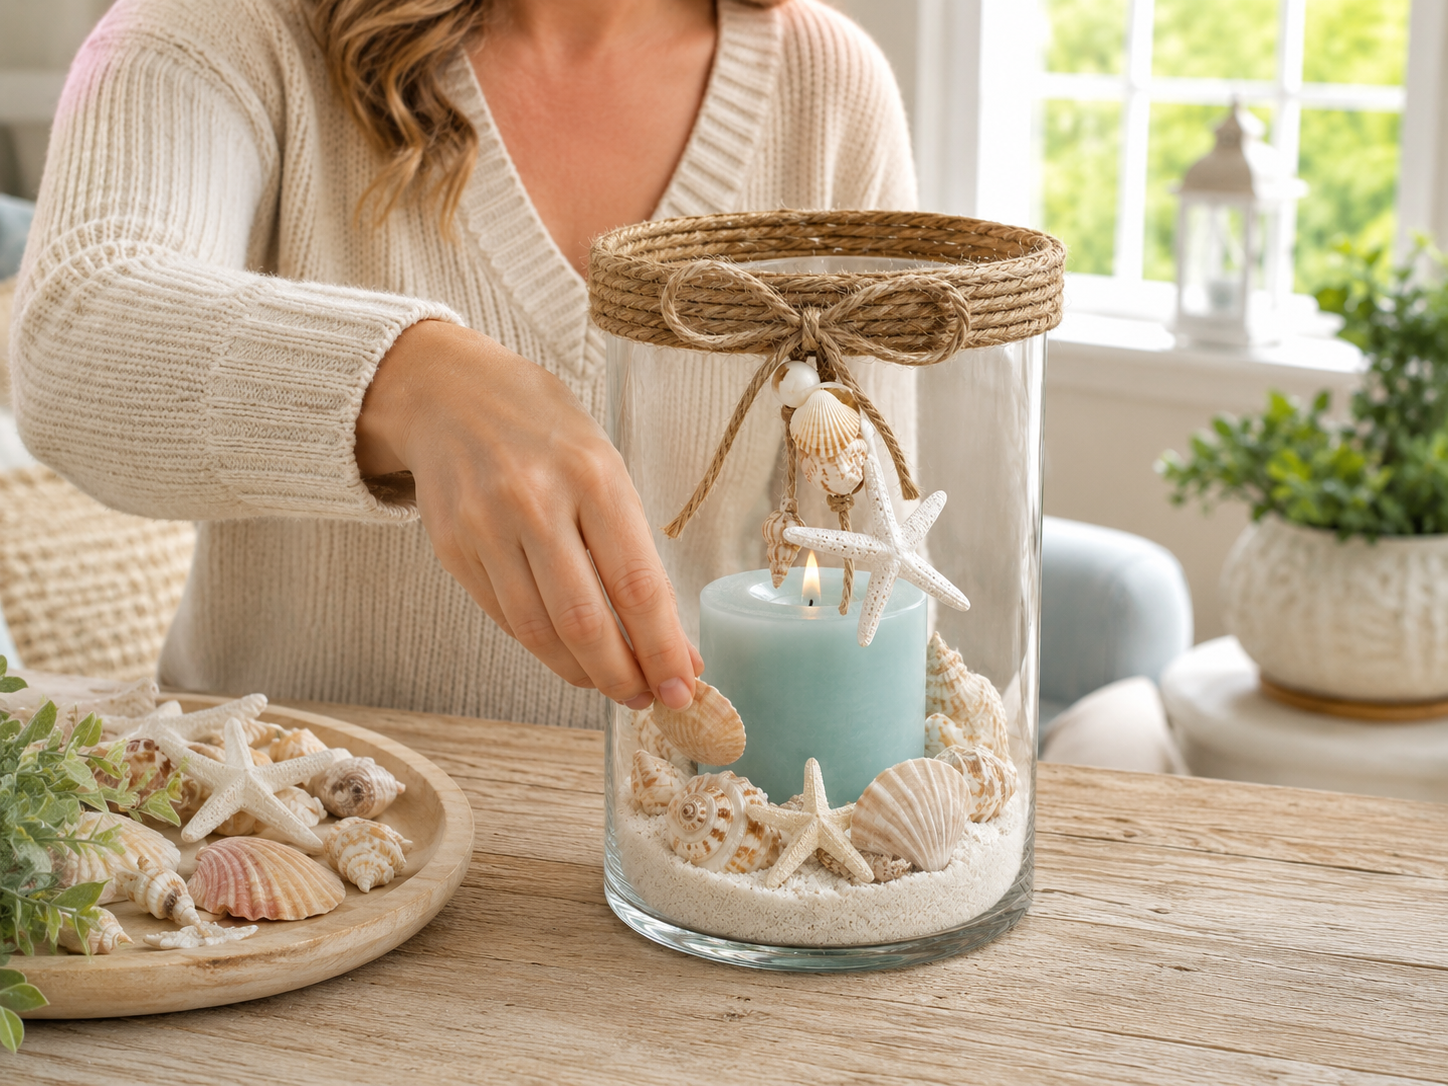
💡 Pro Tip: Start by placing larger shells first, using them as anchors, then fill in the gaps with smaller shells and mini starfish. Rotate the vase as you arrange to ensure an attractive view from all angles. For stability, gently press the shells into the sand to prevent them from shifting or rolling.
📱 Free to Download
Join 50,000+ crafters already using Craftino
Browse 63+ Summer & Beach ideas and thousands more in the app
✓ Save crafts & browse fully offline
✓ Download printable PDF guides for every project
✓ Step-by-step photo tutorials, nothing left out
✓ 1,000+ craft projects with new ones added every week
Step 9: Final Touches and Styling
Review your finished coastal candle holder, ensuring all elements are secure, well-placed, and aesthetically pleasing. Adjust any shells or the candle position as needed for optimal balance. Your elegant summer beach house centerpiece is now complete! For display, place it on a coffee table, console, or dining table. Optionally, add a sprig of faux greenery or other subtle coastal accents around the base of the vase for enhanced styling.
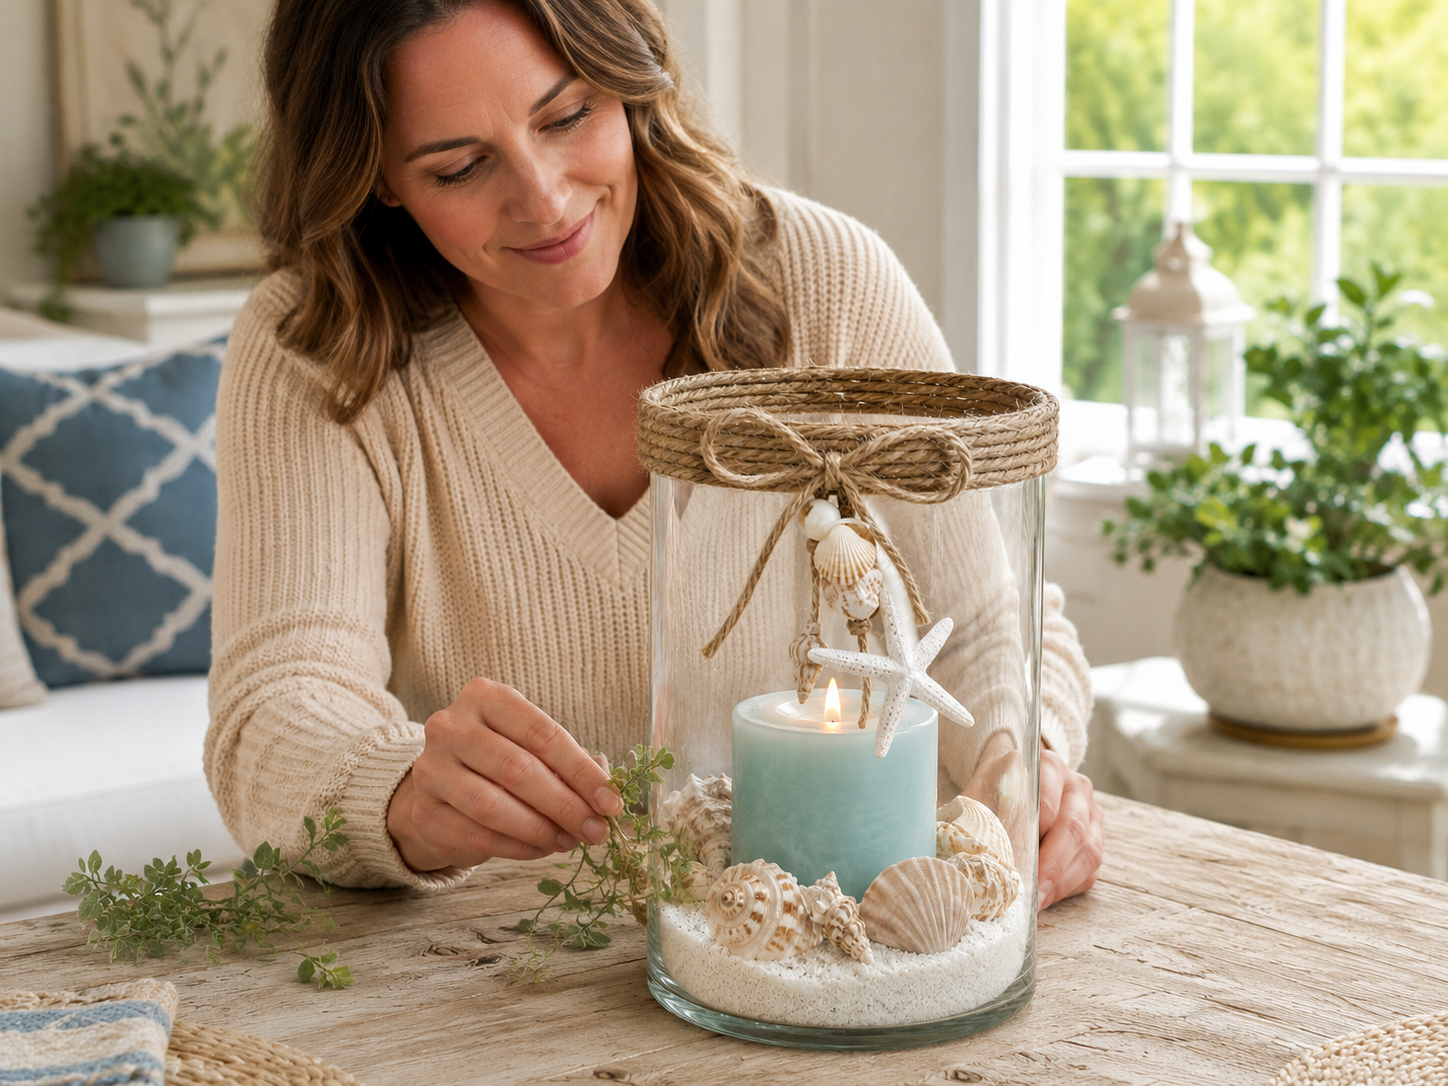
💡 Pro Tip: Step back and view the piece from different angles and lighting conditions. Sometimes a slight adjustment to one shell or bead can significantly improve the overall balance and visual impact. If using a real candle, always prioritize safety: ensure proper ventilation, place it on a heat-safe surface, and never leave it unattended while lit.
Your Elegant Coastal Candle Holder Shines!
Look at that, isn’t your Elegant Coastal Candle Holder just darling? It’s going to look amazing on your patio this summer, or maybe in a guest bathroom to add a little sparkle. Don’t forget to snap a pic and tag me if you make one, I’d love to see your Dollar Tree Chic creation!
📱 Free to Download
Join 50,000+ crafters already using Craftino
Browse 48+ Summer & Beach ideas and thousands more in the app
✓ Save crafts & browse fully offline
✓ Download printable PDF guides for every project
✓ Step-by-step photo tutorials, nothing left out
✓ 1,000+ craft projects with new ones added every week
Frequently Asked Questions
What Dollar Tree supplies do I need for this Elegant Coastal Candle Holder?
You’ll mostly need one glass candle holder or small vase, one bag of decorative sand or pebbles, and about 5-10 shells or small nautical decorations. You can usually find all these items at Dollar Tree.
How much does it cost to make this DIY Summer & Beach candle holder?
This Elegant Coastal Candle Holder: Dollar Tree Chic costs approximately $3-4 per finished holder. This estimate includes the main Dollar Tree supplies like the glass holder, sand, and shells.
How long does it take to make the Dollar Tree Elegant Coastal Candle Holder?
This is a super quick DIY! You can typically assemble one Elegant Coastal Candle Holder in just 15-20 minutes. This does not include any drying time if you use a slow-setting glue.
What type of glue works best for a Dollar Tree Coastal Candle Holder?
Hot glue is usually your best bet for quick adhesion of shells and decorations to glass. For a stronger hold on the shells, you could use E6000 craft adhesive, but it takes about 24 hours to fully cure.
Can I make variations of the Elegant Coastal Candle Holder: Dollar Tree Chic?
Absolutely! You can swap out natural shells for small faux starfish or seahorses, use different colored sand like white or light blue, or even add a small piece of jute twine or rope around the rim for a different look. Get creative with your Summer & Beach Home Decor!
Discover the newest Dollar Tree arrivals for your next craft project here.
Leave a Reply