
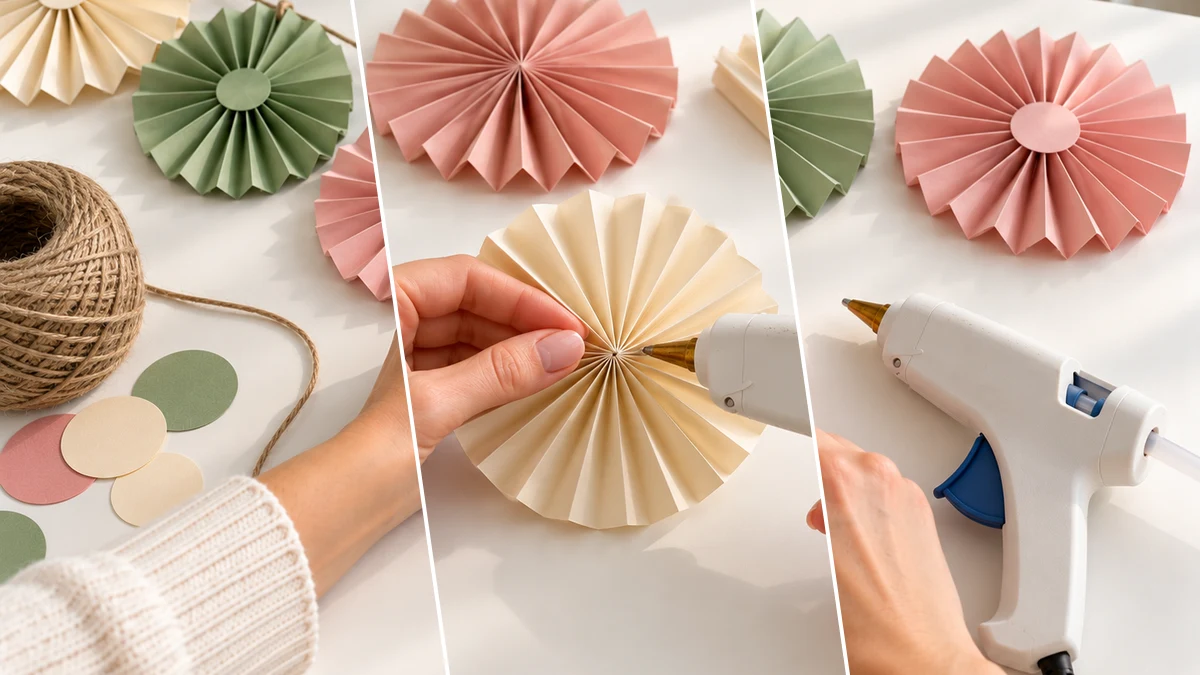
Discover how to craft a charming paper rosette garland using accordion-folded paper. This DIY project features soft shades of cream, sage green, and dusty pink, strung on natural twine. It offers a touch of whimsical elegance suitable for any wall, mantel, or party setting.
Project at a Glance
- Difficulty: Easy
- Estimated active time: 25 minutes to 40 minutes (drying and curing waits not included)
- Estimated component cost: $1 to $3 (reusable tools and general supplies excluded)
- Main material: Paper
- Suggested placement: Wall, Mantel
About This Paper Rosette Garland Project
This accordion-fold paper rosette garland is designed as an everyday decorative accent, moving beyond seasonal-specific themes. Its soft palette of cream, sage green, and dusty pink, combined with natural twine, creates a versatile look. This makes it suitable for various home decor styles or as a gentle addition to a celebration.
The craft uses common materials like colored paper or cardstock, hot glue, and natural twine. This project is classified as easy and can be completed in an estimated active time of 25 to 40 minutes, excluding any unattended drying or curing. The estimated component cost is between $1 and $3, excluding reusable tools and general supplies.
Materials for DIY Accordion Fold Paper Rosette Garland for Neutral Everyday Wall Decor
- Colored Paper or Cardstock (cream, sage green, dusty pink)
- Hot Glue Gun and Glue Sticks
- Scissors or Paper Trimmer
- Natural Twine
Need another material? Browse current craft supplies and deals.
Crafting Your Accordion Fold Paper Rosette Garland
Creating this paper rosette garland involves simple paper folding and assembly techniques. Each step guides you through transforming flat paper into charming rosettes and then assembling them into a beautiful garland. Follow these instructions to achieve your own decorative display.
Step 1: Prepare Paper Strips
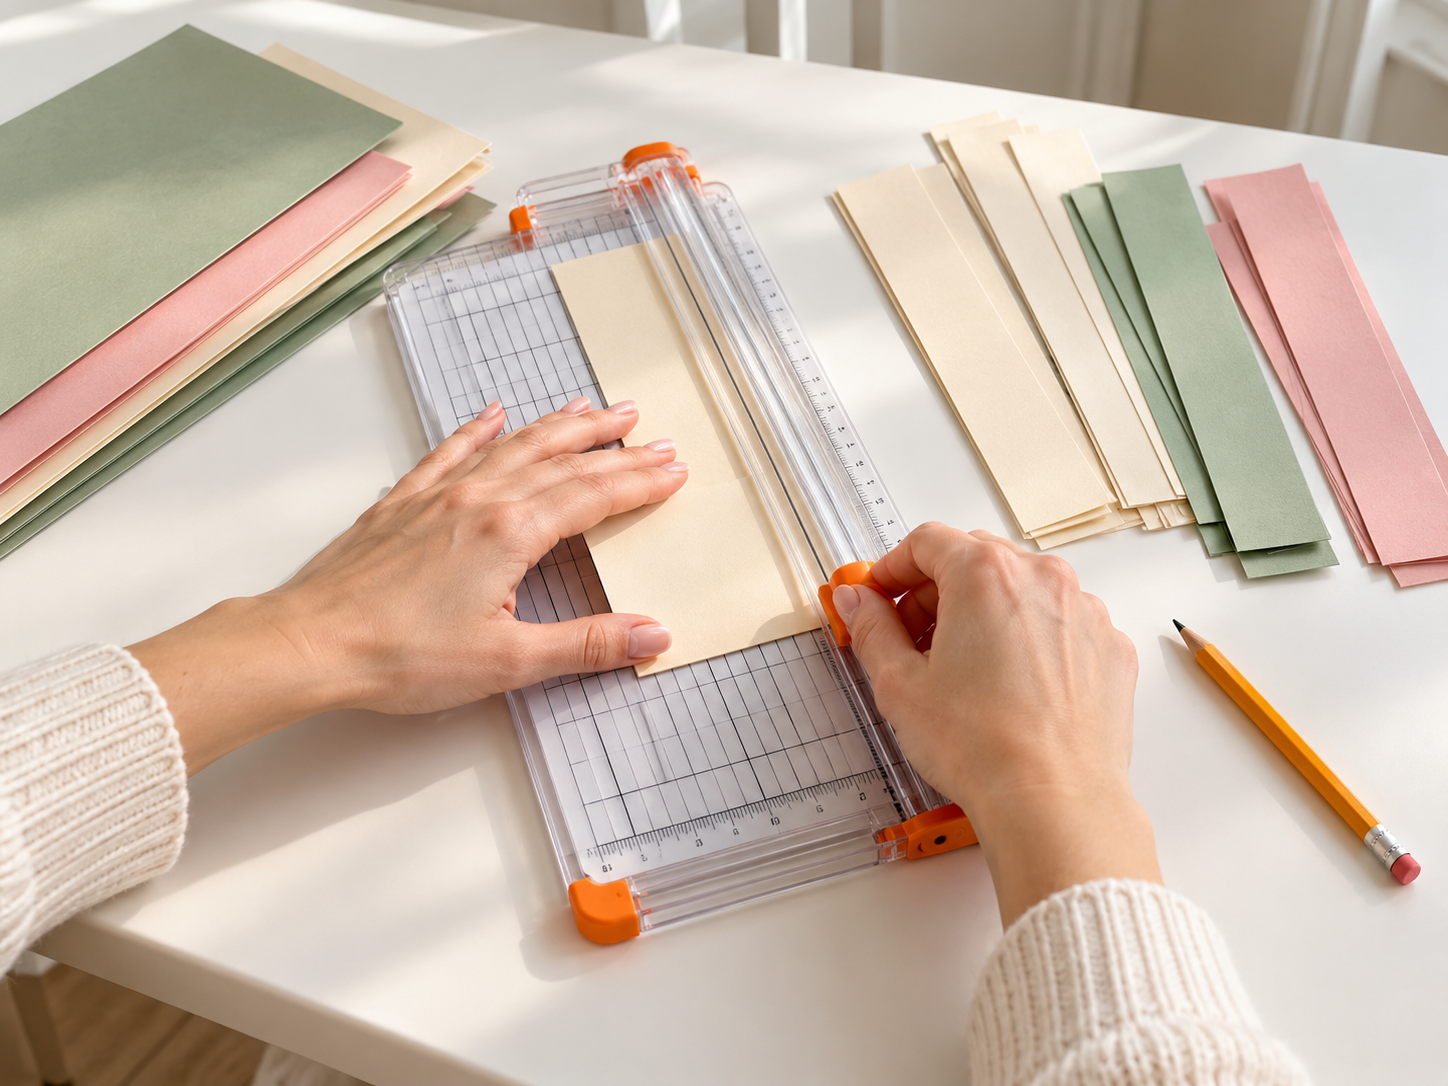
Begin by selecting your colored paper or cardstock. Using a paper trimmer or scissors, cut each sheet into long strips of uniform width. A common and easy width is 2 inches (5 cm), but you can adjust this to create larger or smaller rosettes. Ensure all strips are cut to the same length for consistency across your rosettes.
Step 2: Create Accordion Folds
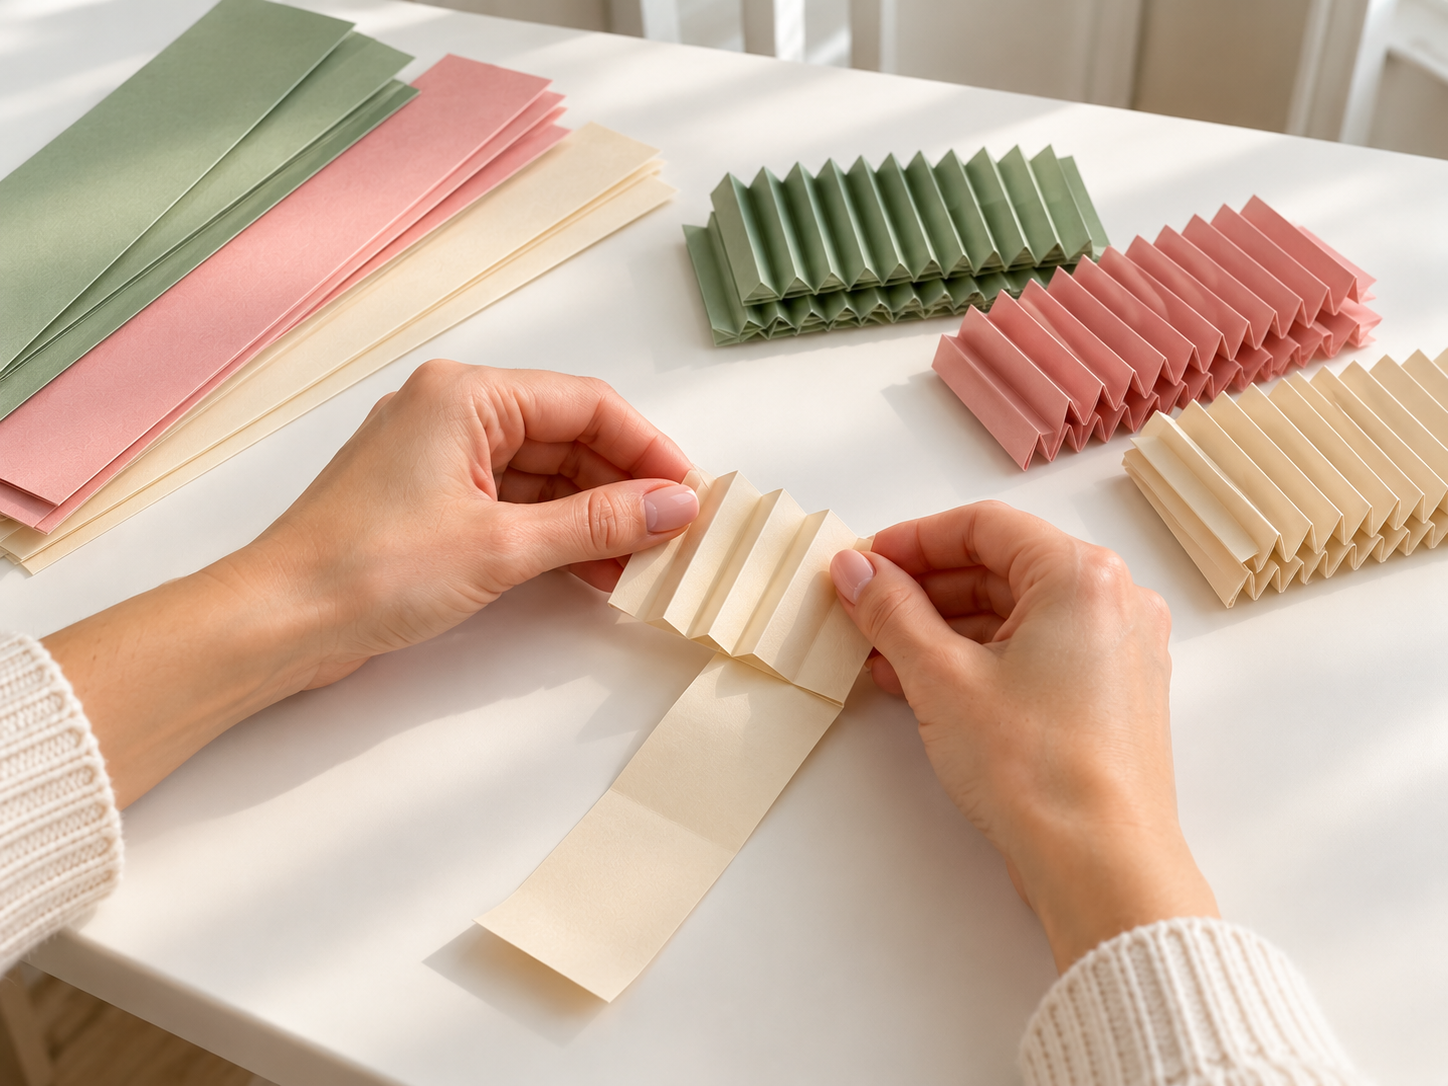
Take one paper strip and begin folding it in an accordion style. Aim for even pleats, typically about 0.5 to 1 inch (1.25 to 2.5 cm) wide, folding back and forth along the entire length of the strip. Press each fold firmly to create sharp creases. Repeat this process for all your paper strips.
Step 3: Form Paper Fans
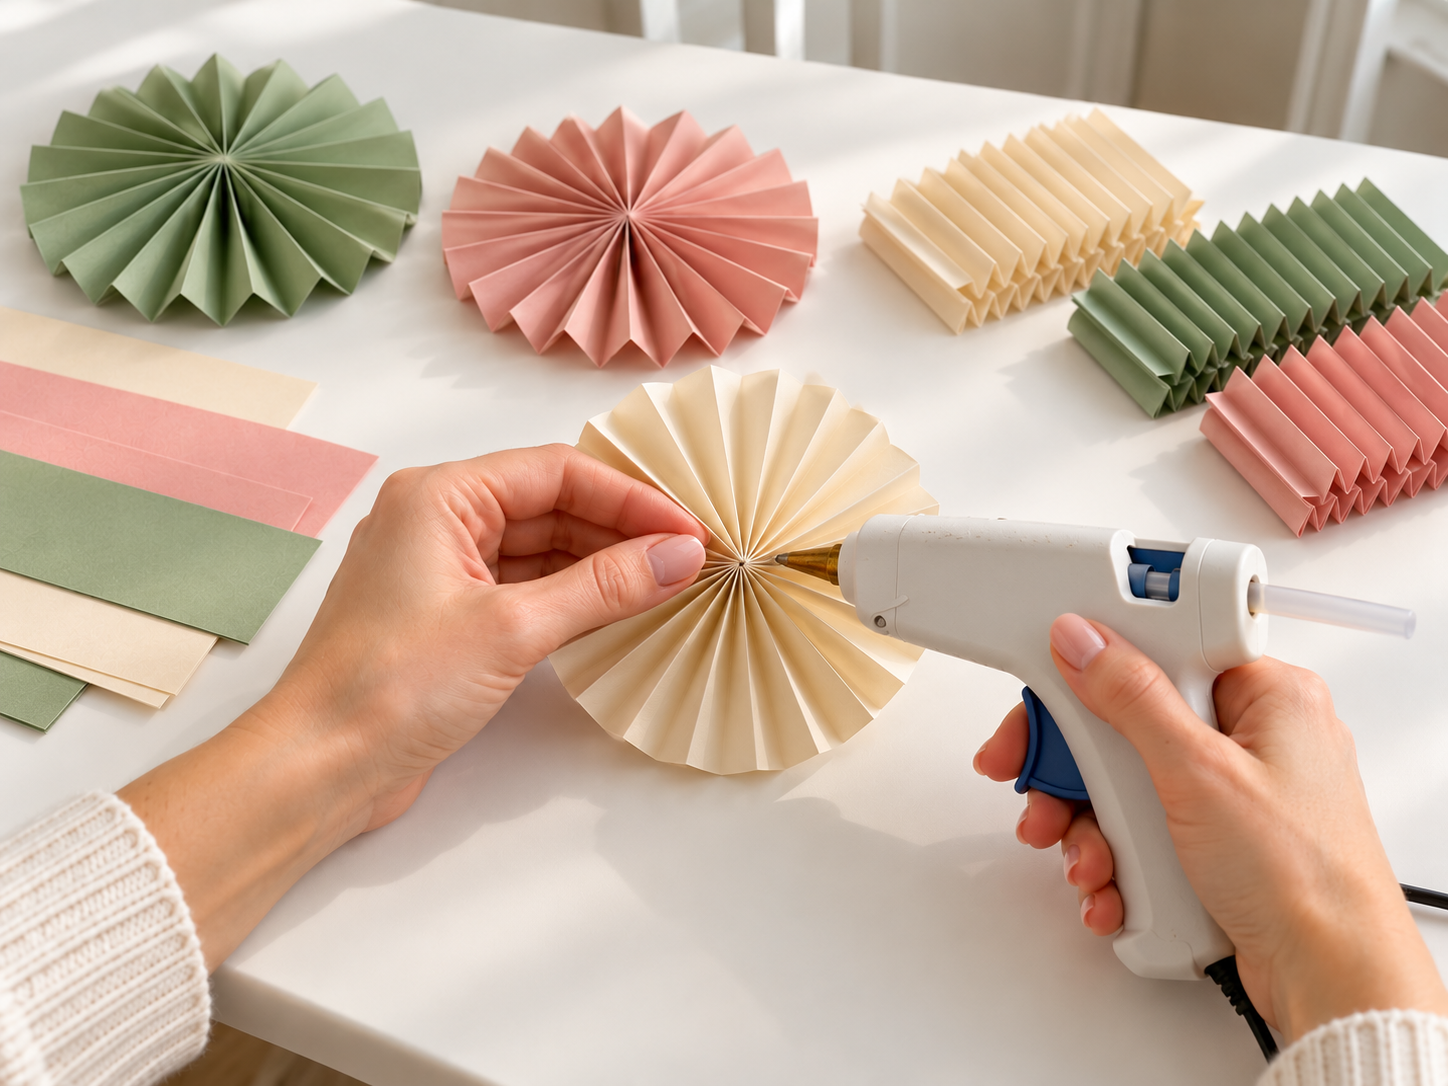
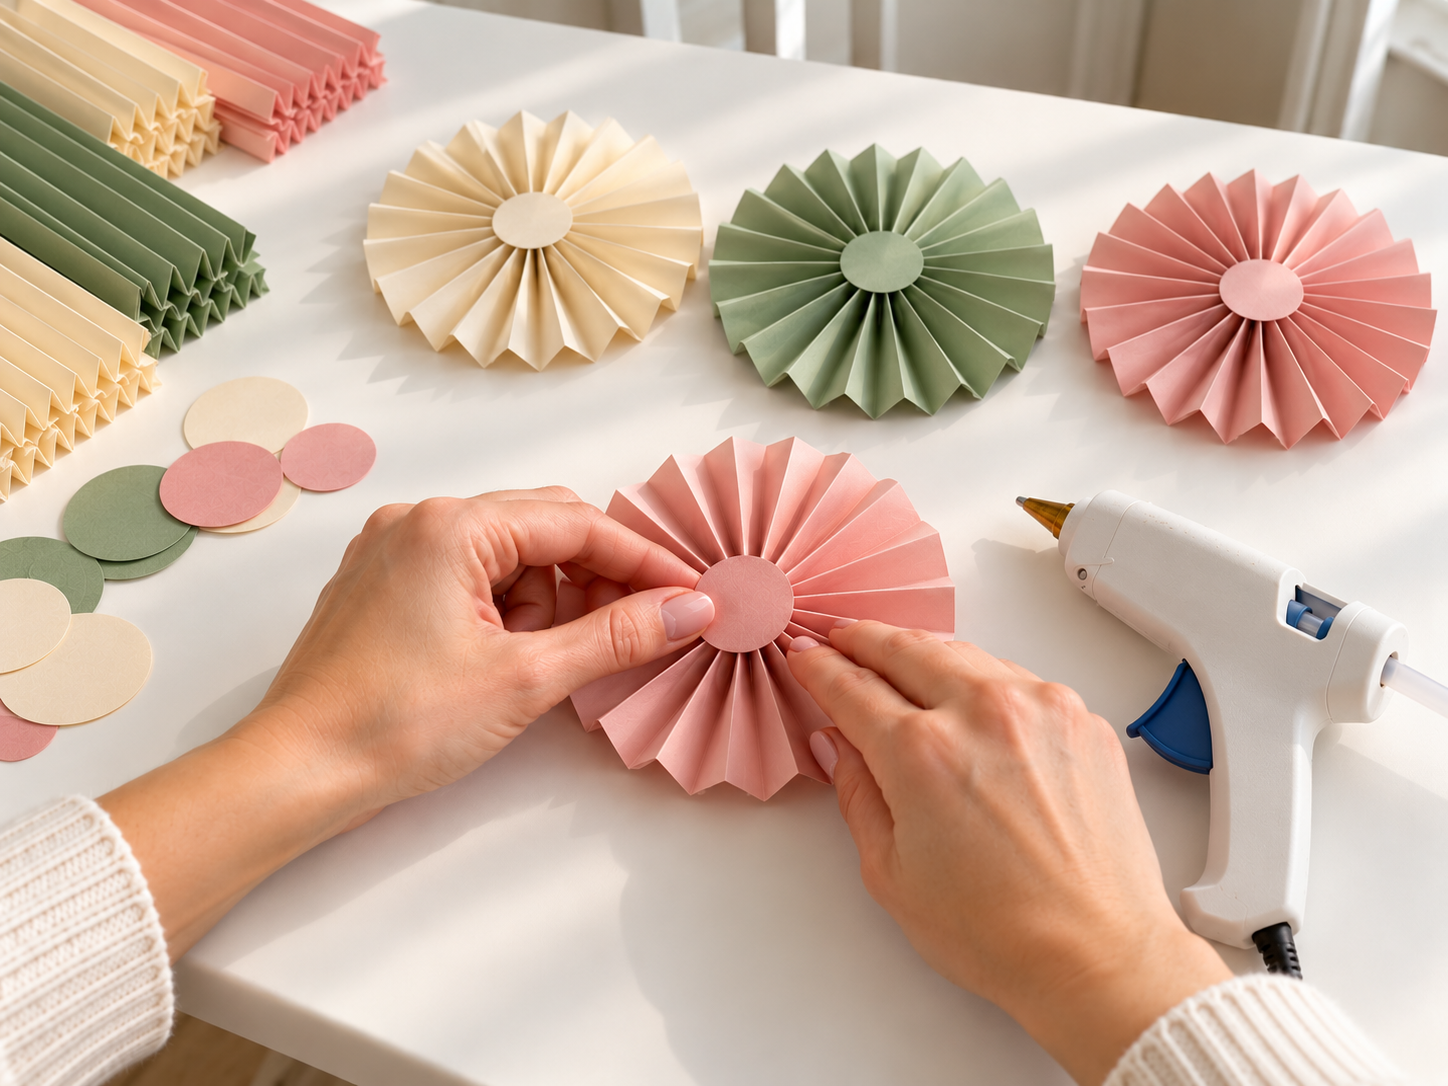
Once all strips are accordion-folded, it's time to create the fan shapes. Carefully bring the two short ends of a folded strip together to form a circle. Apply a small bead of hot glue to one end and firmly press the other end onto it, ensuring the pleats align. Hold until the glue sets, forming a seamless, open fan.


Step 4: Finish Rosette Centers
To complete each rosette, cut small circles from a coordinating or contrasting paper. These circles will cover the center of your paper fans and help them lie flat. Apply a small amount of hot glue to the back of a paper circle and press it firmly onto the center of an open paper fan. This will secure the rosette's shape and add a polished finish.
Step 5: Assemble and Hang Garland
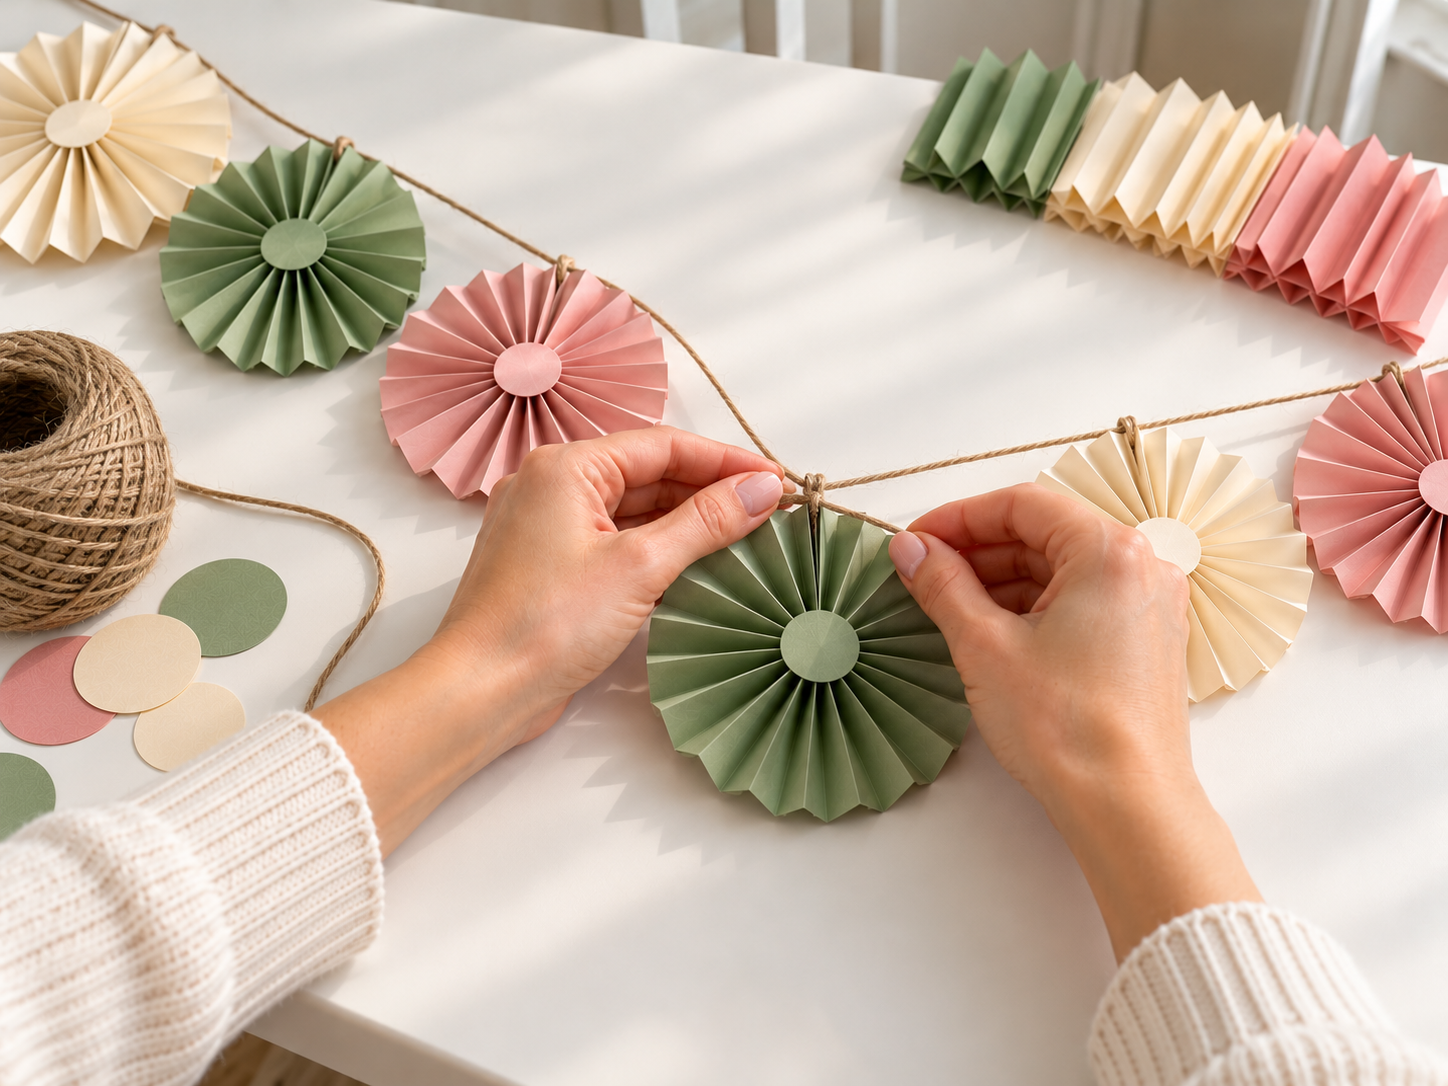
Once all your rosettes are complete, cut a length of natural twine to your desired garland size. Position the rosettes along the twine, deciding on your preferred spacing. Secure each rosette by tying a knot on either side of its center with the twine, or by attaching a small dab of hot glue to the back of the rosette where it meets the twine. Once assembled, your beautiful paper rosette garland is ready to hang and enjoy!
Displaying Your Finished Paper Rosette Garland
Your accordion-fold paper rosette garland is now complete and ready to enhance your space. Hang it across a wall, drape it over a mantel, or use it to add a soft decorative touch to a party. This charming paper craft brings a whimsical and gentle aesthetic wherever it is placed.
Related project collection: DIY Halloween Bat and Dot Garland for Mantel or Wall with Craft Foam
Practical Questions About This Project
What kind of paper works best for this garland?
Colored paper or cardstock is suitable for this project. Cardstock can offer more durability and a slightly firmer rosette shape.
Can different colors of paper be used?
Yes, while the example uses cream, sage green, and dusty pink, you can select any colored paper or cardstock to match your specific decor or occasion.
How long does this craft take to make?
The estimated active time to complete this paper rosette garland is between 25 and 40 minutes, which excludes any unattended drying or curing time.
What is the estimated cost for the materials?
The estimated component cost for this project ranges from $1 to $3, not including reusable tools or general craft supplies.
Can the size of the paper rosettes be changed?
Yes, the size of the rosettes can be adjusted by changing the width of the paper strips cut in Step 1. Wider strips will generally result in larger rosettes.
Search Dollar Tree for paper supplies.

Leave a Reply