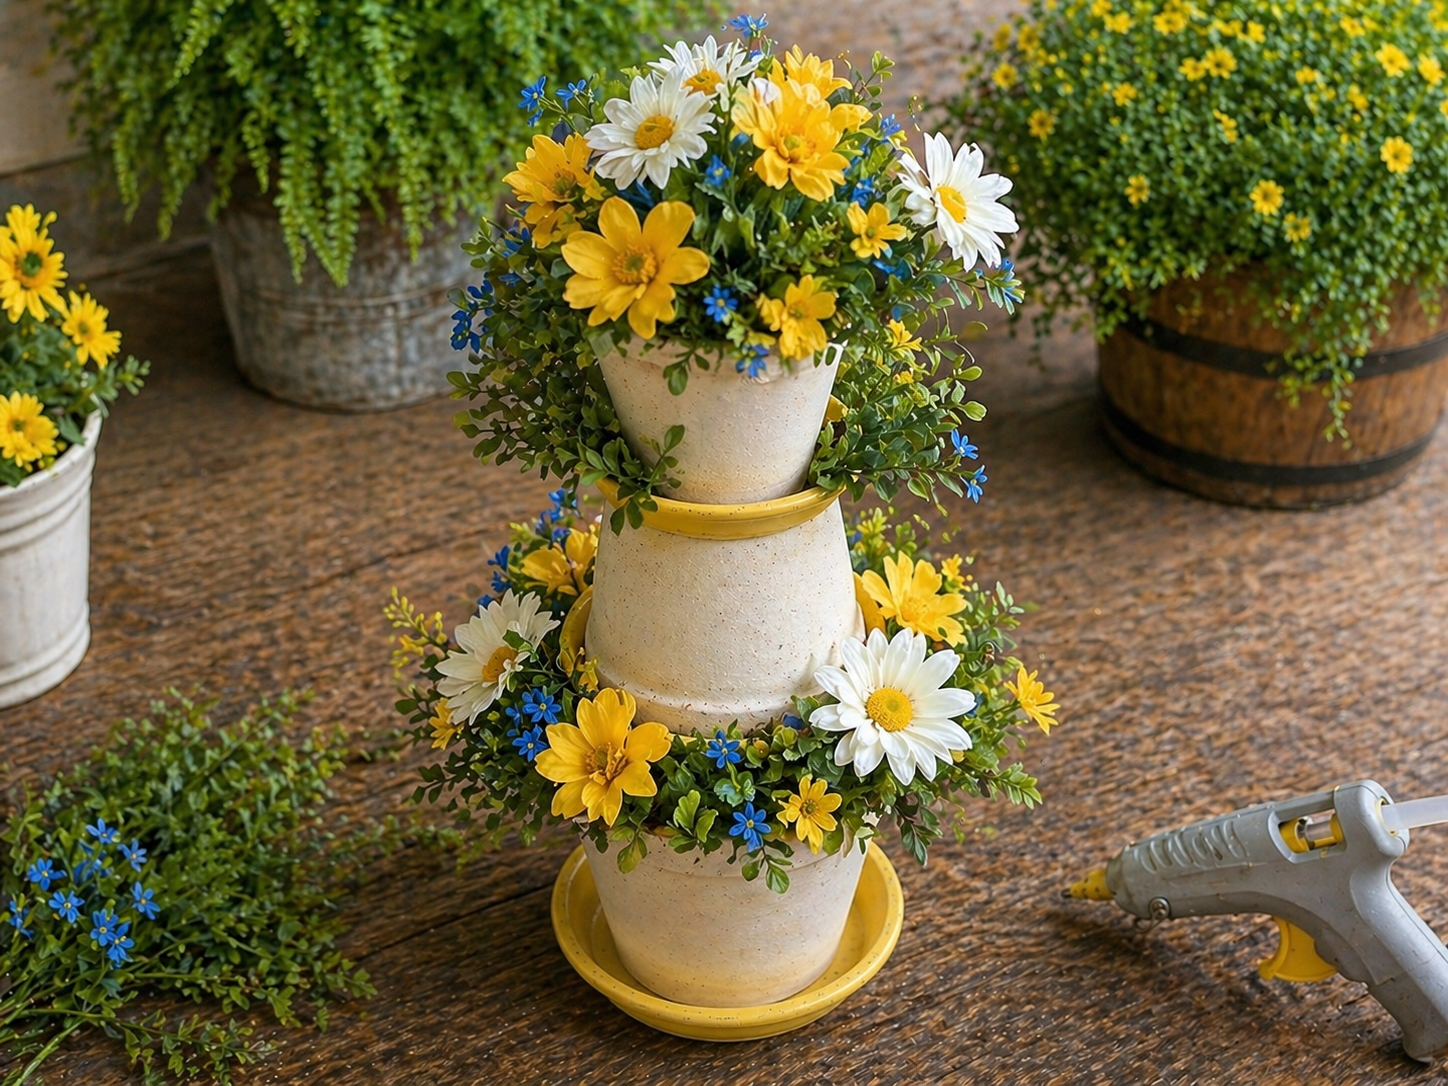
My kids saw some fancy tiered decor on Pinterest, and honestly, I loved the look but not the price tag! So, I figured, why not grab some goodies from Dollar Tree and make our own cute DIY Dollar Tree Tiered Floral Porch Arrangement for Spring? It turned out even better than I dreamed, and my front porch is now ready for sunny days!
See also: Dollar Tree Planters Craft Ideas
Theme: Spring & Garden
Materials Needed
- Terracotta Pots & Saucers (3 sets, graduated sizes for best topiary effect)
- Acrylic Craft Paint (Soft Yellow, Cream/White for distressing)
- Assorted Faux Flowers & Greenery (Yellow spring flowers, white daisies, small blue accent flowers)
- Floral Foam or Spanish Moss
- Hot Glue Gun & Glue Sticks
- Burlap Ribbon
📋 Love staying organized while crafting? Check out our printable planners & craft designs at CraftersDT on Etsy and use code CRAFT20 for 20% off your entire order!
Why This Craft Works
This sweet little tiered arrangement is just perfect for bringing a splash of Spring & Garden cheer to so many spots in your home. I love putting mine right by my front door on the porch, but it would also look adorable on a patio table, a sunny kitchen windowsill, or even as a centerpiece for your Easter brunch. It really brightens up any outdoor space!
📱 Free to Download
Join 50,000+ crafters already using Craftino
Browse 29+ Spring & Garden ideas and thousands more in the app
✓ Save crafts & browse fully offline
✓ Download printable PDF guides for every project
✓ Step-by-step photo tutorials, nothing left out
✓ 1,000+ craft projects with new ones added every week

The best part about this project is how friendly it is to your wallet. You can honestly make this whole DIY Dollar Tree Tiered Floral Porch Arrangement for under $5, depending on how many floral picks you grab. Everything I used came straight from Dollar Tree, which means you get that super cute look without breaking the bank.
This is such an easy craft, perfect for beginners or even if you just need a quick activity with the kids. It took me about 25-30 minutes from start to finish, including the drying time for a little paint. If you’re looking for a quick and budget-friendly way to add some Spring & Garden decor to your home, this is totally it!
Step-by-Step Instructions for DIY Dollar Tree Tiered Floral Porch Arrangement
Alright, crafters, are you ready to get started on your very own DIY Dollar Tree Tiered Floral Porch Arrangement? This project is so much fun, and you’ll be amazed at how quickly it comes together. I promise, even if you think you’re not crafty, you’ve totally got this. Let’s make your porch pop with some beautiful Spring & Garden vibes!
Step 1: Prepare & Paint Pots
Begin by cleaning your terracotta pots and saucers thoroughly to remove any dust or debris. Allow them to dry completely. If desired, apply a base coat of cream or white paint to the main body of the pots, allowing it to dry for texture or a distressed look. Once dry, use soft yellow acrylic paint to carefully paint the rim of each pot and the entire surface of each saucer. Apply thin, even coats, letting each coat dry before applying the next.
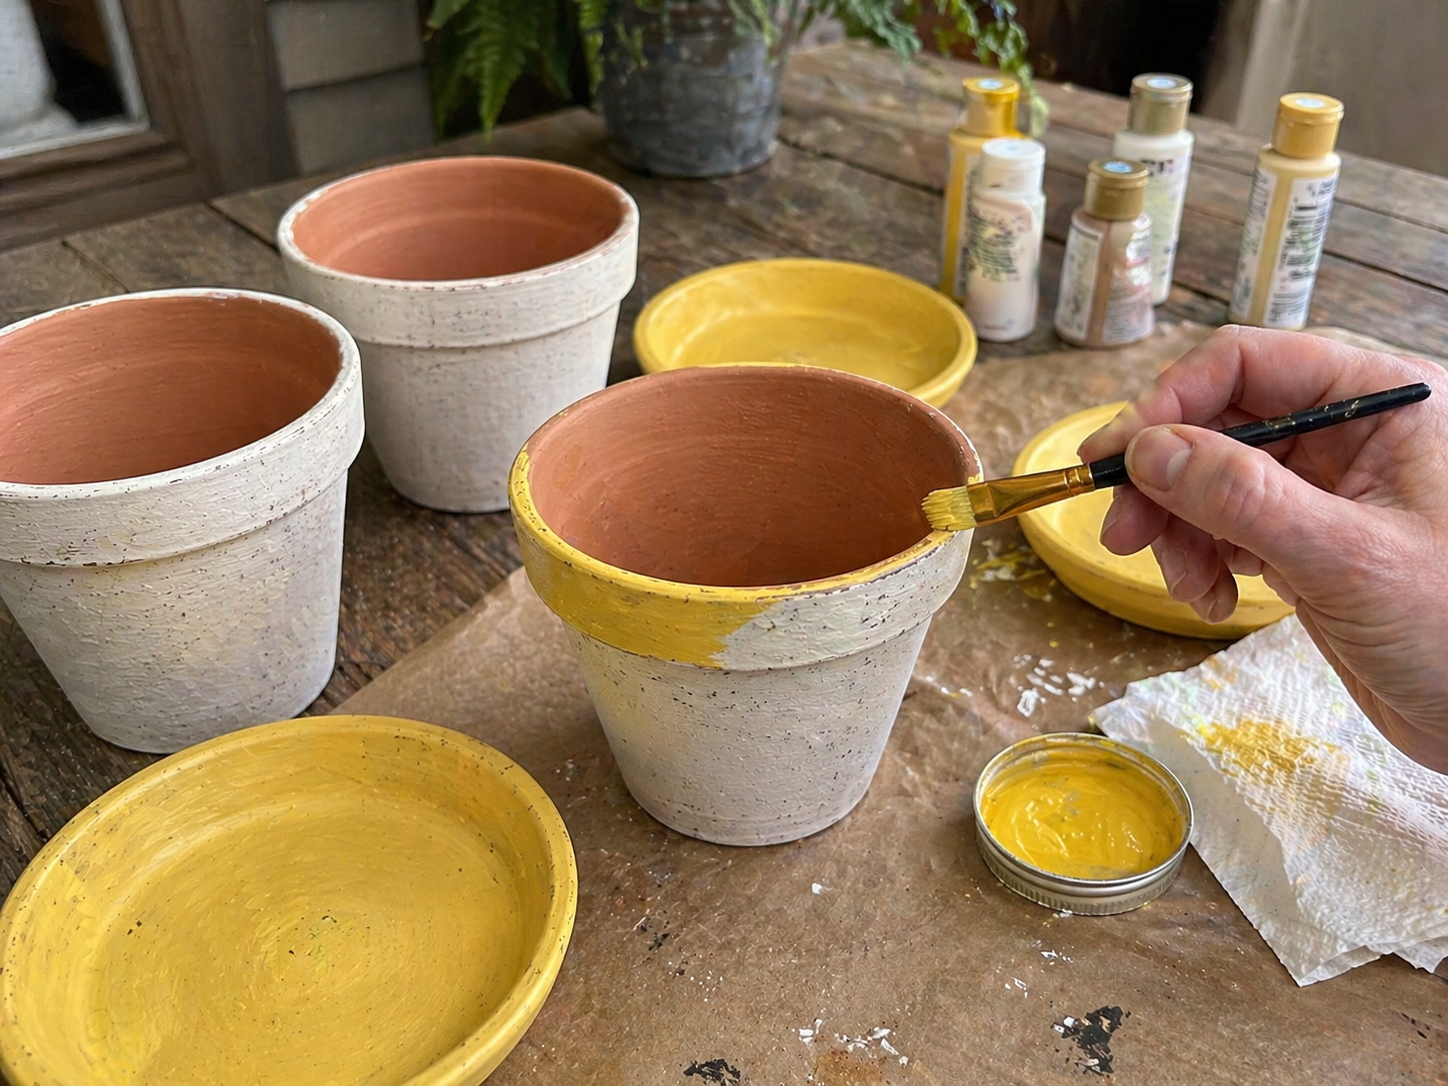
💡 Pro Tip: For an authentic ‘Dollar Tree’ look, consider using inexpensive craft paint and a dry brush technique with the cream/white paint to give the pot bodies a subtle, aged finish before painting the yellow rims. This adds character without requiring perfect coverage. Ensure full drying between coats to prevent smudging or peeling.
Step 2: Assemble Tiered Structure
Once all painted pots and saucers are completely dry, it’s time to assemble your tiered structure. Start by placing the largest pot (right side up) on its matching saucer. Next, apply a generous amount of hot glue to the rim of the largest pot and carefully center and glue the medium-sized saucer on top. Then, place the medium-sized pot upside down on this saucer, securing it with hot glue. Repeat this process for the top tier: glue the smallest saucer on top of the upside-down medium pot, and then glue the smallest pot (right side up) onto the smallest saucer. Ensure each level is stable and balanced before the glue sets.
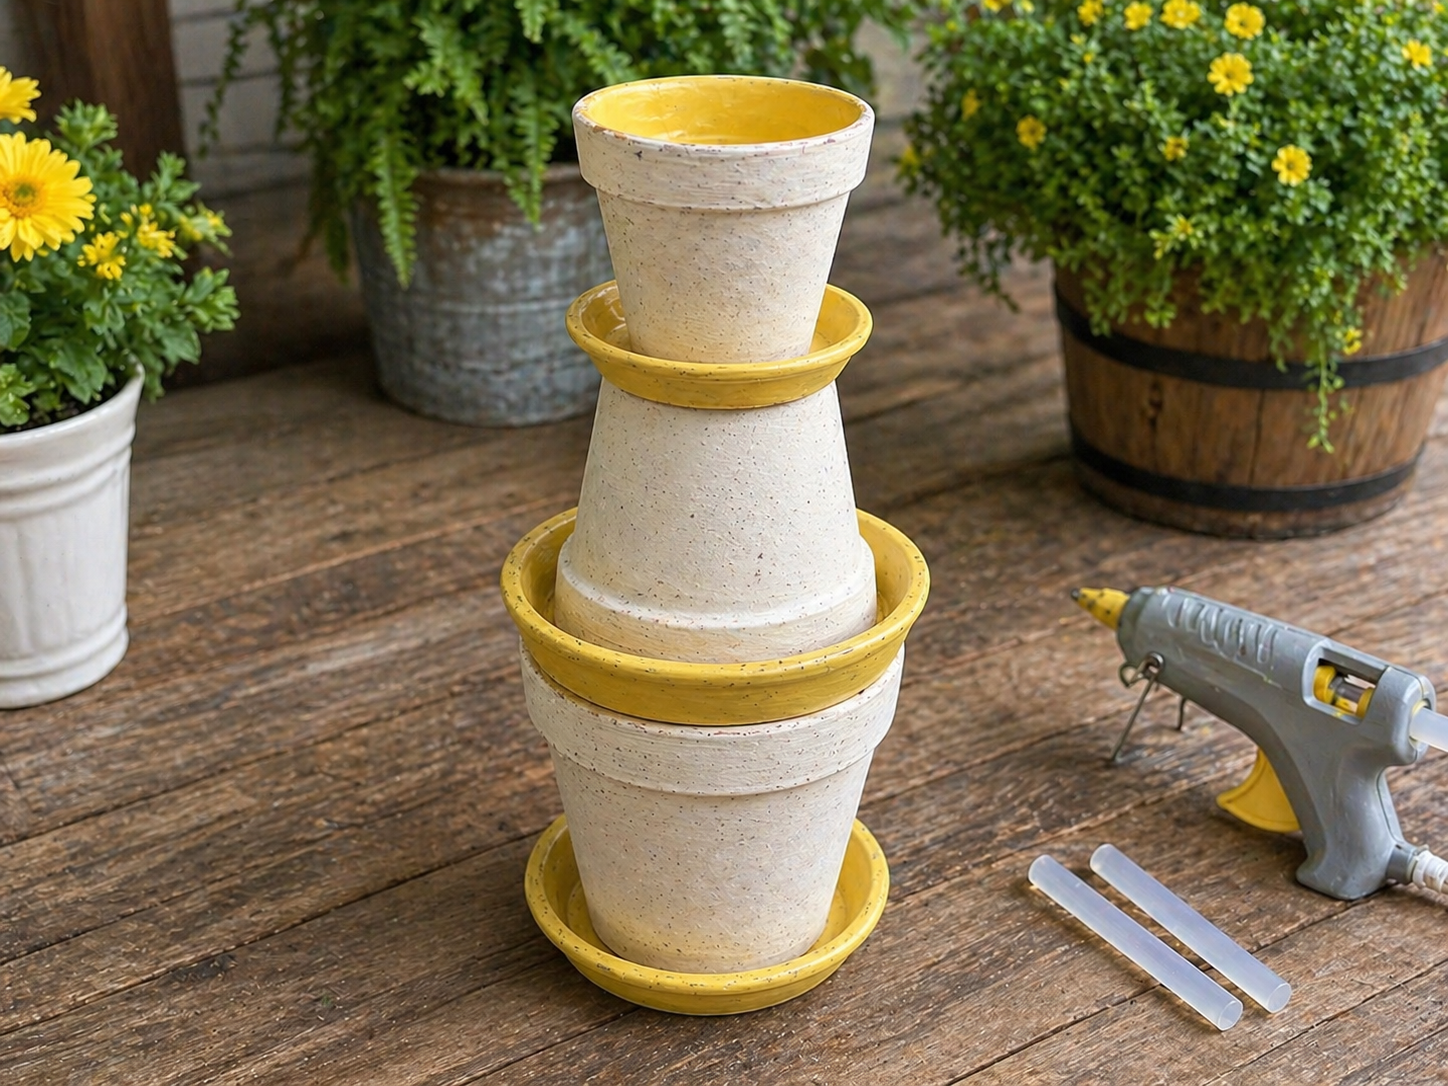
💡 Pro Tip: To ensure maximum stability, use a high-temperature hot glue gun and hold each section firmly in place for 30-60 seconds until the glue cools and hardens. For a slightly leaning topiary (as often seen), intentionally angle the upside-down pots slightly. Using graduated pot sizes (largest at the bottom, smallest at the top) creates a more visually appealing topiary shape.
🗓️ Keep all your craft projects on track! Explore our printable planners & templates at CraftersDT on Etsy and use code CRAFT20 for 20% off!
Step 3: Fill with Filler & Greenery
Now, prepare the ‘planting’ areas. For the top and bottom right-side-up pots, insert floral foam blocks, cutting them to fit snugly just below the rim. If using Spanish moss, loosely pack it into the pots to create a natural, earthy base. Begin to tuck and hot glue small sprigs of faux greenery around the edges of the moss or foam in each pot. Let some greenery spill over the rims naturally for a relaxed, garden-inspired look.
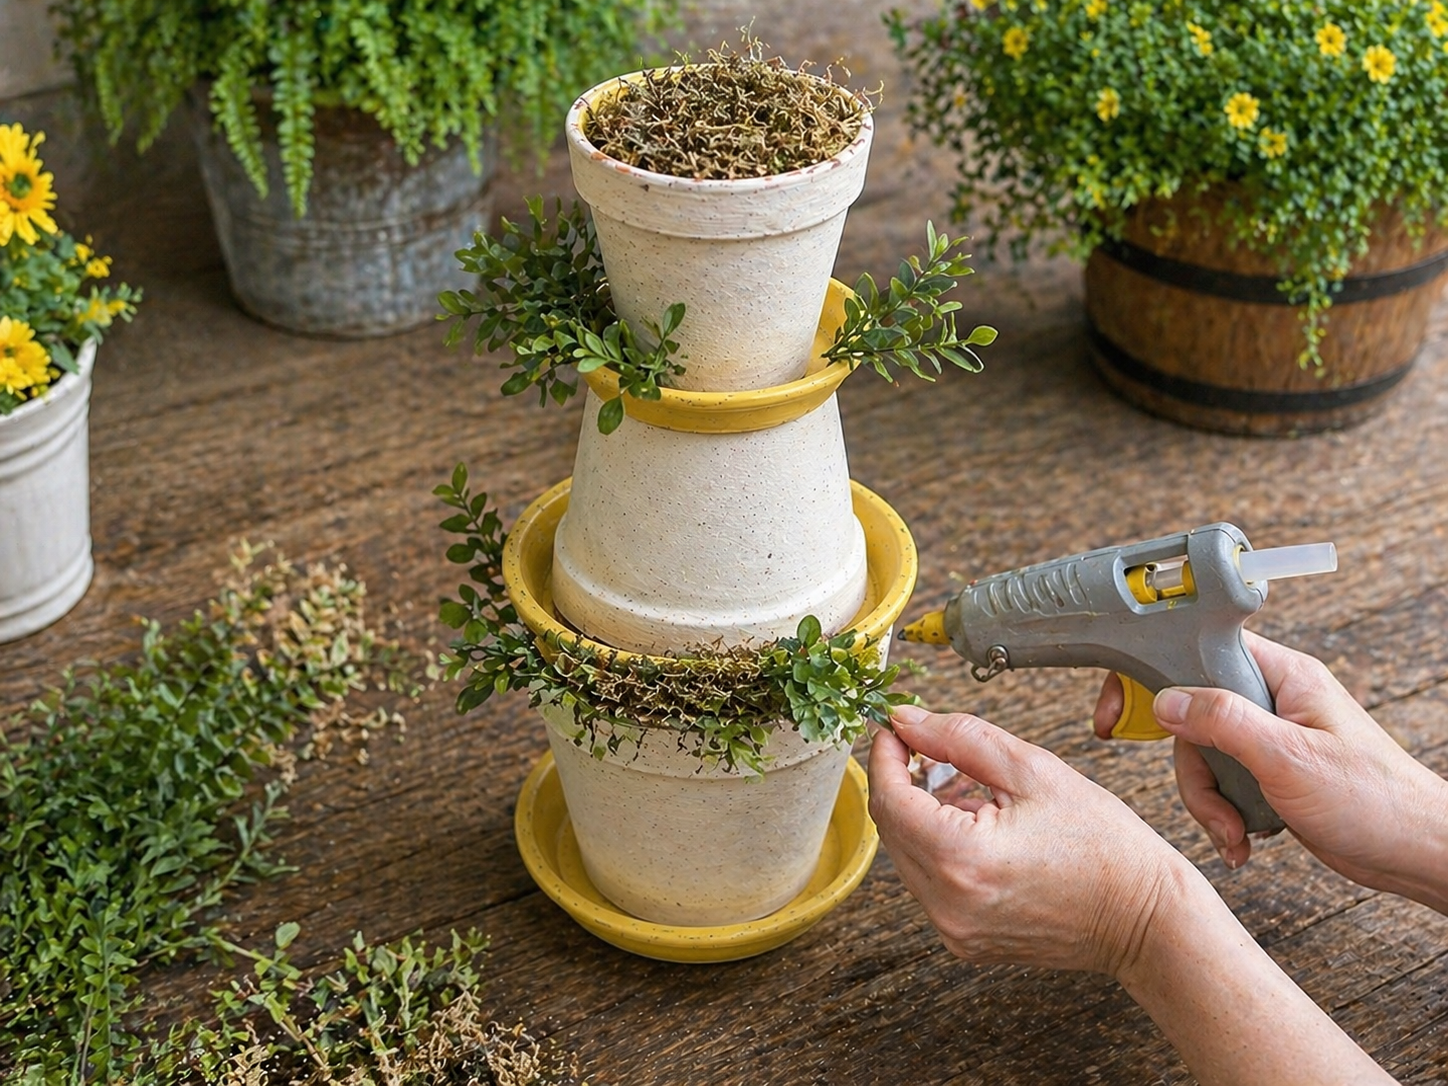
💡 Pro Tip: When using floral foam, ensure it’s wedged tightly to prevent your flowers from shifting. If using Spanish moss, apply a thin layer of hot glue to the inside rim of the pot before tucking in the moss to keep it from falling out. Vary the length and direction of your greenery stems to add dimension and a more organic, less structured appearance.
Step 4: Arrange Faux Flowers
With your greenery base established, start adding the main faux flowers. Insert and hot glue clusters of bright yellow spring flowers and white daisy flowers strategically into the moss/foam, layering them with the existing greenery. Aim for a full, yet informal garden look. Once the larger flowers are in place, add the tiny blue accent flowers, tucking them in between the larger blooms and greenery for pops of contrasting color and added texture. Don’t be afraid to let some flowers slightly overlap or extend outwards for a natural, slightly imperfect charm.
💡 Pro Tip: Before gluing, dry-fit your flower clusters to visualize the arrangement and ensure even distribution of colors and textures across all tiers. Cut flower stems to varying lengths to create depth and avoid a flat appearance. For budget-friendly flowers, gently bend the wire stems rather than cutting to reuse them in other projects if needed.
📱 Free to Download
Join 50,000+ crafters already using Craftino
Browse 60+ Spring & Garden ideas and thousands more in the app
✓ Save crafts & browse fully offline
✓ Download printable PDF guides for every project
✓ Step-by-step photo tutorials, nothing left out
✓ 1,000+ craft projects with new ones added every week
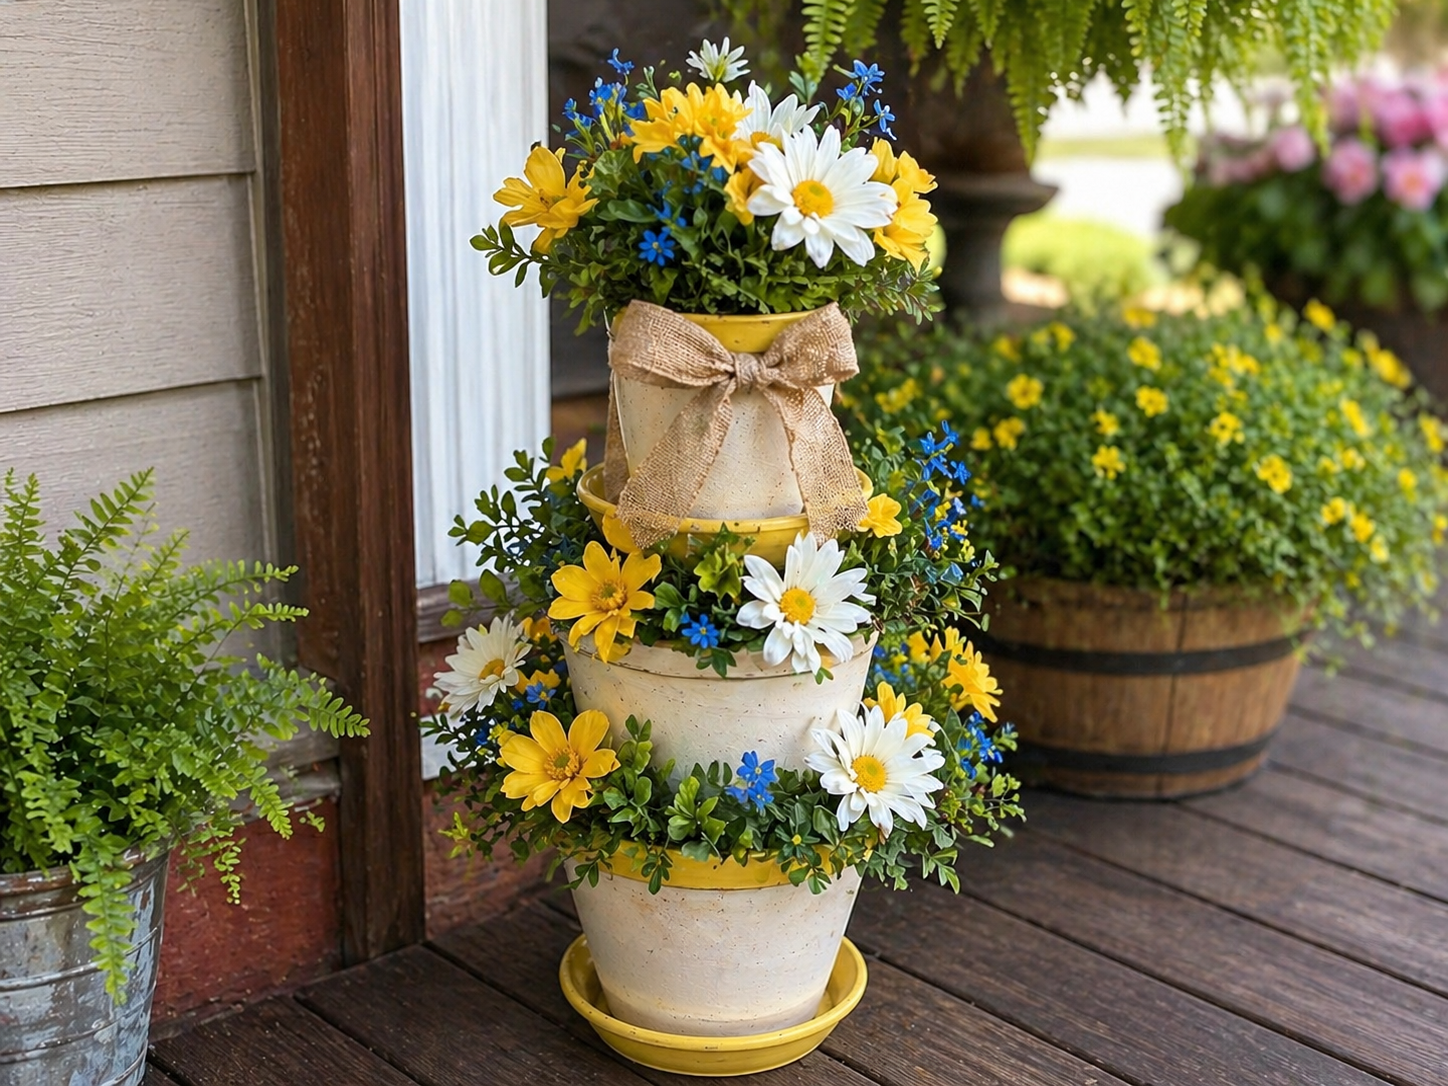
Step 5: Add Burlap Bow & Final Adjustments
To complete your rustic porch arrangement, take your burlap ribbon and tie a simple, charming bow. Position the bow around the upper section of the tiered structure, typically around the middle pot or the saucer just below the top pot, as shown in the inspiration image. Secure the bow in place with a dab of hot glue if needed to prevent it from slipping. Take a final look at your arrangement, fluffing any greenery or flowers and making any minor adjustments to ensure it looks balanced, full, and ready to display!
💡 Pro Tip: For a perfect bow, create two loops first, crossing one over the other, then tuck one loop through the center to form the knot. Adjust the loops until they are even and full. A small piece of floral wire can also be used to create the bow separately and then twist-tied around the pot, making it easier to adjust or remove if you want to change out the decor seasonally.
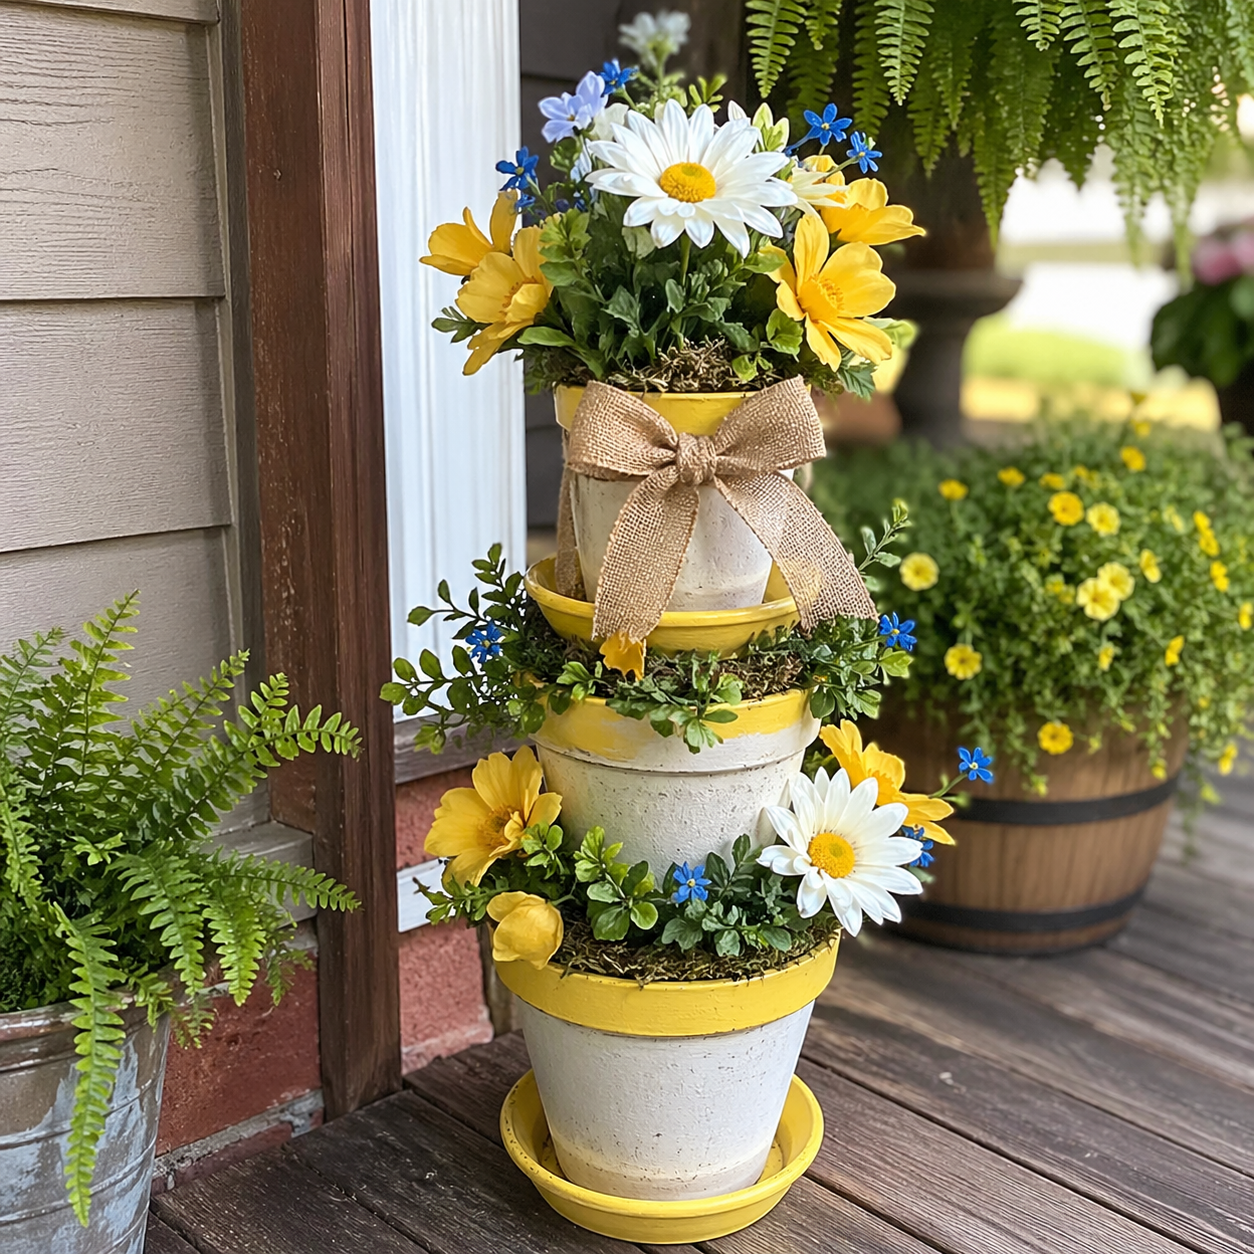
Your Happy Spring Porch Arrangement Awaits!
Look at that, you did it! Your DIY Dollar Tree Tiered Floral Porch Arrangement is ready to make your porch, patio, or even an indoor space feel super welcoming and bright. I just love how mine turned out, and I hope you do too! Don’t forget to share a picture of your beautiful creation with me, I’d love to see it!
📱 Free to Download
Join 50,000+ crafters already using Craftino
Browse 89+ Spring & Garden ideas and thousands more in the app
✓ Save crafts & browse fully offline
✓ Download printable PDF guides for every project
✓ Step-by-step photo tutorials, nothing left out
✓ 1,000+ craft projects with new ones added every week
Frequently Asked Questions
How much does a DIY Dollar Tree Tiered Floral Porch Arrangement cost?
It typically costs about $4 to $5 to make this DIY Dollar Tree Tiered Floral Porch Arrangement using supplies found at Dollar Tree. The exact price depends on how many floral picks you choose.
What type of glue works best for a Dollar Tree tiered arrangement?
For the best hold on a DIY Dollar Tree Tiered Floral Porch Arrangement, I recommend using E6000 glue or a strong hot glue. E6000 offers a more permanent bond for outdoor display.
How long does it take to make this Spring & Garden porch decor?
You can complete this DIY Dollar Tree Tiered Floral Porch Arrangement in about 25 to 30 minutes, not including any paint drying time. It’s a quick and satisfying craft!
Can kids help make this Dollar Tree floral arrangement?
Absolutely! This DIY Dollar Tree Tiered Floral Porch Arrangement is a great craft for kids, especially if you use hot glue on a low setting or craft glue for the assembly. Adult supervision is recommended for cutting floral stems.
How durable is a DIY Dollar Tree Tiered Floral Porch Arrangement for outdoor use?
With E6000 glue and a clear sealant spray, your DIY Dollar Tree Tiered Floral Porch Arrangement can last all season on a covered porch. Direct sun and heavy rain will make Dollar Tree items fade faster.
What Dollar Tree items do I need for a DIY tiered floral display?
You’ll need two different sized planter pots (like 4-inch and 6-inch), a small plate or coaster for the middle tier, floral foam, and about 5-7 small floral picks from Dollar Tree for this Spring & Garden display.
Check out the official Dollar Tree store for more holiday crafts & supplies here.
Leave a Reply