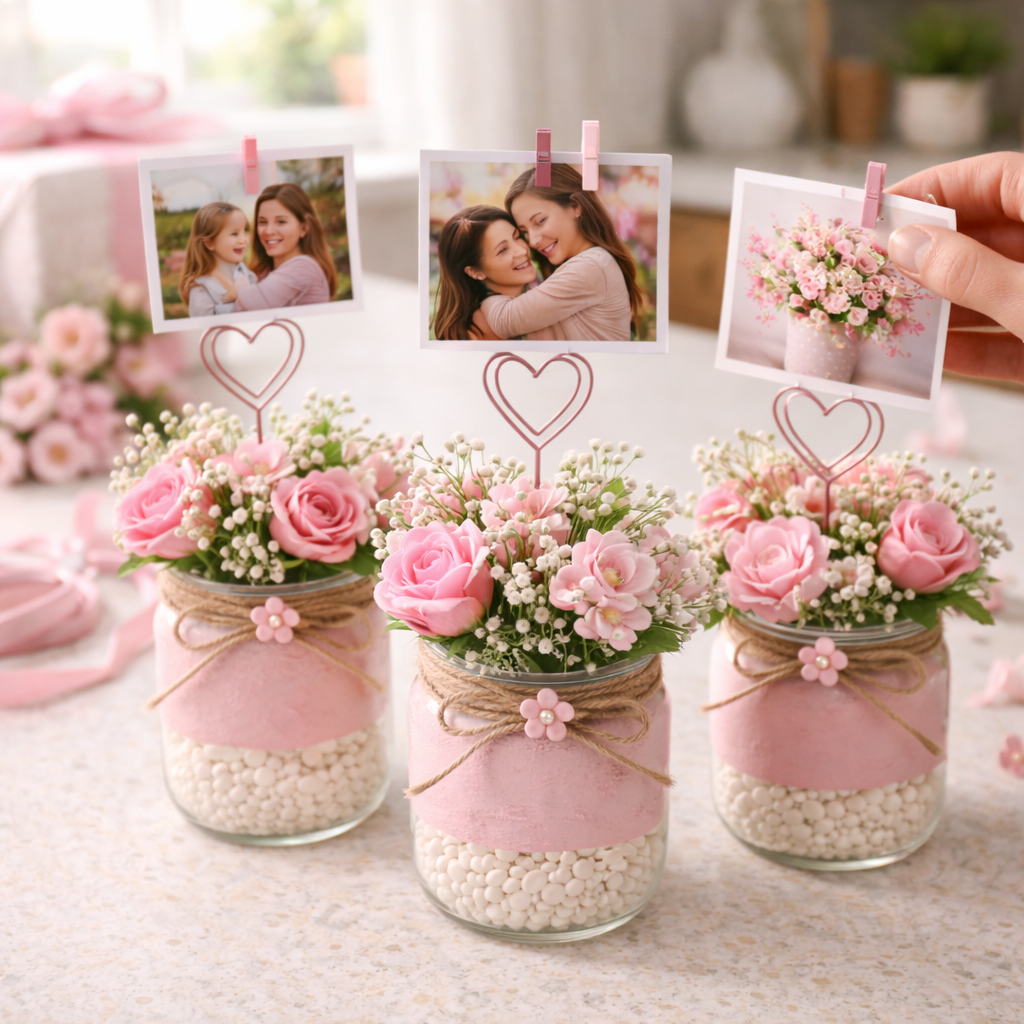
Mother’s Day always seems to sneak up on me, and I’m always looking for a thoughtful, personal gift that won’t break the bank. This year, I was strolling through Dollar Tree and got the best idea for these adorable DIY Mother’s Day Floral Photo Jars! They were so much fun to make and came out super cute, I just had to share.
See also: Charming Farmhouse Blush Floral Jar For Mothers Day
Theme: Mother’s Day
Materials Needed
- Small Clear Glass Jars (3)
- Pastel Pink Acrylic Paint
- White Decorative Filler (stones/beads)
- Assorted Faux Pink Flowers & Greenery
- Jute Twine
- Small Pink Flower Embellishments
- Heart-shaped Wire Photo Holders (3)
- Photos or Decorative Cards
- Craft Adhesive (e.g., hot glue gun and sticks)
- Craft Scissors
📋 Love staying organized while crafting? Check out our printable planners & craft designs at CraftersDT on Etsy and use code CRAFT20 for 20% off your entire order!
Why This Craft Works
These sweet little jars are just perfect for so many things. Imagine them on Mom’s nightstand, brightening up her desk at work, or even sitting pretty on a shelf in the living room. They make such a thoughtful Mother’s Day gift because they’re personal and show you put some love into it. It’s a keepsake she can enjoy all year long.
📱 Free to Download
Join 50,000+ crafters already using Craftino
Browse 25+ Mother’s Day ideas and thousands more in the app
✓ Save crafts & browse fully offline
✓ Download printable PDF guides for every project
✓ Step-by-step photo tutorials, nothing left out
✓ 1,000+ craft projects with new ones added every week

The best part about this craft is how budget-friendly it is. You can honestly make these DIY Mother’s Day Floral Photo Jars for under $5 each, especially if you snag most of your supplies at Dollar Tree. Jars, faux flowers, and even the little floral foam blocks are just a dollar a piece. If you already have some photos printed, you might only spend $2 or $3 for a truly unique present.
You’ll love how easy these are to put together, making them perfect for crafters of all skill levels. I’d say this is a super easy project, and you can whip one up in about 20-30 minutes, even less once you get the hang of it. It’s a fantastic craft for beginners, and your kids can totally help out with picking flowers or placing photos, making it a fun little family activity for Mother’s Day.
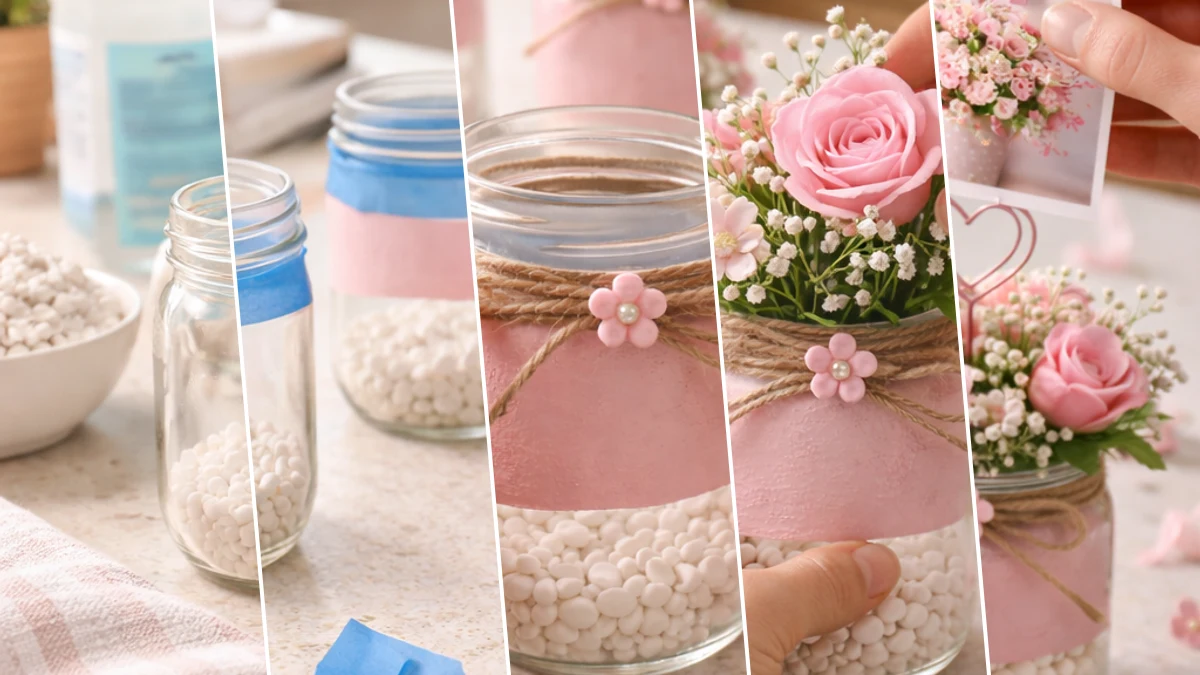
Step-by-Step Instructions for DIY Mother’s Day Floral Photo Jars
Alright, crafters, are you ready to get started? This project is seriously so quick and easy, you’ll be wondering why you didn’t try it sooner! I had a blast putting together my DIY Mother’s Day Floral Photo Jars, and it only took me about half an hour to make a couple. It’s perfect for beginners, or if you need a last-minute Mother’s Day gift that still feels super special. Let’s make something beautiful!
Step 1: Prepare Jars & Add Filler
Begin by thoroughly cleaning all three glass jars with soap and water, then dry them completely to ensure no residue remains. Once dry, carefully pour the white decorative filler (stones or beads) into the bottom of each jar, filling approximately one-quarter to one-third of the jar’s height.

💡 Pro Tip: Pro Tip: Use isopropyl alcohol to wipe down the glass after washing and drying. This ensures a spotless, grease-free surface, which is crucial for paint adhesion in the next step. Ensure the filler is level for a clean base.
Step 2: Paint Pastel Pink Band
Using painter’s tape, mask off the top and bottom portions of each jar, leaving a clear band in the middle where you will apply the paint. Apply the pastel pink acrylic paint evenly over the exposed middle section. For best results, apply multiple thin coats, allowing each coat to dry for at least 15-20 minutes before applying the next, until you achieve opaque coverage. Once satisfied, carefully remove the painter’s tape before the final coat is completely dry to prevent paint from peeling.
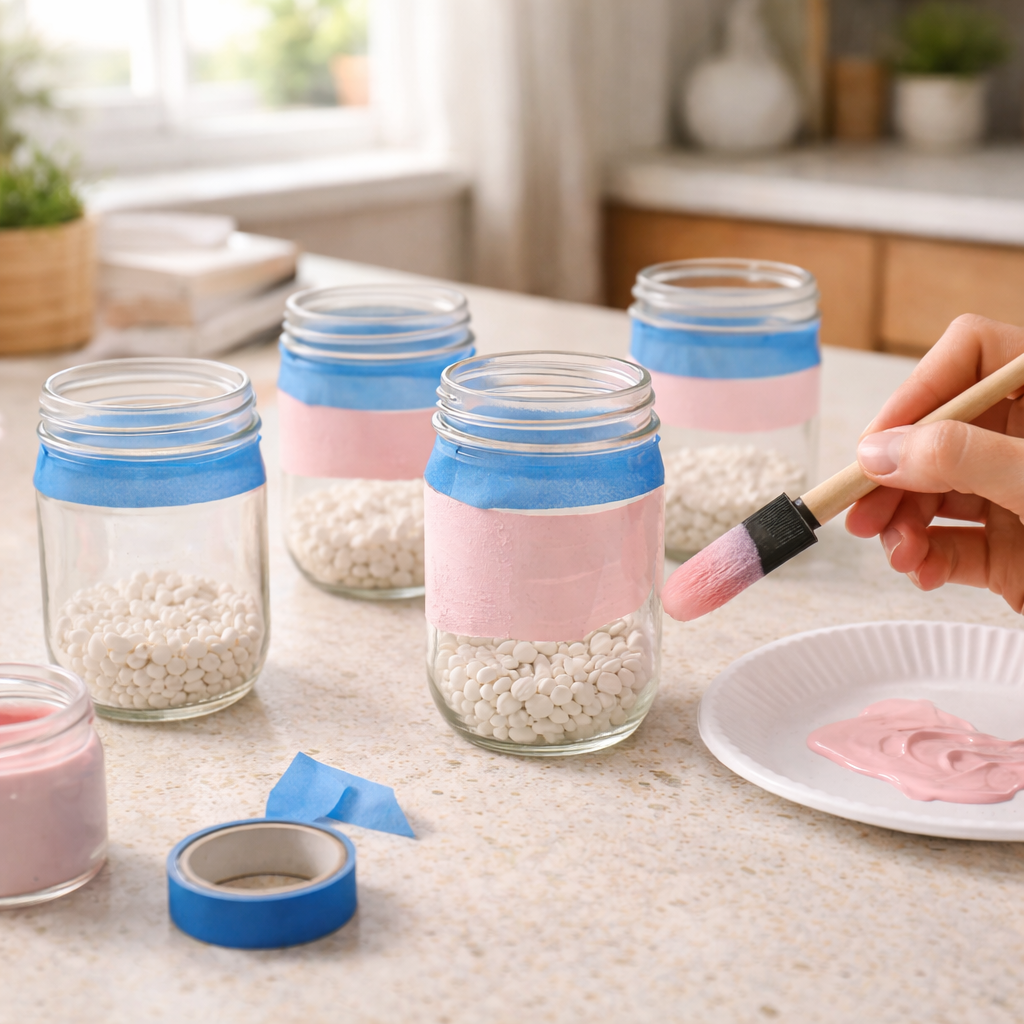
💡 Pro Tip: Pro Tip: To achieve a smooth finish and prevent brush marks, use a soft-bristle brush or a sponge brush. For textured looks, dabbing with a sponge can create a charming, slightly distressed effect. Removing the tape while the paint is still slightly tacky helps create crisp lines.
🗓️ Keep all your craft projects on track! Explore our printable planners & templates at CraftersDT on Etsy and use code CRAFT20 for 20% off!
Step 3: Adorn with Twine Bows
Once the pink paint is fully cured, cut lengths of jute twine (approximately 15-18 inches per jar, adjusting as needed). Wrap the twine around the neck of each jar, just above the painted section, and tie it into a rustic bow. Then, using a small dot of craft adhesive (e.g., hot glue), attach a small pink flower embellishment to the center of each jute bow.
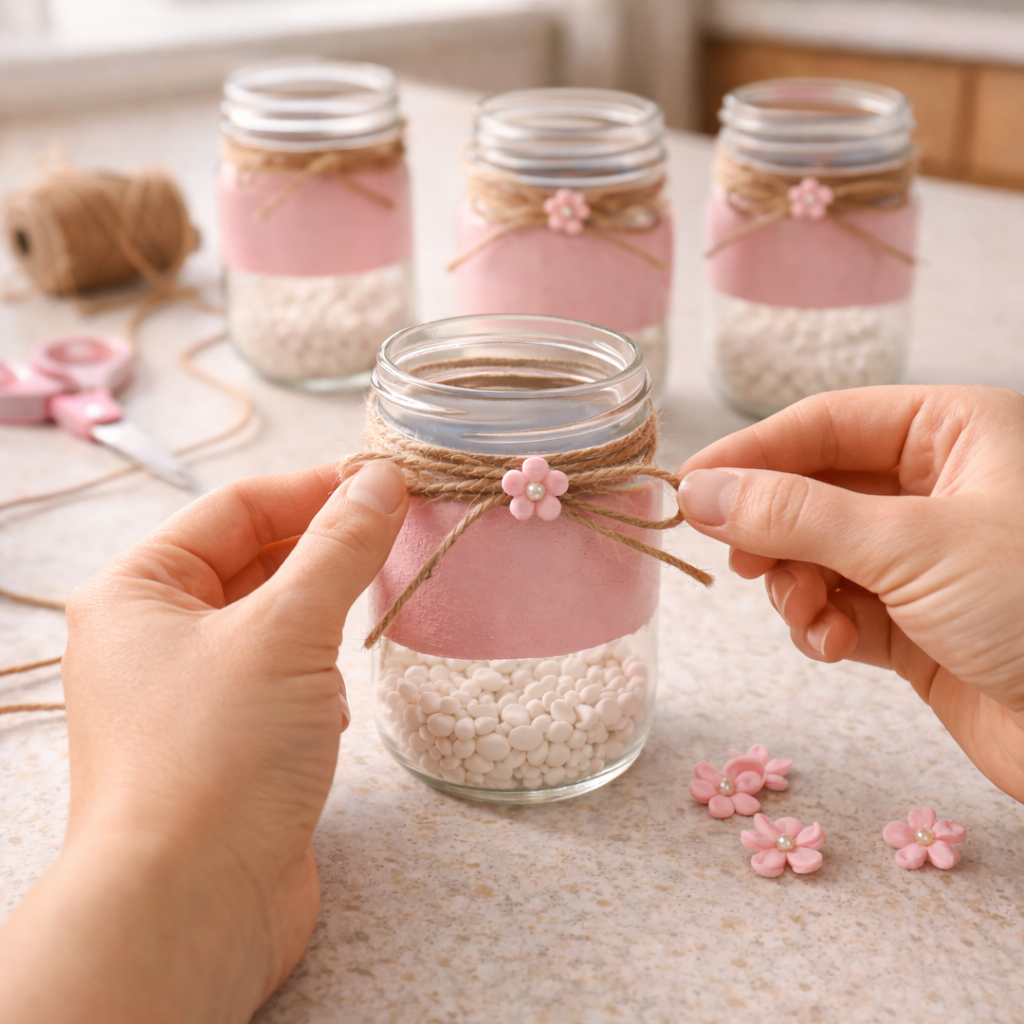
💡 Pro Tip: Pro Tip: Before cutting, wrap the twine around one jar to determine the ideal length for a neat bow. When using hot glue, apply a tiny amount to the back of the embellishment, press firmly, and hold for a few seconds. Too much glue can seep through and look messy.
Step 4: Arrange Floral Toppers
Prepare your faux floral components by trimming stems to appropriate lengths so they sit compactly within the top opening of each jar. Arrange the pink roses, light pink flowers, baby’s breath, and greenery to form a dense, visually appealing bouquet at the top of each jar. Vary the heights and textures for a natural, lush look.
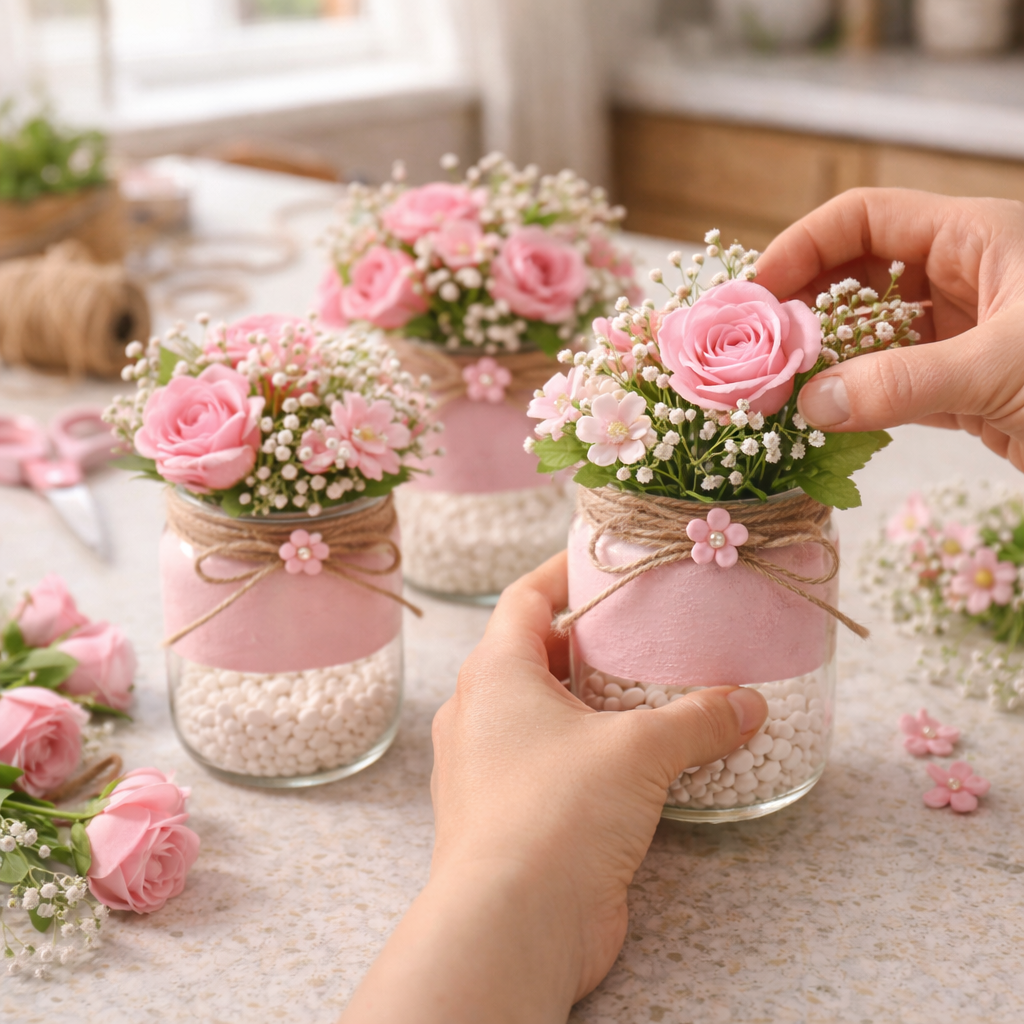
💡 Pro Tip: Pro Tip: To help the faux flowers stand upright and stay compact, you can place a small piece of floral foam or crumpled tissue paper inside the jar before arranging the flowers. Start with the larger roses, then fill in gaps with smaller flowers and baby’s breath, finishing with greenery for depth.
📱 Free to Download
Join 50,000+ crafters already using Craftino
Browse 71+ Mother’s Day ideas and thousands more in the app
✓ Save crafts & browse fully offline
✓ Download printable PDF guides for every project
✓ Step-by-step photo tutorials, nothing left out
✓ 1,000+ craft projects with new ones added every week
Step 5: Add Photo Holders & Photos
Gently insert the heart-shaped wire photo holders into the center of each floral arrangement, pushing them down securely enough so they stand upright and are stable. Once the holders are in place, clip your chosen photos or decorative cards into the top clip of each holder.
💡 Pro Tip: Pro Tip: Ensure the wire holder is firmly nestled within the floral arrangement for stability; if it feels wobbly, adjust the flowers around its base. When selecting photos, consider printing them on slightly thicker cardstock for better rigidity when clipped.
Your Sweet Mother’s Day Floral Jars!
Look at you, all done with your beautiful DIY Mother’s Day Floral Photo Jars! Aren’t they just the cutest? Pop them on a mantel, a bookshelf, or gift them to all the amazing moms in your life. Don’t forget to share your creations with me, I love seeing all your different flower choices and photo memories!
📱 Free to Download
Join 50,000+ crafters already using Craftino
Browse 92+ Mother’s Day ideas and thousands more in the app
✓ Save crafts & browse fully offline
✓ Download printable PDF guides for every project
✓ Step-by-step photo tutorials, nothing left out
✓ 1,000+ craft projects with new ones added every week
Frequently Asked Questions
How much does it cost to make DIY Mother’s Day Floral Photo Jars?
You can make one of these lovely jars for under $5, especially if you get most supplies like the jar and faux flowers from Dollar Tree. Some crafters can even do it for just $2-3!
What type of jars work best for these Dollar Tree Mother’s Day photo crafts?
Standard mason jars (16 oz or 12 oz) work great. You can also find pretty glass jars, often 10-12 oz, at Dollar Tree that are perfect for this project.
Can kids help make these DIY Mother’s Day Floral Photo Jars?
Absolutely! This is a fantastic craft for kids aged 5 and up. They can help choose flowers, pick photos, and arrange the items inside with a little adult supervision for cutting.
How long does it take to create one DIY Mother’s Day Floral Photo Jar?
You can typically finish one beautiful floral photo jar in about 20 to 30 minutes from start to finish. It’s a quick and rewarding project.
What’s the best photo size for these Mother’s Day jars?
Photos sized 3×5 inches or 4×6 inches work really well for most standard mason jars. You might need to trim them slightly to fit perfectly.
How can I customize my DIY Mother’s Day Floral Photo Jars?
You can customize them by adding a pretty ribbon around the jar’s neck, painting the lid, or using different colored flowers and greenery to match Mom’s favorite colors.
Discover the newest Dollar Tree arrivals for your next craft project here.
Leave a Reply