You know how it goes, you pop into Dollar Tree for one thing and leave with a whole cart full of craft supplies you didn’t even know you needed? Yeah, me too! That’s exactly how this super cute Rustic Patriotic Star Wreath: A Dollar Tree DIY came to life. My youngest saw some fancy store-bought wreaths and asked if we could make something similar for way less money, and challenge accepted!
See also: Sparkling Patriotic Deco Mesh Wreath
Theme: Patriotic / 4th of July
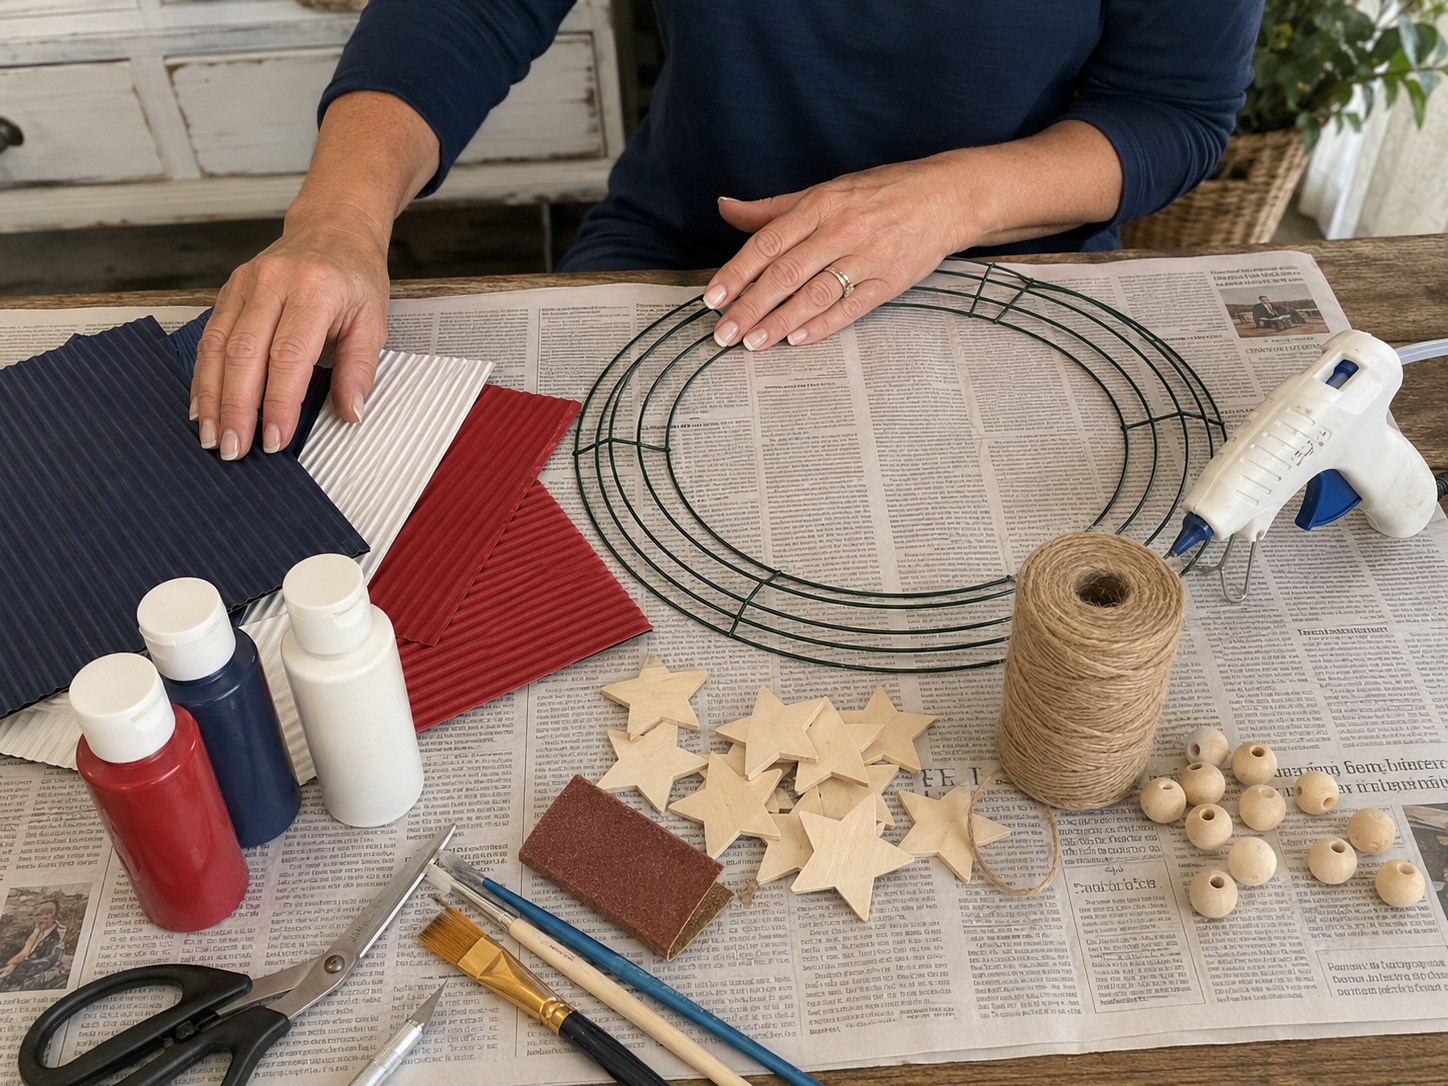
Materials Needed
- Round Wire Wreath Form (or Foam Ring)
- Corrugated Cardboard Sheets (or sturdy Poster Board)
- Acrylic Paint (Navy, Red, White)
- Small Unfinished Wooden Star Cutouts
- Jute Twine
- Wooden Craft Beads
- Hot Glue Gun & Glue Sticks
- Scissors & Craft Knife
- Paintbrushes
- Optional: Sandpaper (fine grit)
📋 Love staying organized while crafting? Check out our printable planners & craft designs at CraftersDT on Etsy and use code CRAFT20 for 20% off your entire order!
Why This Craft Works
This Rustic Patriotic Star Wreath is just perfect for adding a cozy, festive touch to your home for the summer months and especially for the big 4th of July celebrations. Imagine it hanging proudly on your front door, welcoming guests to your backyard BBQ, or even propped up on your mantel in the living room. It gives off those sweet, farmhouse vibes while screaming ‘USA! USA!’ in the prettiest way.
📱 Free to Download
Join 50,000+ crafters already using Craftino
Browse 41+ Patriotic / 4th of July ideas and thousands more in the app
✓ Save crafts & browse fully offline
✓ Download printable PDF guides for every project
✓ Step-by-step photo tutorials, nothing left out
✓ 1,000+ craft projects with new ones added every week

And let’s talk budget, because that’s my favorite part! You can whip up this entire Rustic Patriotic Star Wreath for literally just a few dollars. Seriously, all the main supplies came straight from Dollar Tree, so you’re looking at a total cost of around $3 to $4, maybe $5 tops if you need to grab some glue too. It’s such a steal for Home Decor that looks way more expensive than it is.
Now, for the best part: this project is super easy, even if you’re a beginner crafter! You’ll be done in about 20 to 30 minutes, so it’s perfect for a quick afternoon project or even something to do with older kids. No fancy tools or skills required, just a bit of gluing and arranging. It’s a fantastic way to get some cute Patriotic / 4th of July decor without breaking a sweat or your wallet.
Step-by-Step Instructions for Rustic Patriotic Star Wreath: A Dollar Tree DIY
Alright, crafters, are you ready to get your hands a little gluey? This Rustic Patriotic Star Wreath: A Dollar Tree DIY is honestly one of the quickest and most satisfying Patriotic / 4th of July projects I’ve made lately. You’re going to love how fast it comes together and how adorable it looks when you’re done. So grab your supplies, put on some tunes, and let’s make some magic!
Step 1: Gather & Prepare Materials
Begin by gathering all your supplies. Lay down a protective covering like newspaper or a craft mat on your workspace to prevent paint spills or glue drips. Ensure your hot glue gun is plugged in and heating up, and have your craft knife and scissors readily available.
💡 Pro Tip: Set up in a well-ventilated area, especially when working with paints or if you plan on using any spray sealants later. Having everything organized before you start will make the crafting process much smoother.
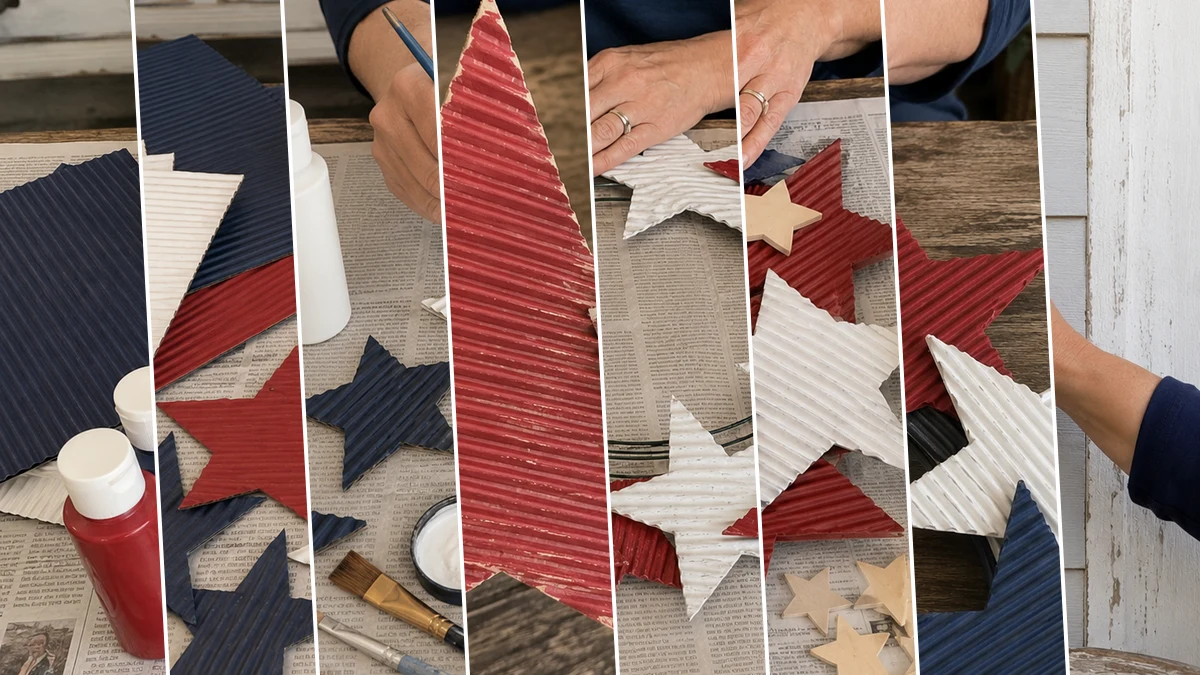
Step 2: Cut Cardboard Stars
Using a pencil, trace various sizes of star shapes onto your corrugated cardboard or sturdy poster board. Aim for a mix of large (e.g., 6-8 inches) and medium (e.g., 4-5 inches) stars. Carefully cut them out using sharp scissors for thinner board or a craft knife with a cutting mat for corrugated cardboard. The corrugated texture adds to the rustic feel.
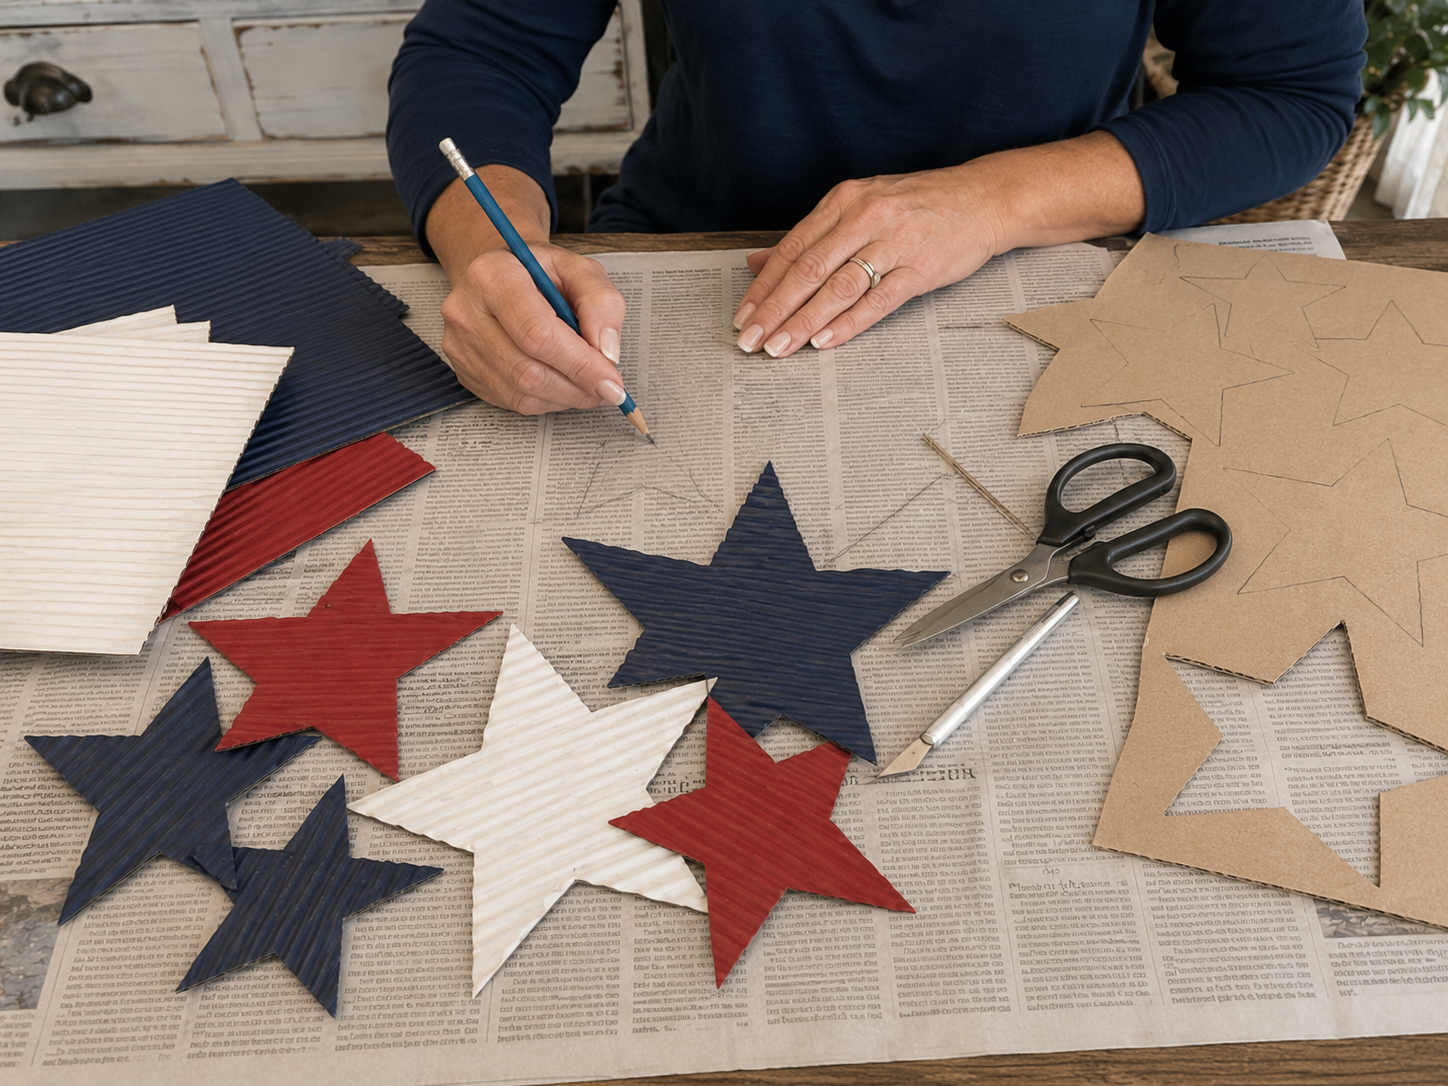
💡 Pro Tip: To achieve a nice variety without needing templates, search for ‘star stencil printable’ online and print out a few different sizes. When cutting corrugated cardboard, apply firm, even pressure with your craft knife, making multiple passes if necessary, to get clean edges. Rotate the cardboard, not the knife, for curves.
🗓️ Keep all your craft projects on track! Explore our printable planners & templates at CraftersDT on Etsy and use code CRAFT20 for 20% off!
Step 3: Paint Patriotic Colors
Choose your patriotic palette: deep navy, rustic red, and warm white acrylic paints. Paint the cardboard stars, ensuring even coverage. Don’t worry about perfect lines; the rustic style embraces slight imperfections. Paint the front and sides of each star. Allow them to dry completely between coats, which may take 20-30 minutes for acrylics.
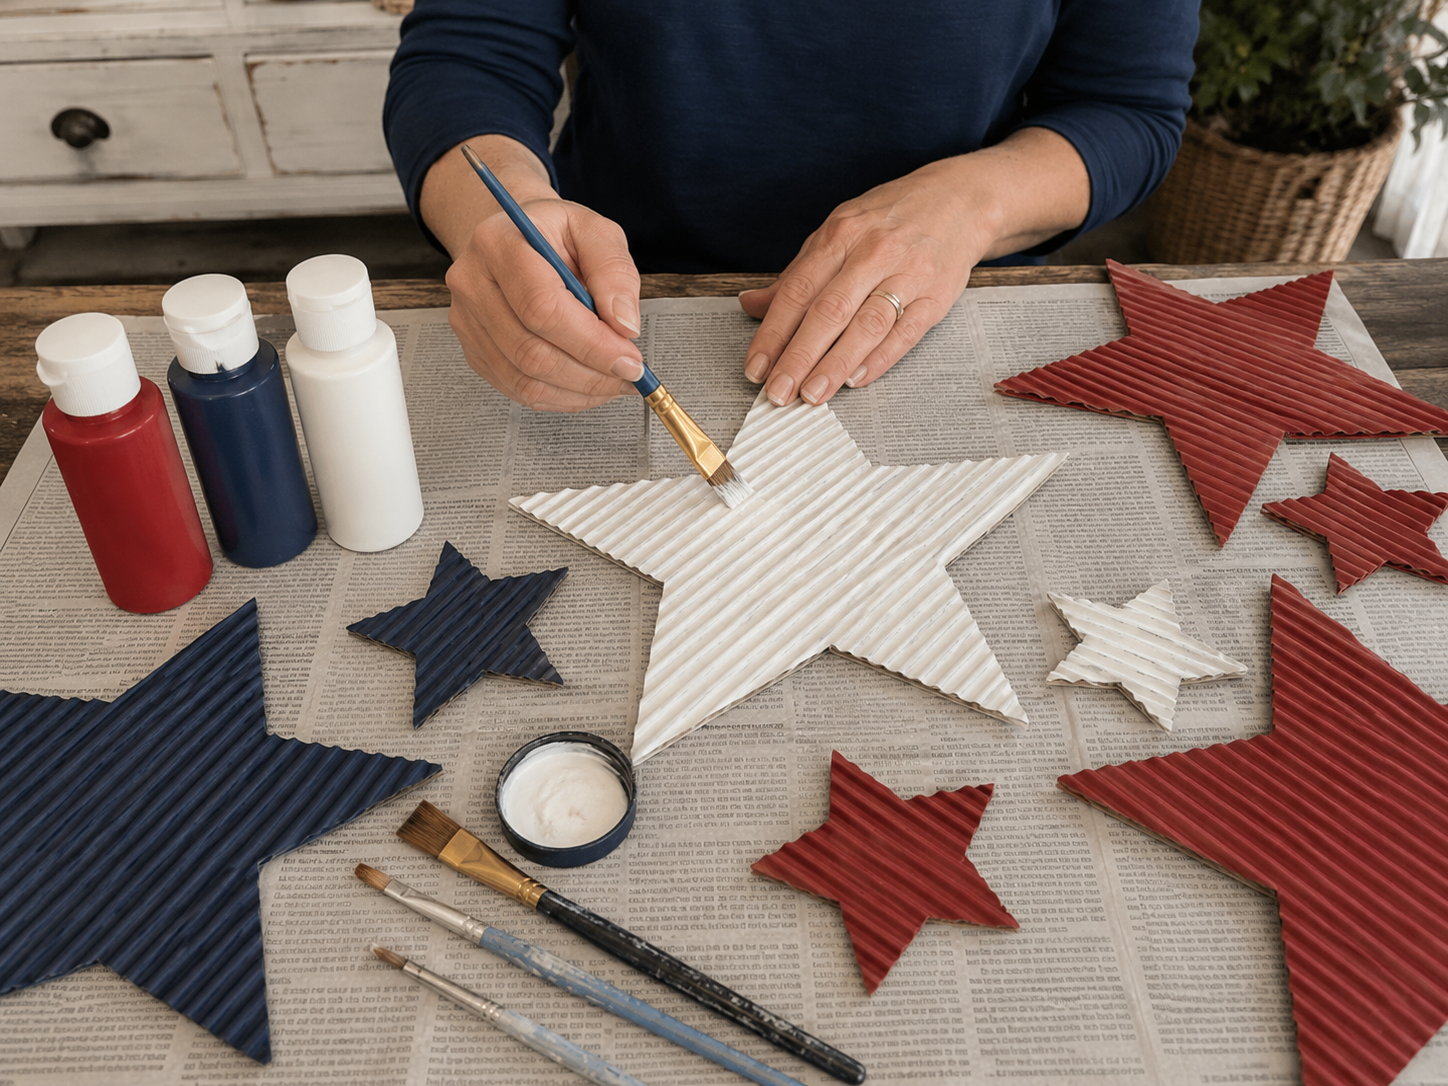
💡 Pro Tip: Apply paint in thin, even coats to prevent warping the cardboard and to achieve better adhesion. If you’re using corrugated cardboard, make sure the paint gets into the grooves for full coverage. For a truly rustic look, you can leave some very minor patches of unpainted cardboard peeking through.
Step 4: Distress for Farmhouse Look
Once the paint is thoroughly dry, take a piece of fine-grit sandpaper (around 120-220 grit) and lightly sand the edges and raised corrugated lines of each star. This process gently removes small amounts of paint, exposing the cardboard underneath and giving the stars an aged, weathered, farmhouse-style appearance.
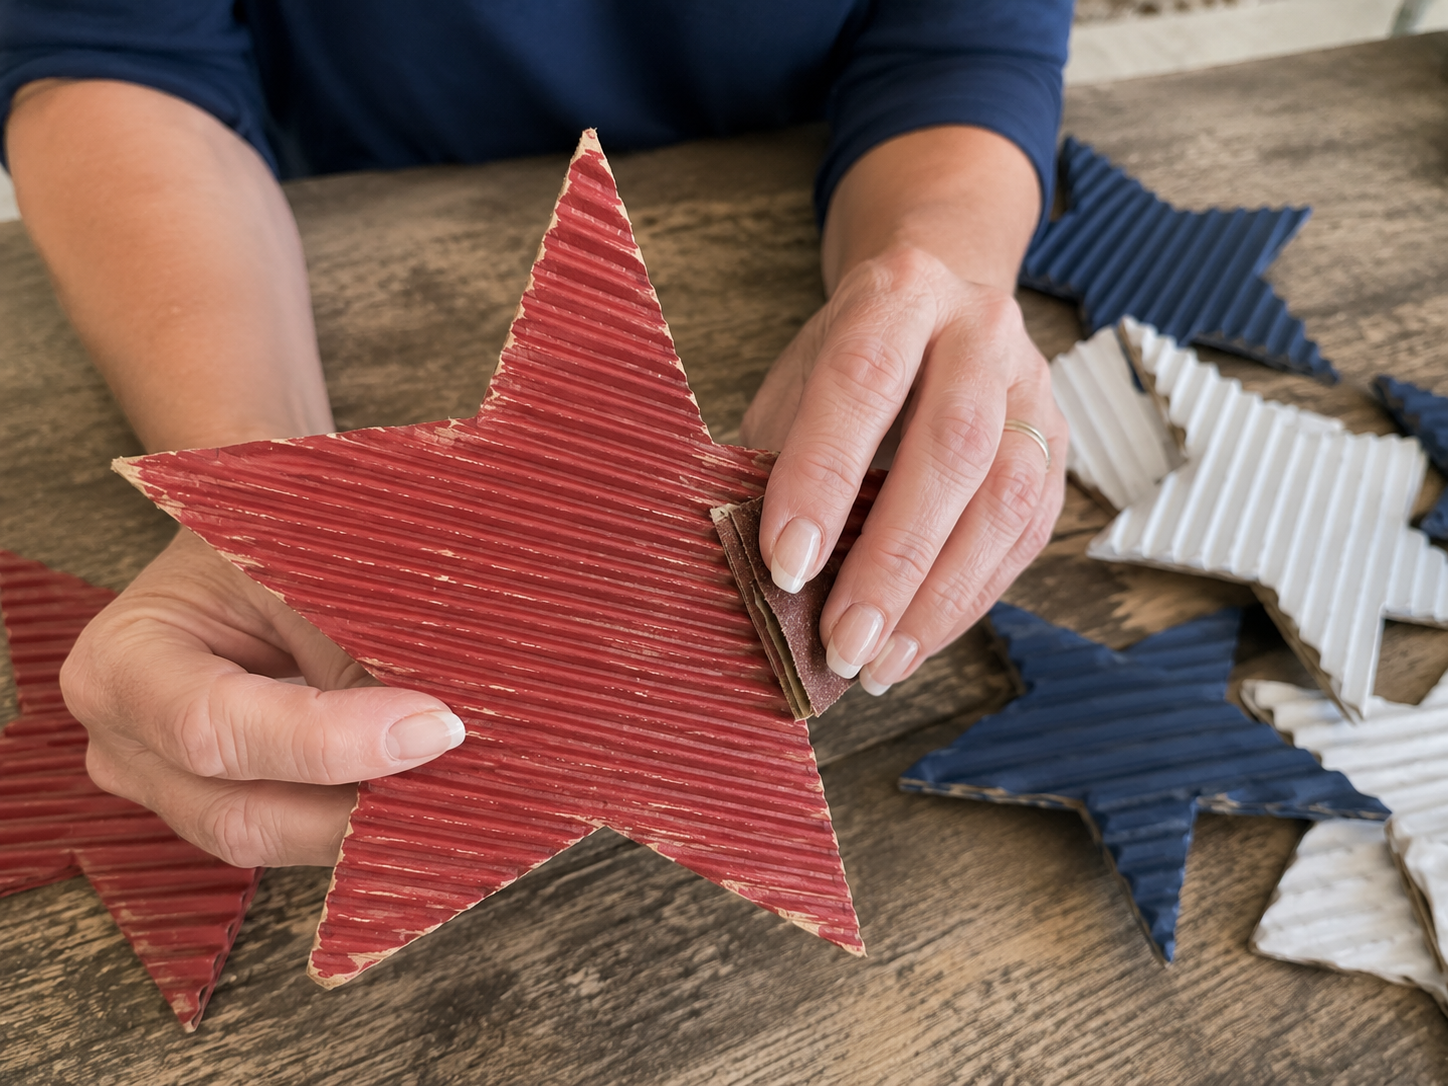
💡 Pro Tip: Start with a very light touch; you can always sand more, but you can’t add paint back easily without repainting. Focus on the corners and edges where natural wear would occur. For corrugated cardboard, lightly running sandpaper along the ridges enhances the texture and provides a great distressed look.
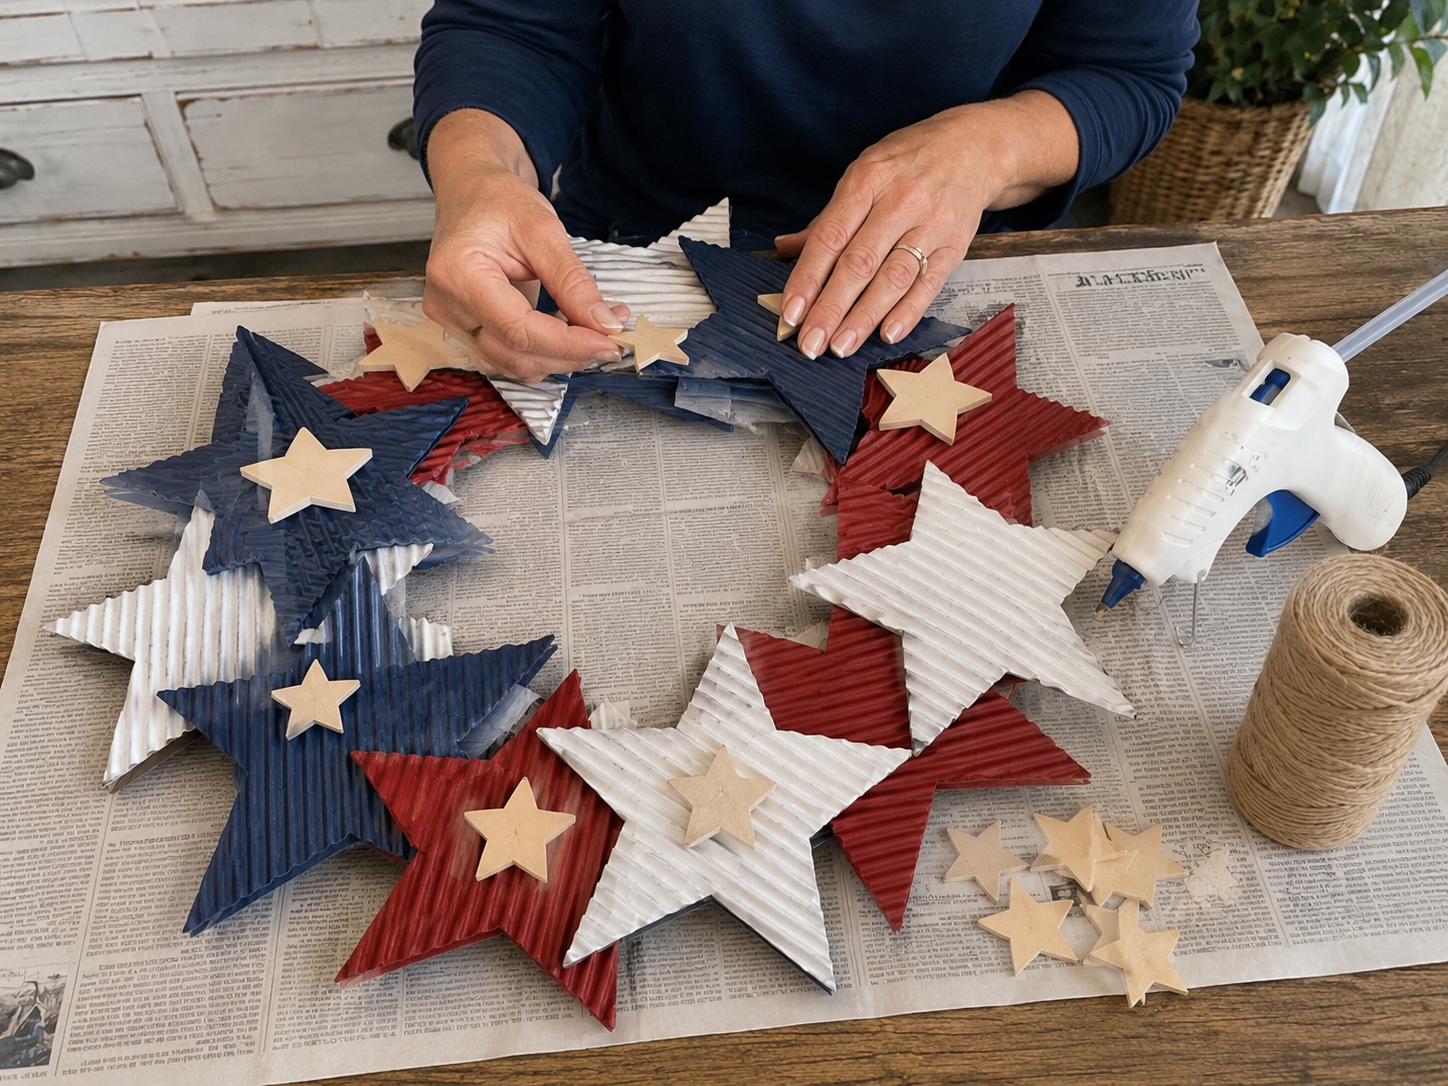
Step 5: Assemble Wreath Layout
Arrange your painted and distressed stars around your wreath form in an overlapping circular layout. Experiment with different placements, sizes, and color combinations. To achieve a subtle flag-inspired design, group most of your navy stars on one side, then mix the red and white stars around the rest of the circle. Once happy with the arrangement, use hot glue to firmly attach each star to the wreath form and to each other where they overlap, ensuring a secure bond.

💡 Pro Tip: Before applying any glue, lay out all your stars on the wreath form (or even on your table in a circle if your form is small) to visualize the final look. Take a picture! This helps you remember your favorite arrangement. Apply a generous dab of hot glue to the back of each star, pressing it firmly for a few seconds.
Step 6: Add Wooden Star Accents
Take your small, unfinished wooden star cutouts and strategically place them on top of a few of the larger painted stars. These add an extra layer of dimension and a touch of natural wood tone. Use a small dab of hot glue to secure each wooden star in place. Don’t cover every star; choose spots that enhance the overall design.
💡 Pro Tip: Vary the placement of the small wooden stars. Some can be centered, some slightly off-center, or even partially peeking out from under another star. This asymmetry adds to the handmade, organic feel of the wreath. A tiny dot of hot glue is usually enough for these light wooden pieces.
Step 7: Craft Beaded Jute Hanger
Cut a piece of jute twine approximately 12-18 inches long, depending on your desired hanging length. Thread 3-5 wooden craft beads onto the twine. Tie the ends of the twine together to form a loop, securing it with a strong double knot. Then, hot glue or tie the twine loop to the top of your wreath form, ensuring it’s centered and sturdy for hanging.

💡 Pro Tip: For a secure knot, wrap the twine around your fingers twice before pulling it through to create a square knot. If your wooden beads have small holes, use a thin piece of wire or a beading needle to help thread the jute twine. Varying bead sizes can add more visual interest to your hanger.
📱 Free to Download
Join 50,000+ crafters already using Craftino
Browse 85+ Patriotic / 4th of July ideas and thousands more in the app
✓ Save crafts & browse fully offline
✓ Download printable PDF guides for every project
✓ Step-by-step photo tutorials, nothing left out
✓ 1,000+ craft projects with new ones added every week
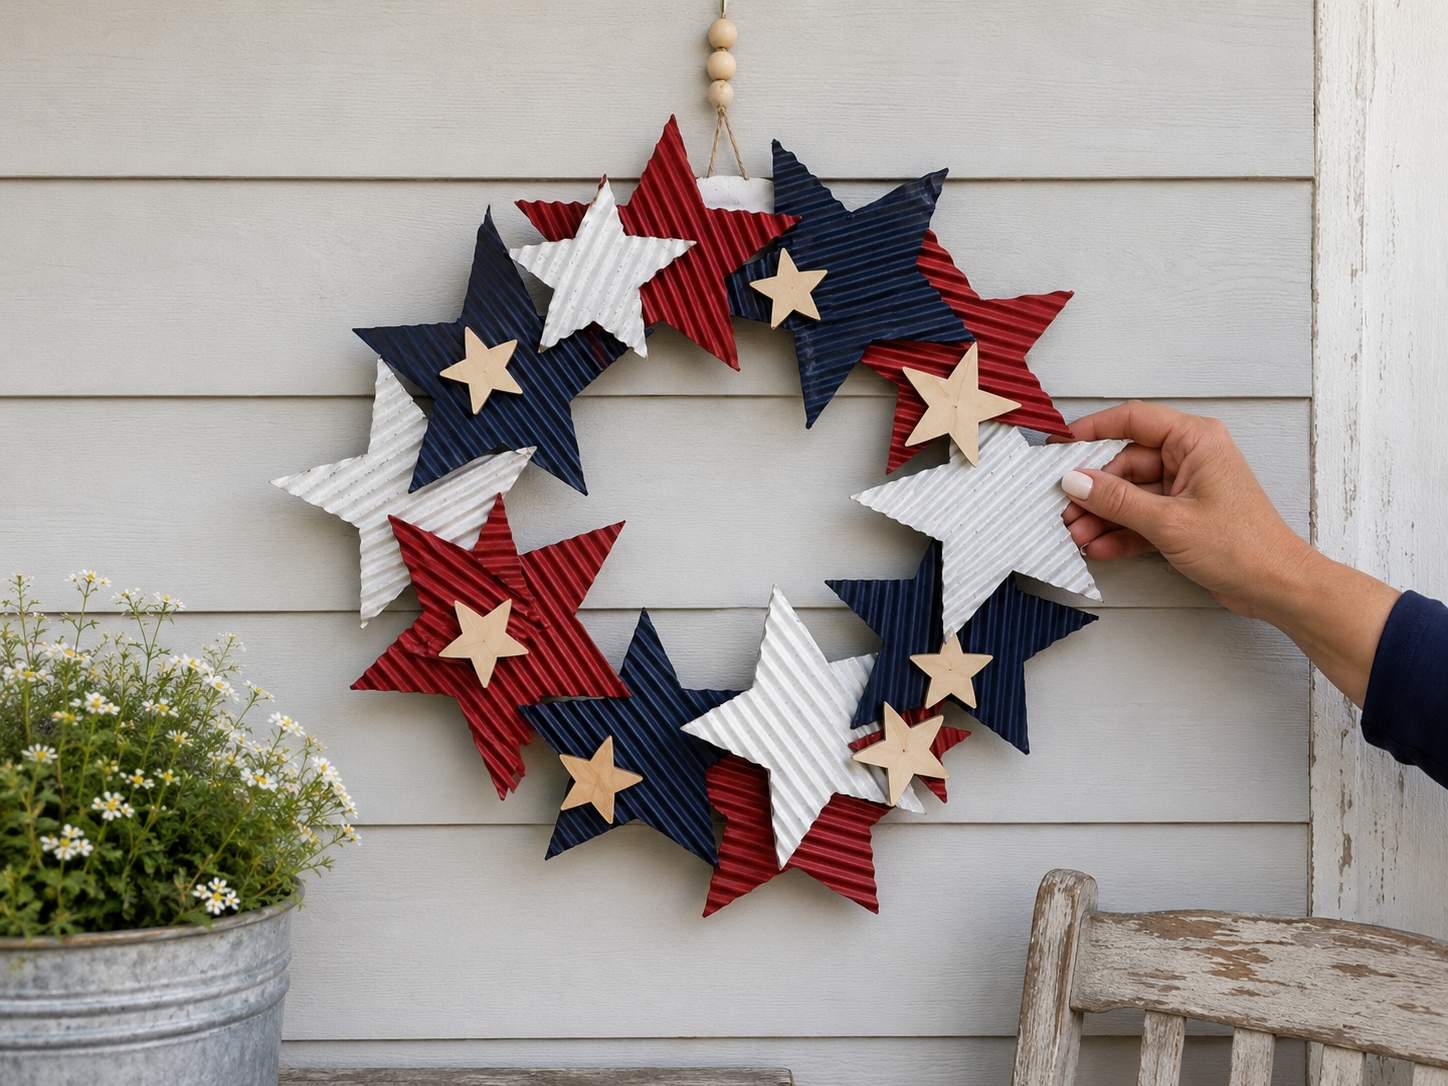
Step 8: Final Adjustments & Display
Step back and inspect your finished wreath. Gently adjust any overlapping stars to ensure a full and pleasing aesthetic. Add a few extra dabs of hot glue where needed to reinforce any loose spots or secure layers. Once you’re satisfied, your rustic patriotic star wreath is ready to adorn your front door, porch, or wall, bringing a charming farmhouse touch to your seasonal decor.
💡 Pro Tip: Hang your wreath on a temporary hook or nail and view it from a distance. Sometimes, minor adjustments to star placement or layering become more apparent from afar. Ensure all glue points are fully cooled and hardened before hanging permanently. Consider adding a clear matte spray sealant for outdoor durability if it will be exposed to elements.
Your Rustic Patriotic Star Wreath Is Ready!
And there you have it, your very own beautiful Rustic Patriotic Star Wreath! Doesn’t it just look amazing? Hang it on your door, porch, or even on a gallery wall for some instant Home Decor charm. I bet your neighbors will be asking where you bought it! Don’t forget to share your finished wreath with me, I love seeing your creations!
📱 Free to Download
Join 50,000+ crafters already using Craftino
Browse 20+ Patriotic / 4th of July ideas and thousands more in the app
✓ Save crafts & browse fully offline
✓ Download printable PDF guides for every project
✓ Step-by-step photo tutorials, nothing left out
✓ 1,000+ craft projects with new ones added every week
Frequently Asked Questions
How much does it cost to make this Rustic Patriotic Star Wreath: A Dollar Tree DIY?
You can make this entire wreath for about $3 to $5, depending on if you already have basic craft supplies like glue. All the primary items, like the stars and wreath form, are just $1.25 each at Dollar Tree.
What type of glue works best for a Dollar Tree star wreath?
For the best hold, I recommend using hot glue. A small hot glue gun and glue sticks from Dollar Tree or any craft store will work perfectly, drying in about 30 seconds per star.
How many wooden stars do I need for this Patriotic / 4th of July wreath?
You’ll typically need one package of 6-8 small wooden stars and one package of 3-4 larger wooden stars from Dollar Tree to get a nice layered look on your wreath form.
How long does it take to make this Rustic Patriotic Star Wreath?
This is a super quick craft! You can complete your Rustic Patriotic Star Wreath in about 20-30 minutes, making it perfect for a fast decorating project for the 4th of July.
Can I use this Dollar Tree DIY wreath outdoors?
Yes, you can use it outdoors, but I’d suggest hanging it in a covered area like a porch or under an awning to protect it from direct rain and harsh sun. The wood and paint will last much longer if not exposed to constant weather.
What are some ways to customize my Rustic Patriotic Star Wreath?
You can easily customize it! Try adding a small burlap bow to the top, painting some of the stars white, or even incorporating a few small red or blue berries for extra texture. You can also paint the base wreath form a different color.
Discover the newest Dollar Tree arrivals for your next craft project here.
Inspiration / Credit: Jeanne Linder
Leave a Reply