Ever walk into Dollar Tree and grab stuff you don’t even need, just because it’s a dollar? Same, girl, same! But sometimes, those impulse buys turn into the cutest little projects. My kiddos saw a tiny fairy house on TikTok and begged me to make one, and guess what? We whipped up this adorable Charming Dollar Tree Fairy Garden House DIY, and it seriously made my heart happy!
See also: Creative 10 Dollar Tree Garden Projects On A Budget
Theme: Spring & Garden
Materials Needed
- Small Terracotta Pots/Planters (2)
- Matching Terracotta Saucer
- Acrylic Paints (Sage Green, Cream/Ivory, White)
- Assorted Mini Fairy Garden Embellishments (Door, Window, Faux Moss, Flowers, Greenery Stems, Butterfly, Ladybug, Tiny Stepping Stones)
- Hot Glue Gun and Glue Sticks
- Paint Brushes (various sizes, including a small round brush for dots)
- Scissors
- Optional: Sandpaper or primer for terracotta
📋 Love staying organized while crafting? Check out our printable planners & craft designs at CraftersDT on Etsy and use code CRAFT20 for 20% off your entire order!
Why This Craft Works
This little fairy garden house is just perfect for adding a whimsical touch to your Home Decor, especially for Spring & Garden vibes. You can tuck it into a flower pot on your porch, place it on a tiered tray, or even put it in a kiddo’s bedroom as a fun decoration. It’s such a sweet way to bring a bit of charm and imagination into any space.
📱 Free to Download
Join 50,000+ crafters already using Craftino
Browse 53+ Spring & Garden ideas and thousands more in the app
✓ Save crafts & browse fully offline
✓ Download printable PDF guides for every project
✓ Step-by-step photo tutorials, nothing left out
✓ 1,000+ craft projects with new ones added every week

And the best part? The cost! Seriously, we’re talking about making this entire Charming Dollar Tree Fairy Garden House DIY for under five bucks. Most of the time, you can find everything you need for about three or four dollars, depending on what little extras you decide to grab. It’s the ultimate budget-friendly craft!
As for how hard it is, this project is super easy, I promise! It takes about 20-30 minutes to put together, so it’s perfect for beginner crafters, busy moms who need a quick win, or even for a fun afternoon activity with the kids. No complicated steps, just pure crafting joy.
Step-by-Step Instructions for Charming Dollar Tree Fairy Garden House DIY
Alright, crafters, you are going to absolutely love making this little fairy house! It’s such a fun and easy project, honestly. I think it took me maybe 20 minutes from start to finish, so it’s perfect for beginners or even crafting with your kids. Get ready to create your own Charming Dollar Tree Fairy Garden House DIY!
Step 1: Prepare & Prime Pots
Start by thoroughly cleaning your terracotta pots and saucer. Ensure they are free from dust and debris. If using new terracotta, it’s recommended to lightly sand any rough edges and then apply a thin, even coat of terracotta primer to all surfaces that will be painted. This prevents the porous terracotta from absorbing too much paint and helps achieve a smoother finish.

💡 Pro Tip: Terracotta is very porous. Priming prevents paint from being absorbed unevenly, ensuring vibrant, true colors and requiring fewer coats. Let primer dry completely as per product instructions, typically 20-30 minutes.
Step 2: Paint the Roof Base
Take the smaller pot, which will serve as your house roof. Paint the entire exterior surface, including the rim, with sage green acrylic paint. Apply thin, even coats to avoid drips and ensure full coverage. You may need 2-3 coats. Let each coat dry to the touch before applying the next.
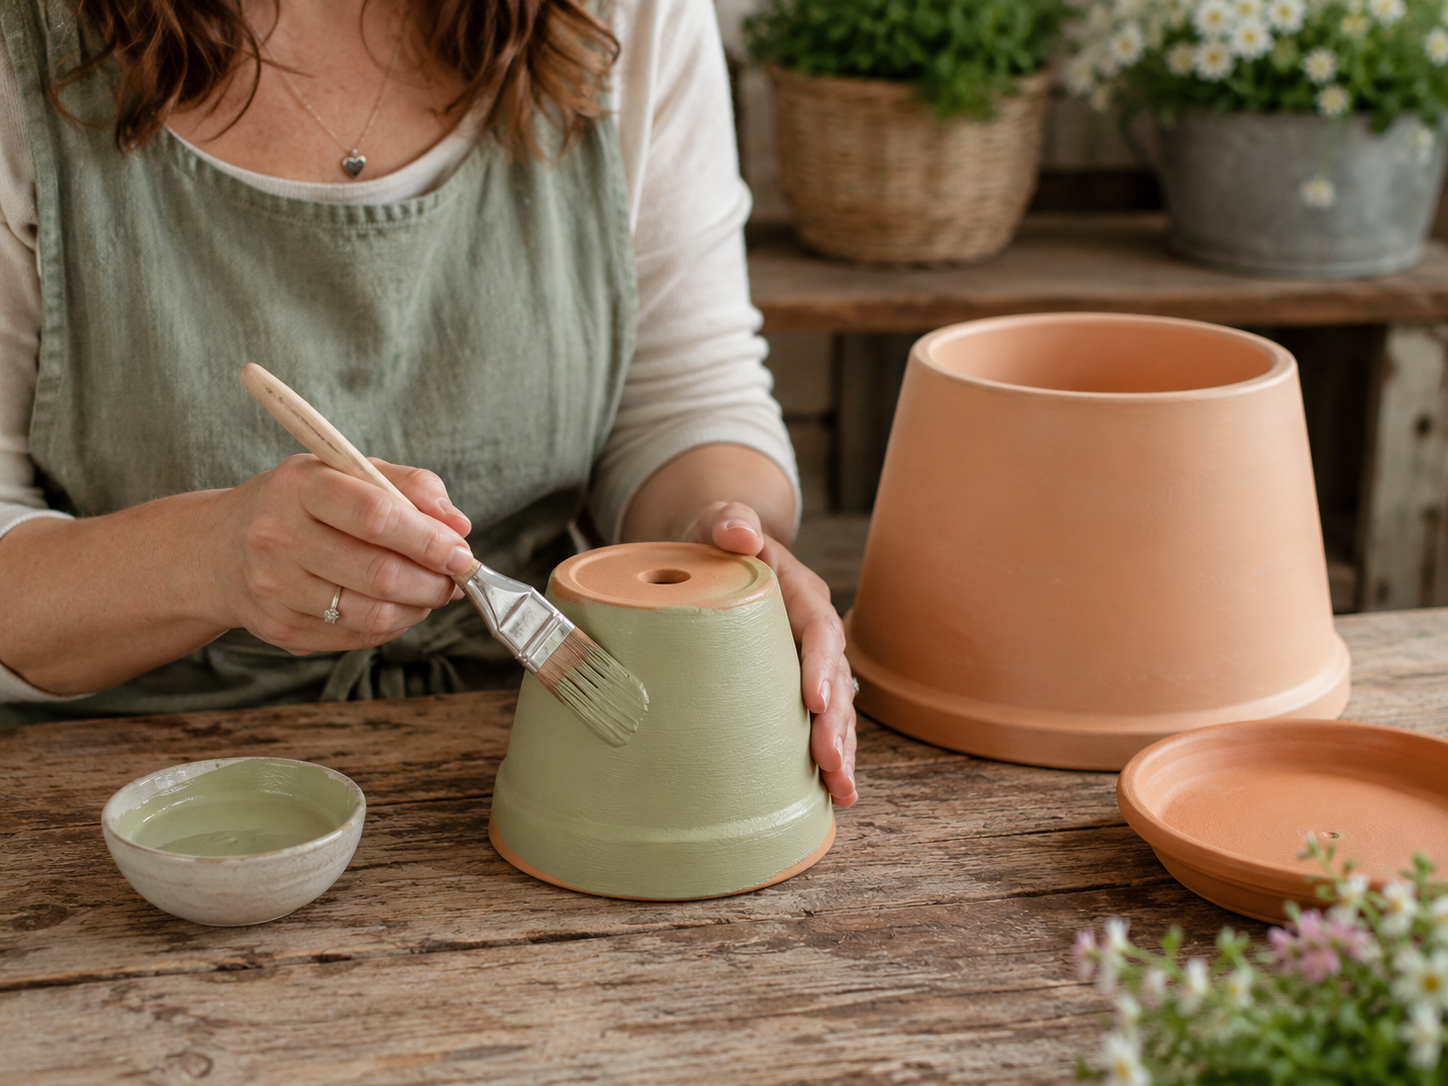
💡 Pro Tip: For smooth, streak-free coverage on curved surfaces, use a soft flat brush and long, even strokes. If the paint seems too thick, add a tiny drop of water to thin it slightly, but be careful not to over-dilute. Allow at least 1 hour between coats for optimal adhesion.
🗓️ Keep all your craft projects on track! Explore our printable planners & templates at CraftersDT on Etsy and use code CRAFT20 for 20% off!
Step 3: Add Polka Dots to Roof
Once the sage green paint on the roof pot is completely dry, use a small round brush, the end of a paintbrush, or a dotting tool dipped in white acrylic paint to create polka dots. Randomly place dots of varying sizes across the roof for a whimsical effect. Maintain consistent spacing as you work around the pot.
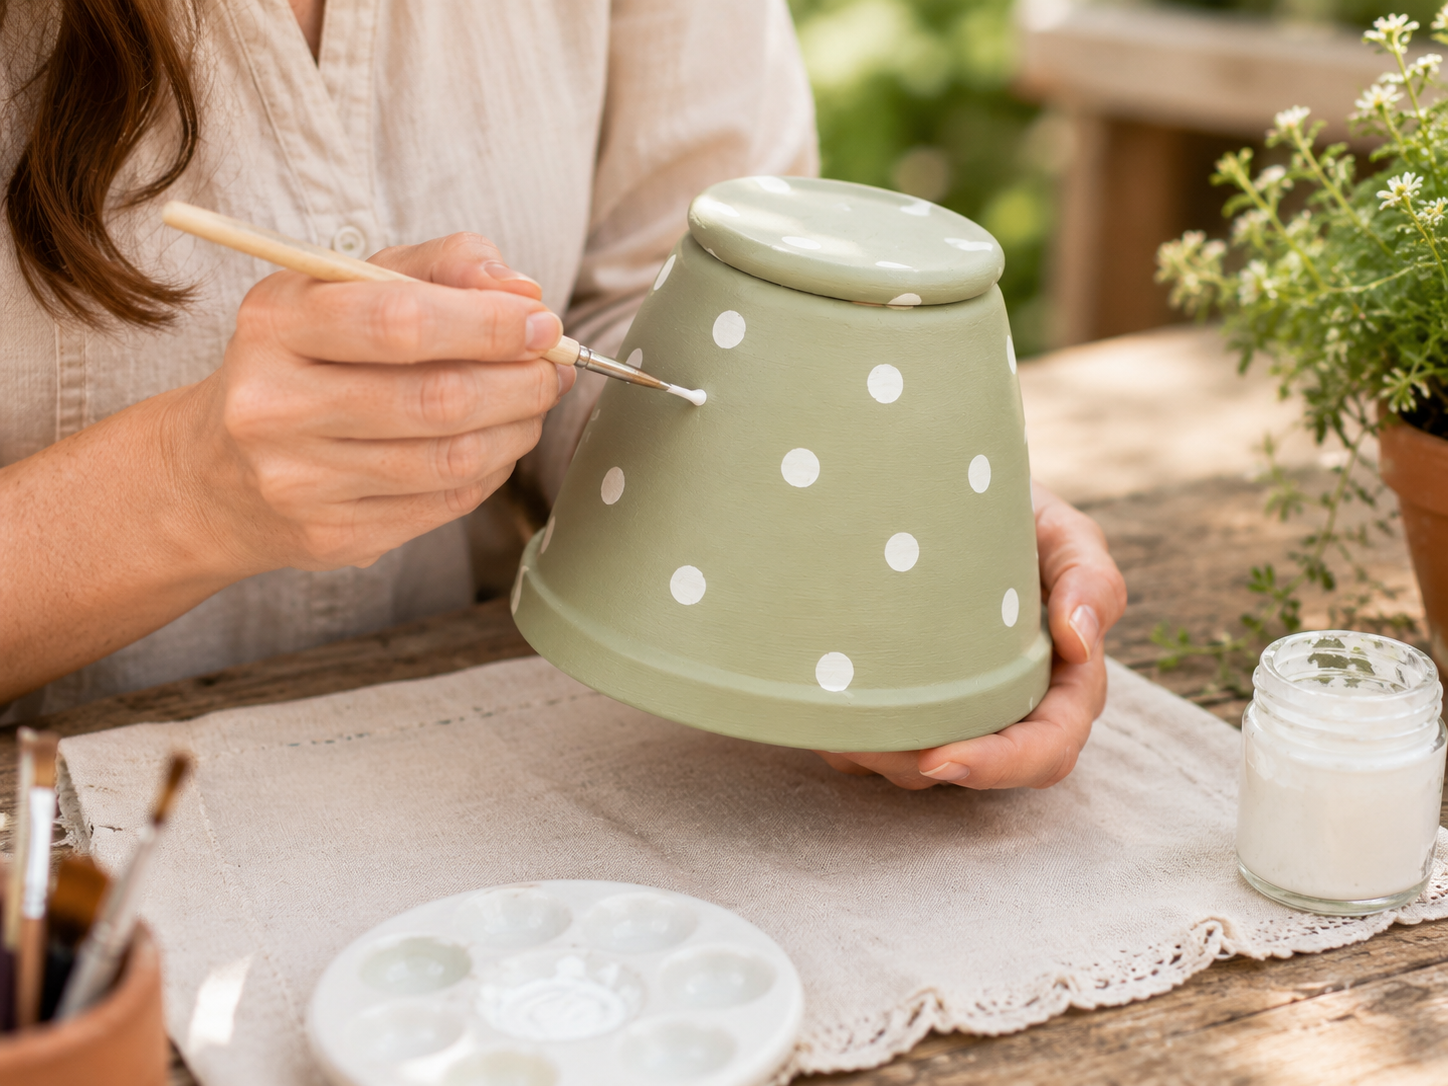
💡 Pro Tip: To achieve perfectly round polka dots, dip your tool into paint, then press down firmly and lift straight up. Practice on a piece of scrap paper first. Reload your tool with paint for each dot to ensure consistent size and opacity. Avoid overcrowding the dots.
Step 4: Paint House Base & Saucer
Now, paint the larger pot (the house base) and the matching saucer with cream or ivory acrylic paint. Apply 2-3 thin, even coats, allowing each coat to dry fully before applying the next. Paint both the exterior and the interior rim of the base pot, and the entire saucer.
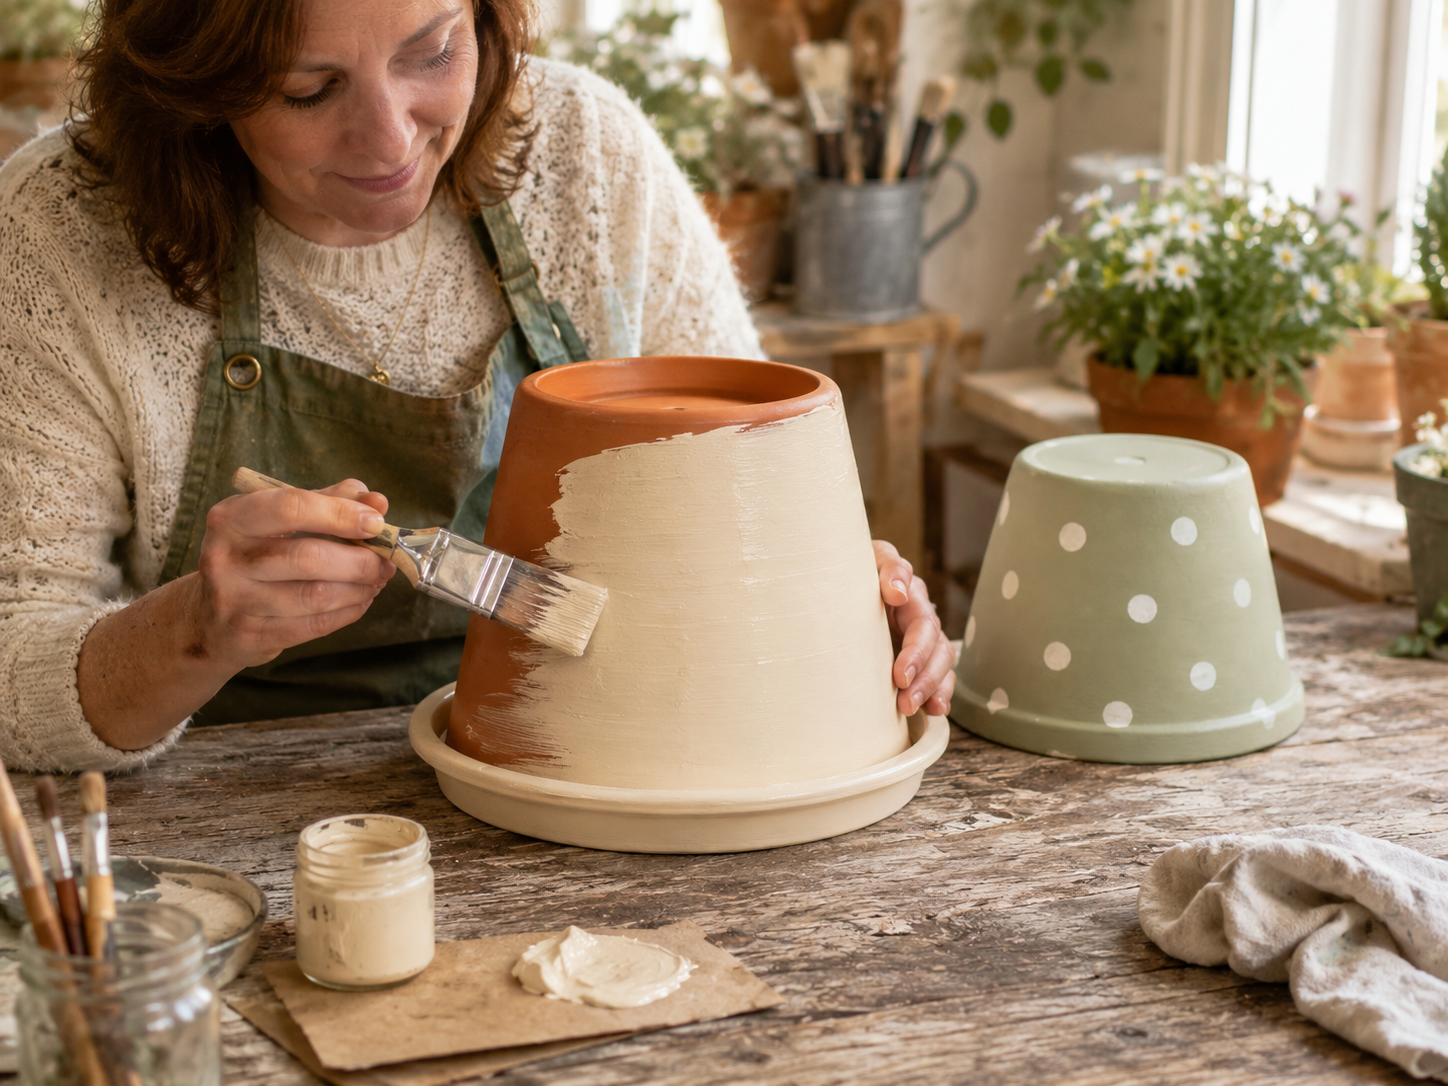
💡 Pro Tip: For a smooth, uniform finish, ensure your brush strokes are consistent. If you want a slightly textured ‘aged’ look, consider dabbing the final coat with a sponge brush. Always clean your brushes thoroughly between different colors.
Step 5: Assemble House Structure
Once all painted pieces are completely dry, it’s time to assemble. Apply a generous bead of hot glue to the rim of the larger, cream-painted pot. Carefully center and press the rim of the smaller, sage green polka-dotted pot (upside down) onto the glued rim of the larger pot. Hold firmly for a minute until the glue sets.
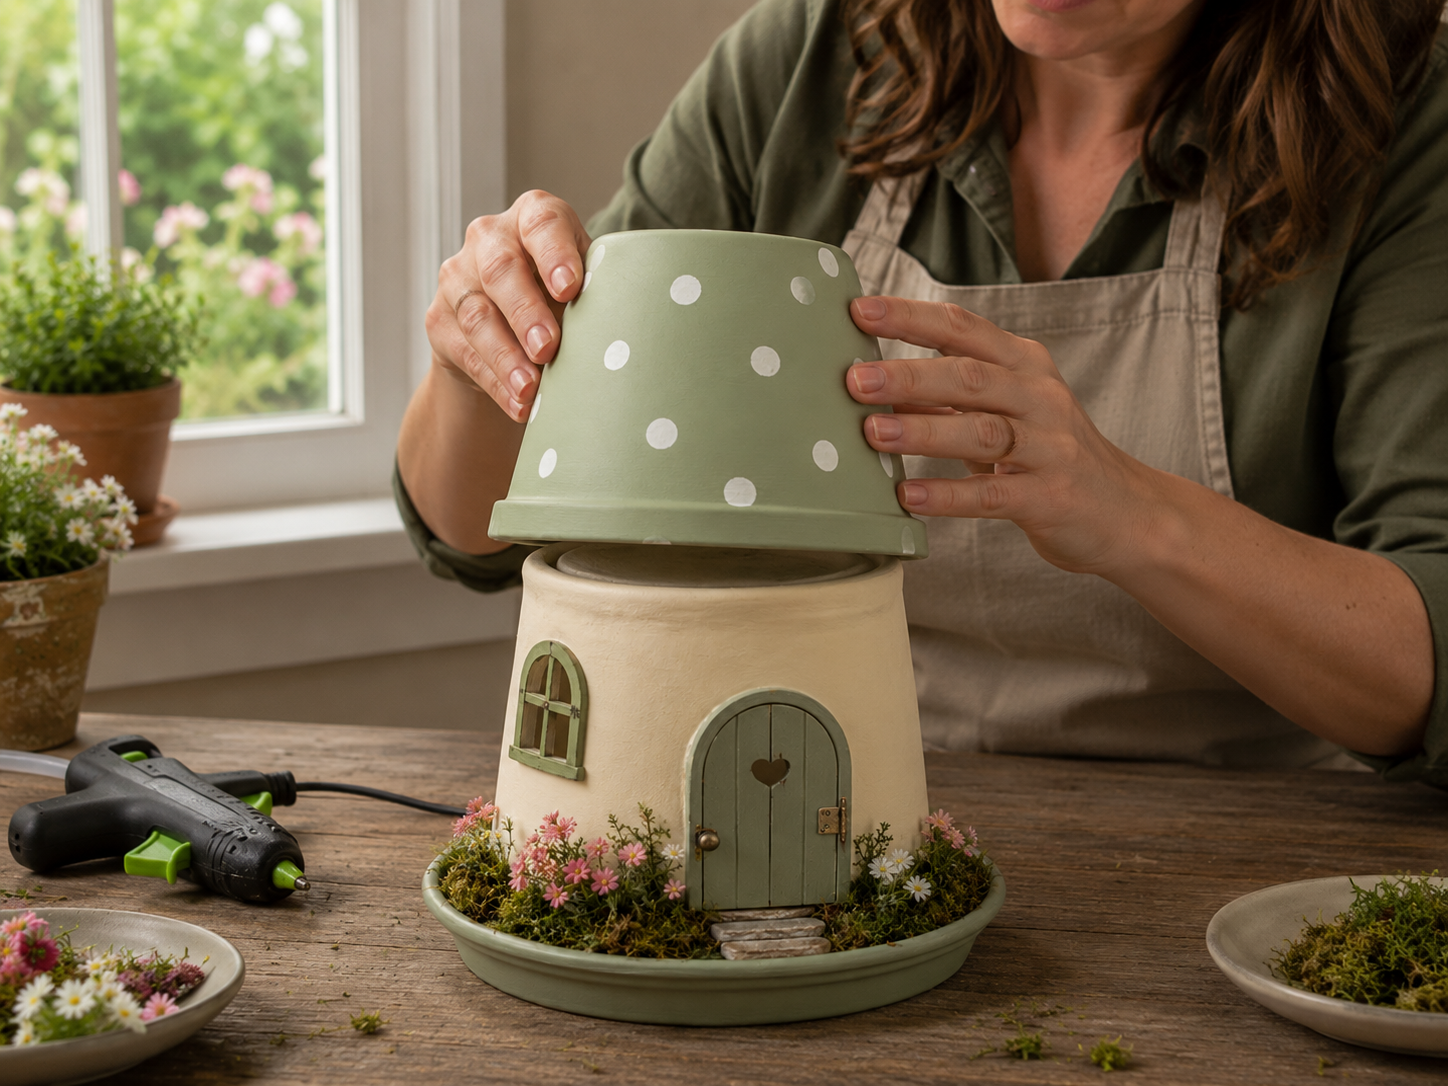
💡 Pro Tip: Use high-temperature hot glue for a stronger bond, especially on porous surfaces like terracotta. Work quickly as hot glue cools fast. If you’re concerned about perfect alignment, mark the center points on both rims before applying glue. Ensure the roof pot is truly upside down to create the ‘mushroom’ shape.
Step 6: Attach Door & Window
With the house structure assembled, apply a small amount of hot glue to the back of your mini wooden door and window accents. Carefully position and press the door onto the cream house body, ensuring it’s centered and straight. Then, attach the tiny window nearby. Hold each piece until the glue firmly sets.
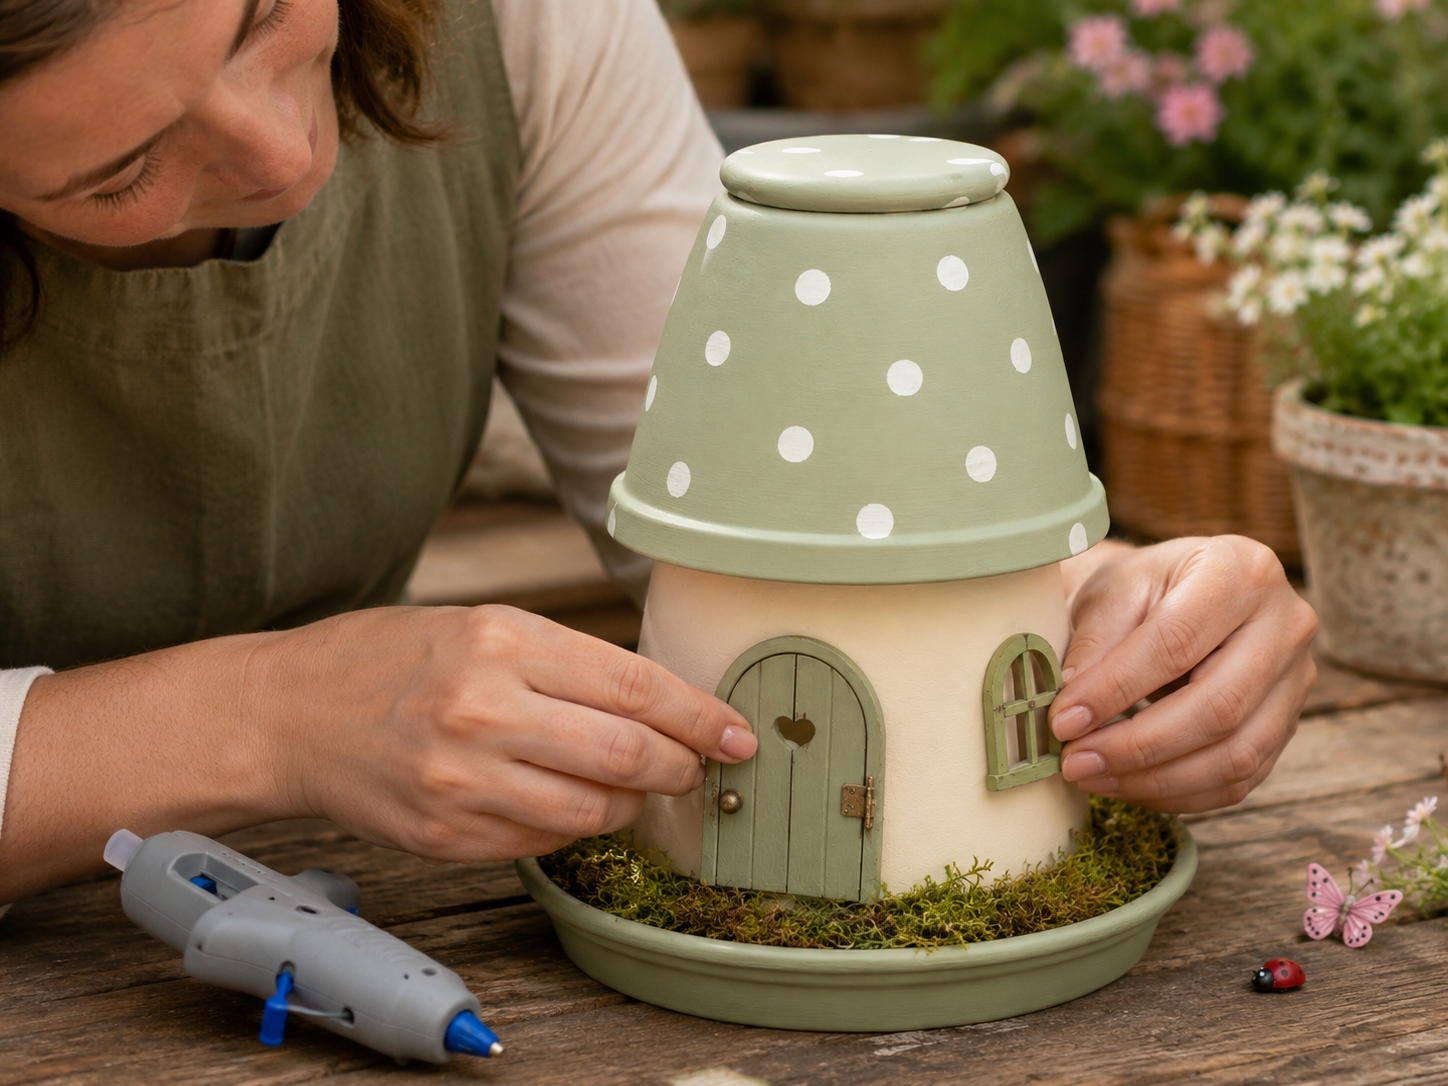
💡 Pro Tip: Before applying glue, dry-fit your door and window to decide on the best placement. Use just enough hot glue to secure them without excess oozing out. If glue squeezes out, let it cool completely, then gently peel it away with tweezers or a craft knife.
Step 7: Add Moss & Greenery
Begin to create a natural base by hot gluing faux moss around the bottom rim of the cream pot, covering the seam where it meets the saucer (though the saucer isn’t attached yet). Extend the moss slightly outwards. Then, carefully glue small greenery stems to create a vine effect around the doorway and base of the house, mimicking natural growth.
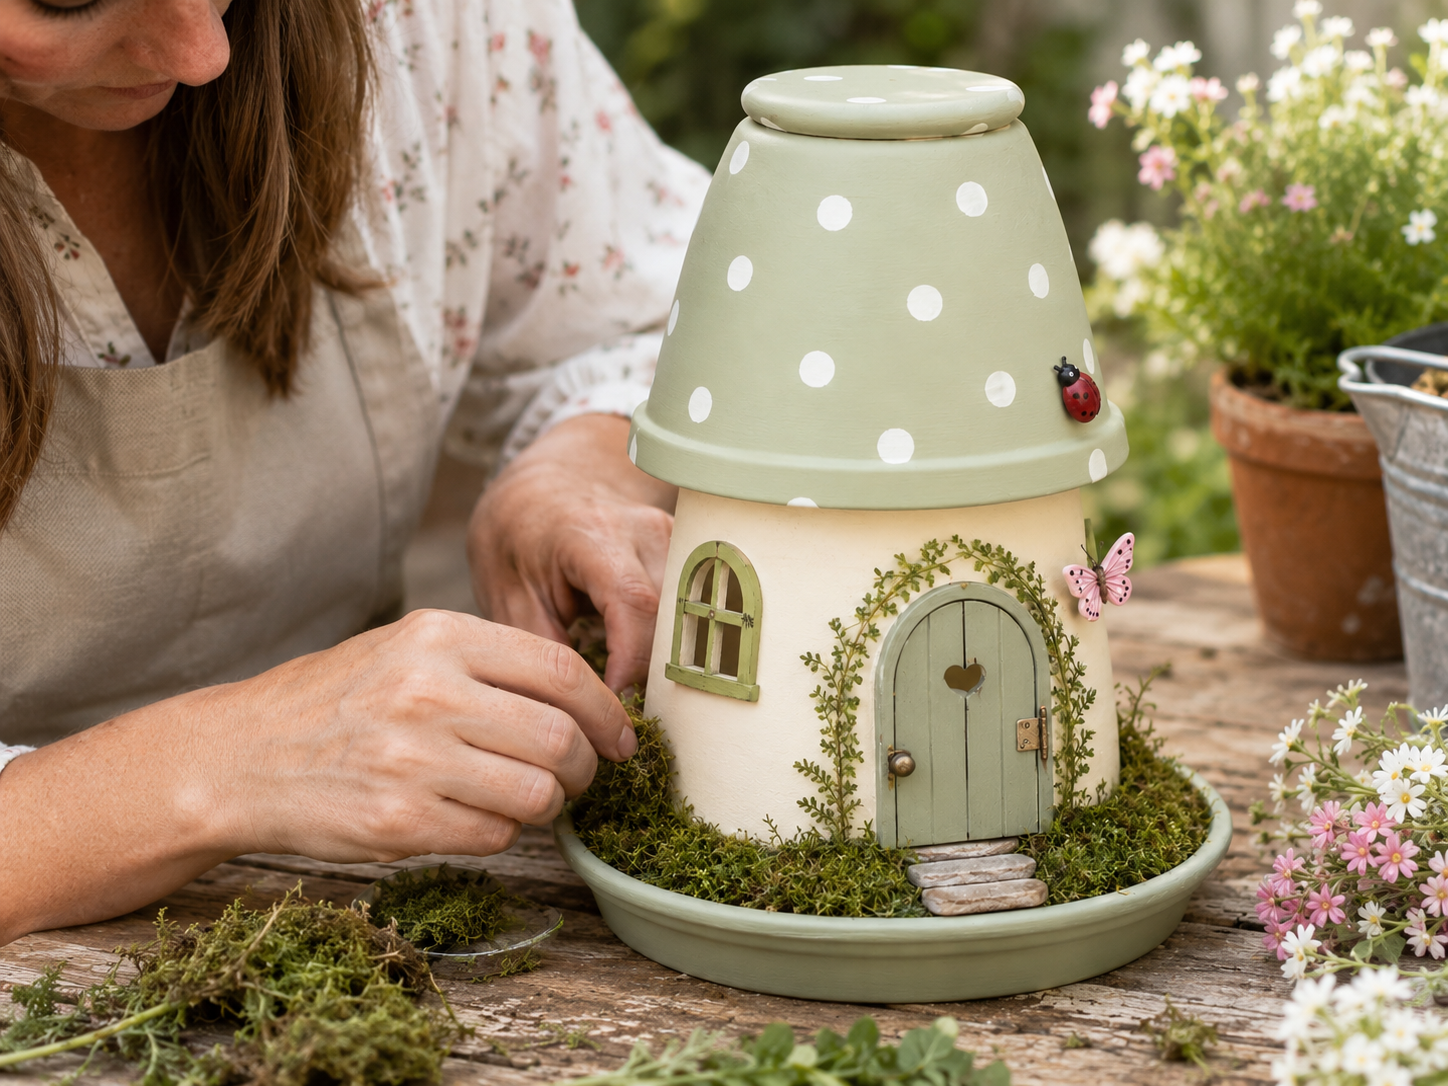
💡 Pro Tip: When working with faux moss, tear it into smaller, irregular pieces for a more natural look. Apply hot glue directly to the pot, then press the moss onto it. For vines, gently bend and shape the greenery stems before gluing to fit the contours around the door.
Step 8: Embellish with Flowers & Details
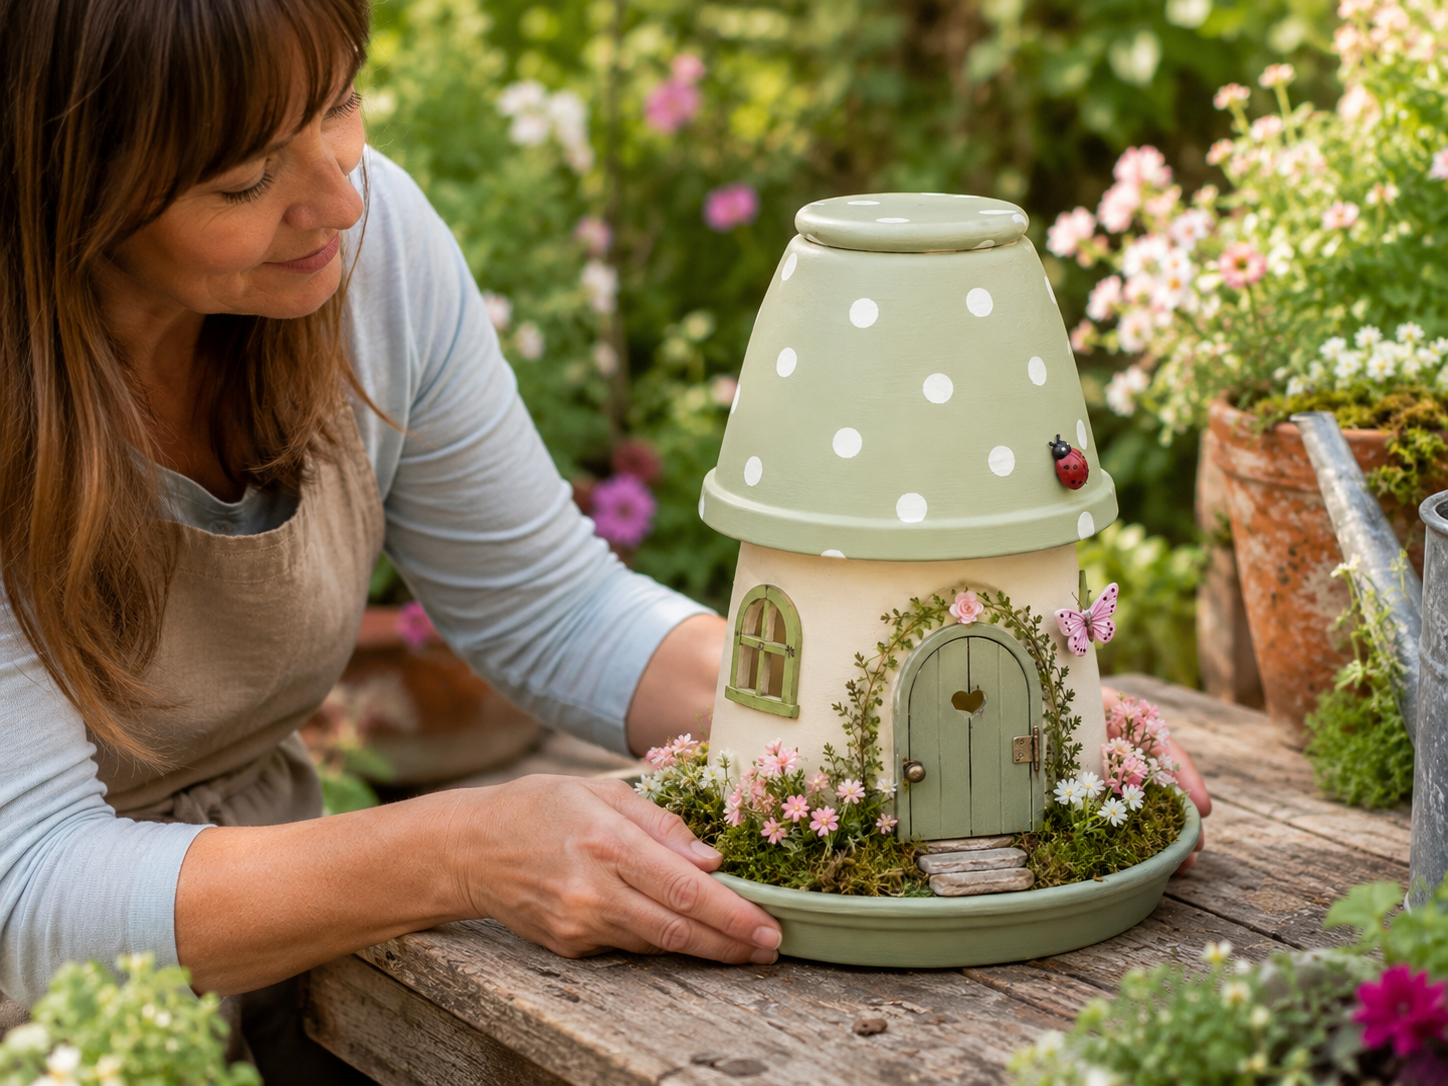
Now for the magical touches! Hot glue mini faux flowers sparsely within the moss and greenery around the house base. Attach a small butterfly embellishment near the door and a cute ladybug decoration onto the sage green roof. If you have tiny stepping stones, glue them leading up to the door for a welcoming path.
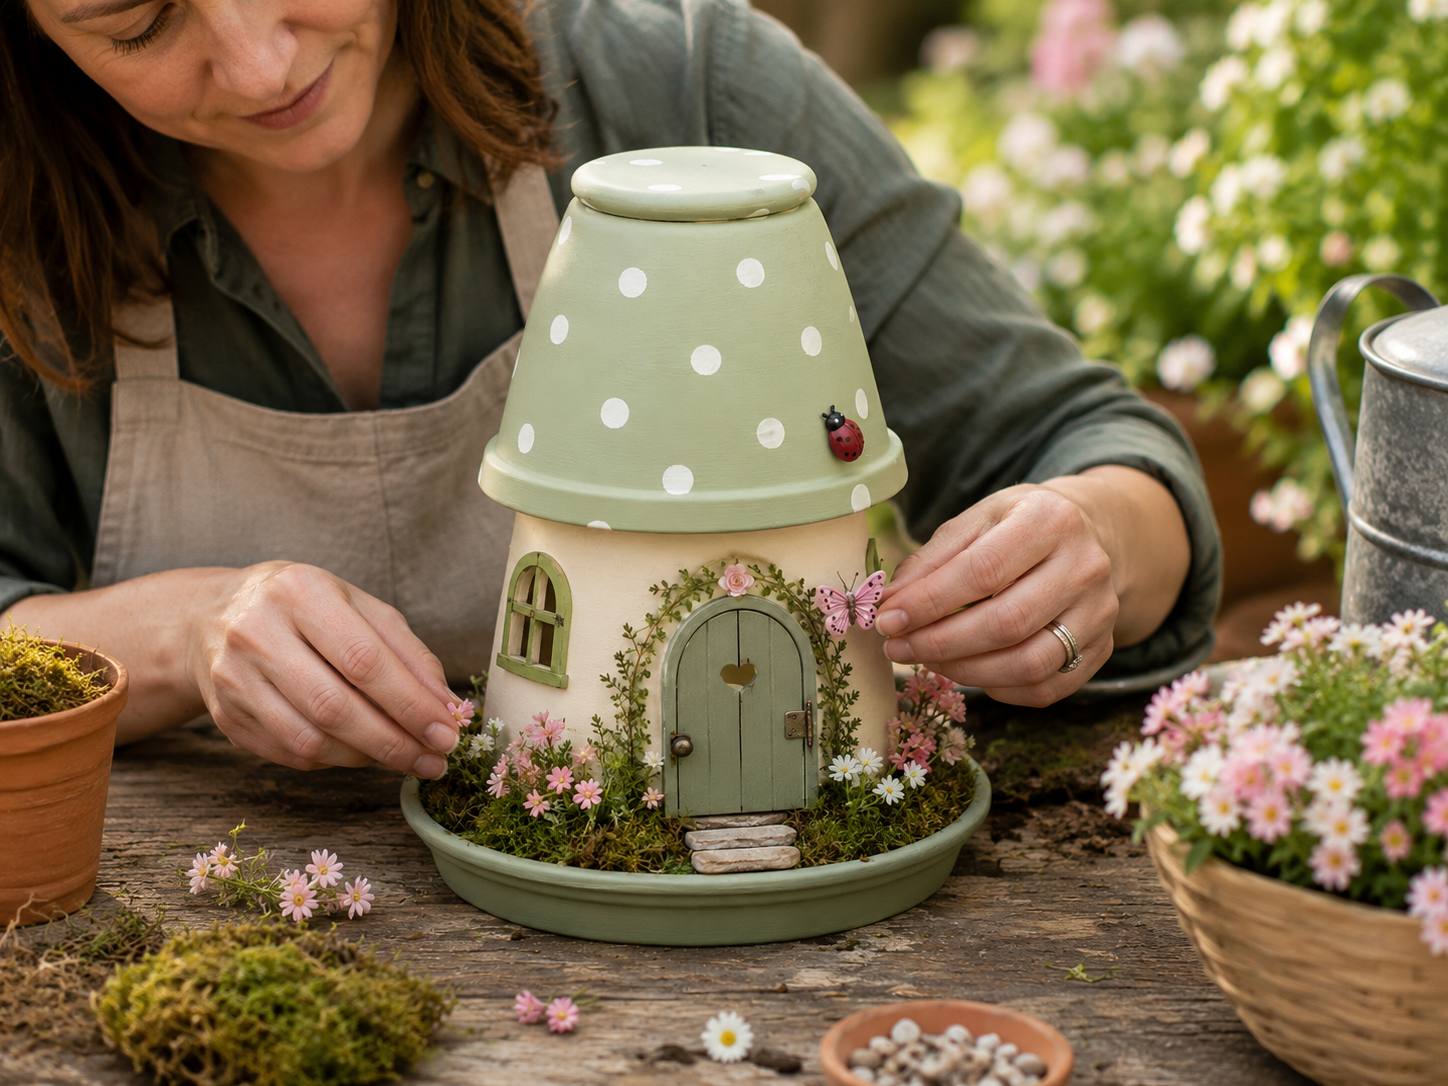
💡 Pro Tip: Less is often more with miniature details; strategically placed accents draw the eye. Use tweezers to handle very small embellishments for precise placement. Ensure the ladybug and butterfly are securely attached but appear delicate and natural.
Step 9: Create Garden Base & Display
Fill your painted saucer with a layer of faux moss. You can add a few extra mini flowers or greenery if desired. Carefully place your completed fairy house into the center of the moss-filled saucer, ensuring it sits securely. The saucer serves as the fairy house’s own charming little garden.

💡 Pro Tip: For a more lush look, slightly mound the moss in the saucer. You can secure the fairy house to the saucer with a few dots of hot glue on its base, but it’s often stable enough without it if you wish to easily move it later. Arrange the moss to blend seamlessly with the moss on the house.
📱 Free to Download
Join 50,000+ crafters already using Craftino
Browse 52+ Spring & Garden ideas and thousands more in the app
✓ Save crafts & browse fully offline
✓ Download printable PDF guides for every project
✓ Step-by-step photo tutorials, nothing left out
✓ 1,000+ craft projects with new ones added every week
Step 10: Style Your Fairy Garden House
Your charming Dollar Tree Fairy Garden House is complete! Place it on a rustic garden table, a sunny windowsill, or nestled among your real plants to add a touch of whimsy. This cozy cottage is perfect for bringing a little bit of fairy magic to any indoor or outdoor space.
💡 Pro Tip: Consider surrounding your fairy house with other miniature garden elements like tiny fences, bird baths, or even small pebbles to enhance the magical scene. Rotate its position seasonally or for different events to keep your display fresh and engaging.
Your Charming Fairy Garden House Awaits!
Isn’t it just the cutest little thing? Pop your finished fairy garden house on a shelf, a porch, or tucked into a planter for a touch of Spring & Garden magic. I bet your friends and family would love one as a sweet gift too! Don’t forget to share your version with me, I love seeing how you make it your own.
📱 Free to Download
Join 50,000+ crafters already using Craftino
Browse 52+ Spring & Garden ideas and thousands more in the app
✓ Save crafts & browse fully offline
✓ Download printable PDF guides for every project
✓ Step-by-step photo tutorials, nothing left out
✓ 1,000+ craft projects with new ones added every week
Frequently Asked Questions
How much does it cost to make this Charming Dollar Tree Fairy Garden House DIY?
You can make this entire Charming Dollar Tree Fairy Garden House DIY for under $5. Most crafters find all the supplies for about $3-$4.
What kind of glue works best for a Dollar Tree fairy garden house?
A hot glue gun with about 2-3 glue sticks works perfectly for this project. It dries fast and holds everything securely in place.
How long does it take to make this Spring & Garden fairy house?
This craft is super quick! You can typically complete your Charming Dollar Tree Fairy Garden House DIY in about 20-30 minutes from start to finish.
What Dollar Tree items do I need for this fairy garden house?
You’ll need a small wooden birdhouse, some faux flowers or greenery, a bag of decorative moss, and maybe some tiny pebbles or decorative gems, all found at Dollar Tree.
Can I customize my Charming Dollar Tree Fairy Garden House DIY?
Absolutely! You can paint the birdhouse a different color, use various types of tiny faux flowers, or add extra small embellishments like miniature ladybugs or butterflies to make it unique.
Discover the newest Dollar Tree arrivals for your next craft project here.
Leave a Reply