
Ever walk into Dollar Tree just for one thing and leave with a whole cart full of craft supplies you didn’t know you needed? Yeah, me too! That’s exactly how I ended up making this super cute and easy DIY Dollar Tree Graduation Cap Door Hanger, perfect for celebrating your grad’s big day without breaking the bank.
Theme: Wedding & Party
Materials Needed
- Black Foam Board
- Gold Glitter Foam Sheet
- Assorted Ribbons (Black, Gold, Patterned Black & White)
- Gold Cord or Embroidery Thread
- White Paper
- Hot Glue Gun & Sticks
- Basic Craft Tools (Scissors, Ruler, Pencil)
- Door Hanger Hook or Jute Loop
Why This Craft Works
This fun DIY Dollar Tree Graduation Cap Door Hanger is just perfect for celebrating your graduate in style! You can hang it right on their bedroom door, on the front door to welcome party guests, or even use it as a centerpiece for a graduation party table. It adds such a sweet, personal touch to any Wedding & Party celebration.
And let’s talk about the budget, because we all love a good deal! Making this cap door hanger ran me about $11-14 total, using almost everything from my local Dollar Tree. It’s such an affordable way to make a big impact for a special occasion, and you won’t believe how much bang for your buck you get.
You’ll be happy to hear that this is an Easy craft, even if you’re just starting out with DIY projects! From start to finish, the whole thing took me about 40-60 minutes, including drying time. It’s perfect for beginners, busy moms needing a quick decoration, or even for older kids to help make for their friends.
Step-by-Step Instructions for DIY Dollar Tree Graduation Cap Door Hanger
Alright, crafters, are you ready to get started on this adorable graduation cap project? You’re going to love how quickly this DIY Dollar Tree Graduation Cap Door Hanger comes together. It’s so much fun to make and honestly, it’s pretty hard to mess up! Gather your goodies and let’s make something special for your grad.
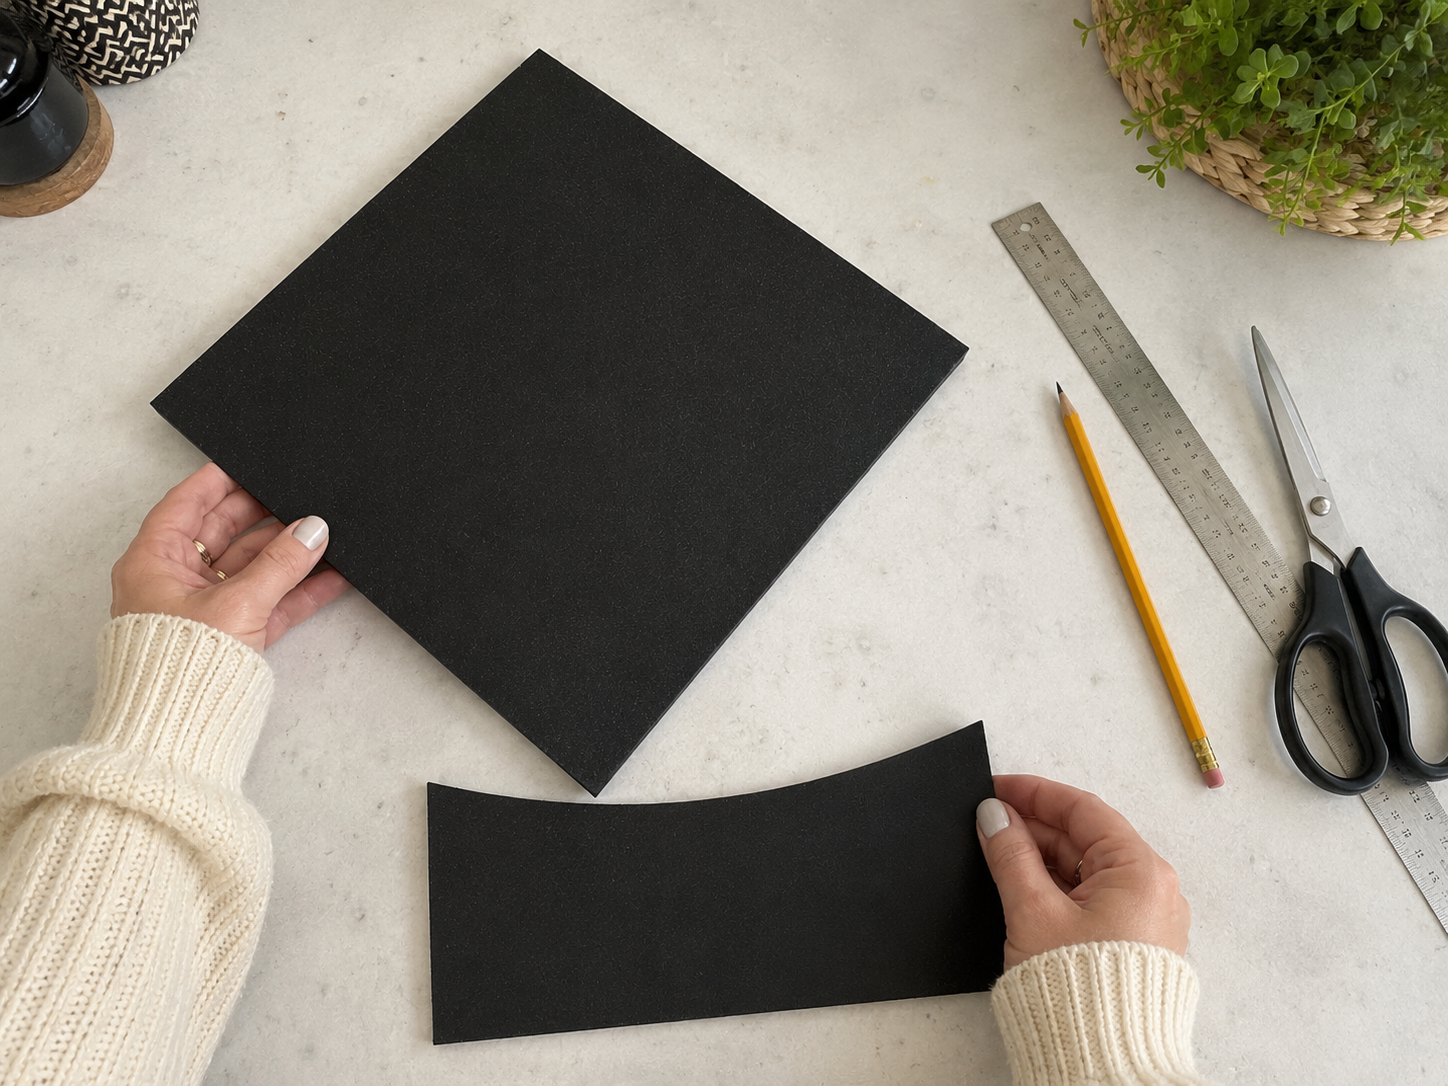
Step 1: Cut Cap Shapes
Using a ruler and pencil, mark out a large square or diamond shape (approximately 12-14 inches per side) from your black foam board for the top of the graduation cap. Then, measure and cut a slightly smaller rectangular or gently curved piece (about 8-10 inches wide by 4-6 inches tall) that will serve as the base for your ribbon cluster. Cut both shapes cleanly using sharp scissors or a craft knife.
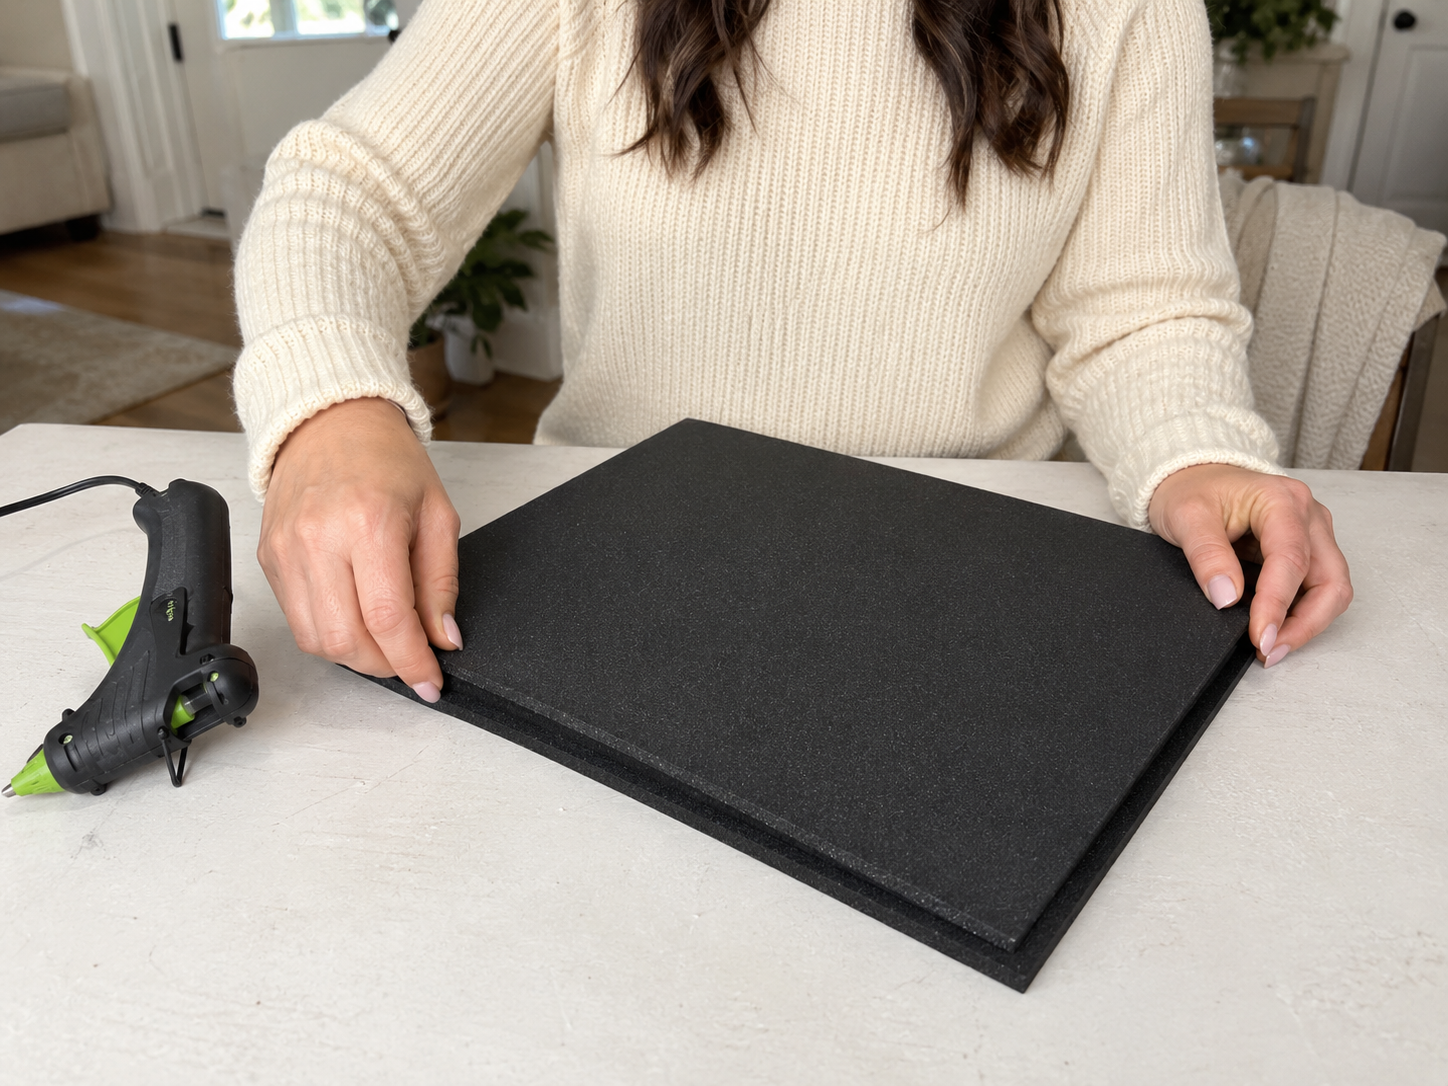
Step 2: Assemble Cap Base
Align the smaller rectangular or curved foam board piece centrally underneath the large graduation cap shape. The top edge of the smaller piece should slightly overlap the bottom edge of the cap, creating a cohesive base for your door hanger. Apply a generous line of hot glue along the overlapping edge and press firmly to secure. Ensure it’s centered and straight.
Step 3: Prepare Ribbon Cluster
Cut lengths of your assorted black, gold, and patterned black-and-white ribbons. For a full look, cut several pieces of each ribbon type, ranging from 12 to 18 inches long. Fold each ribbon piece in half or create loops, then layer them, alternating colors and patterns, to build a visually appealing cluster. Don’t glue them yet, just arrange them.
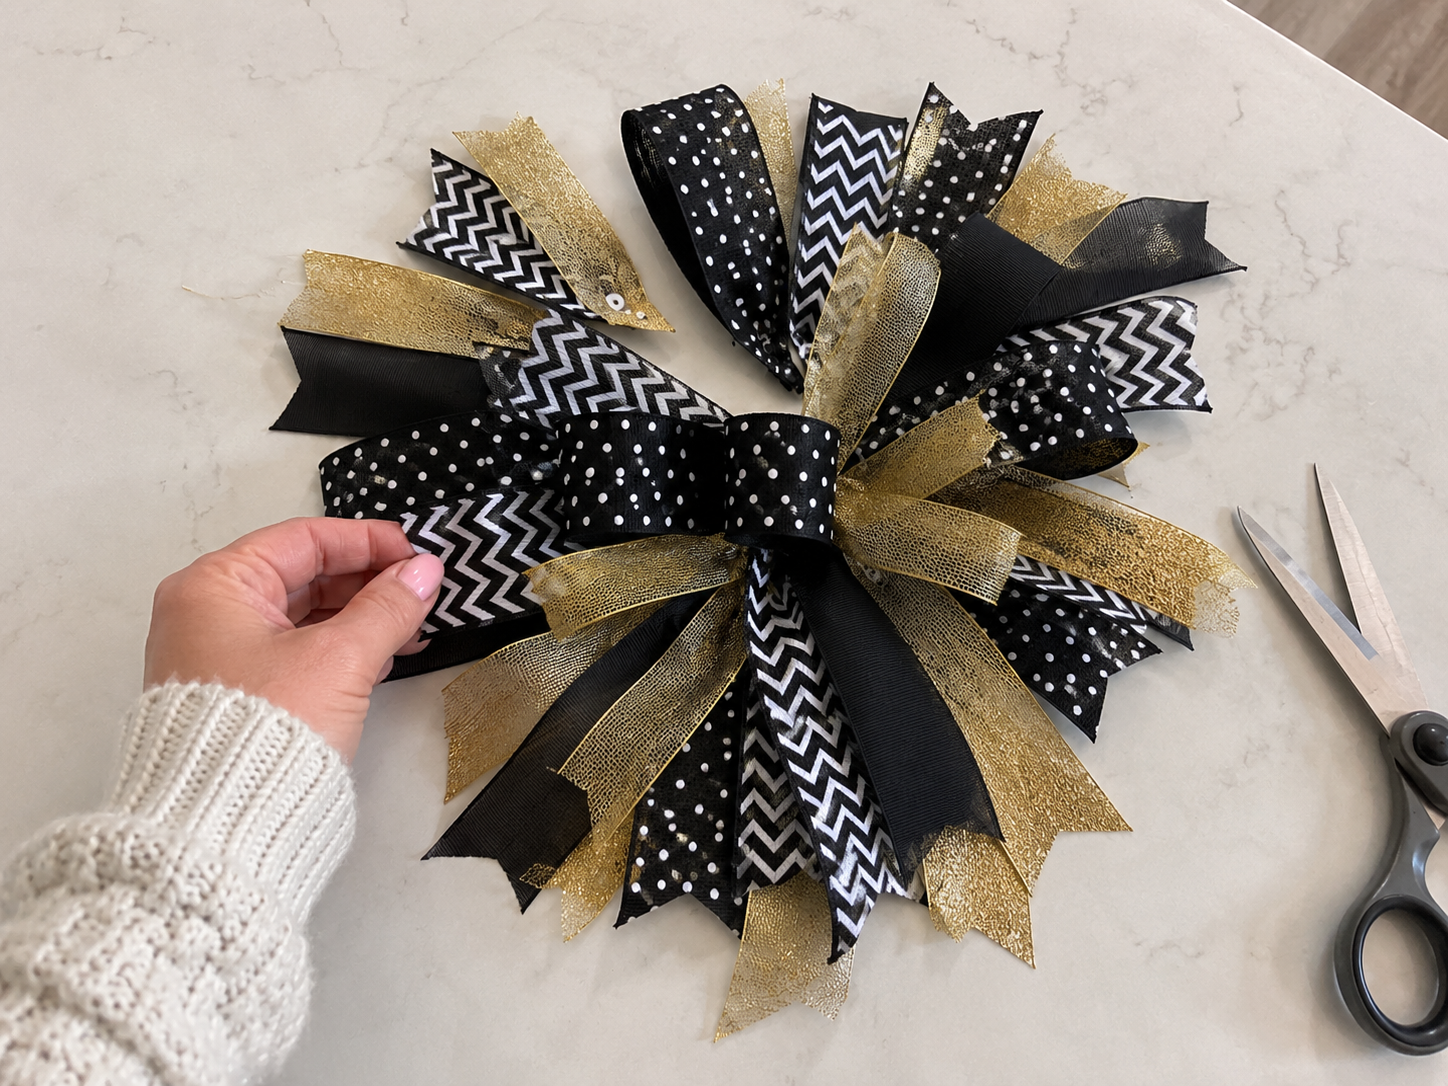
Step 4: Attach Ribbon Cluster
Carefully lift your prepared ribbon cluster and position it onto the lower, smaller foam board piece of your cap base. Once you’re happy with the arrangement, use hot glue to secure the central ‘pinch’ point of the ribbon cluster to the foam board. Press firmly until the glue cools and holds the ribbons in place, allowing the tails to cascade downwards.
Step 5: Craft Diploma Scroll
Take a small piece of white paper (approx. 4×6 inches) and tightly roll it into a scroll. Secure the scroll by tying a thin piece of gold ribbon or string around its middle, forming a small bow. Apply a dab of hot glue to the back of the tied diploma scroll and carefully attach it to the ribbon cluster, slightly off-center under the cap, giving it a natural, celebratory placement.

📱 Craftino App
Make more crafts like this
1,000+ Wedding & Party ideas with photo guides & Pro Tips
✓ Step-by-step photo tutorials, nothing left out
✓ Pro Tips for every step
✓ Save crafts & browse fully offline
✓ New ideas added every week

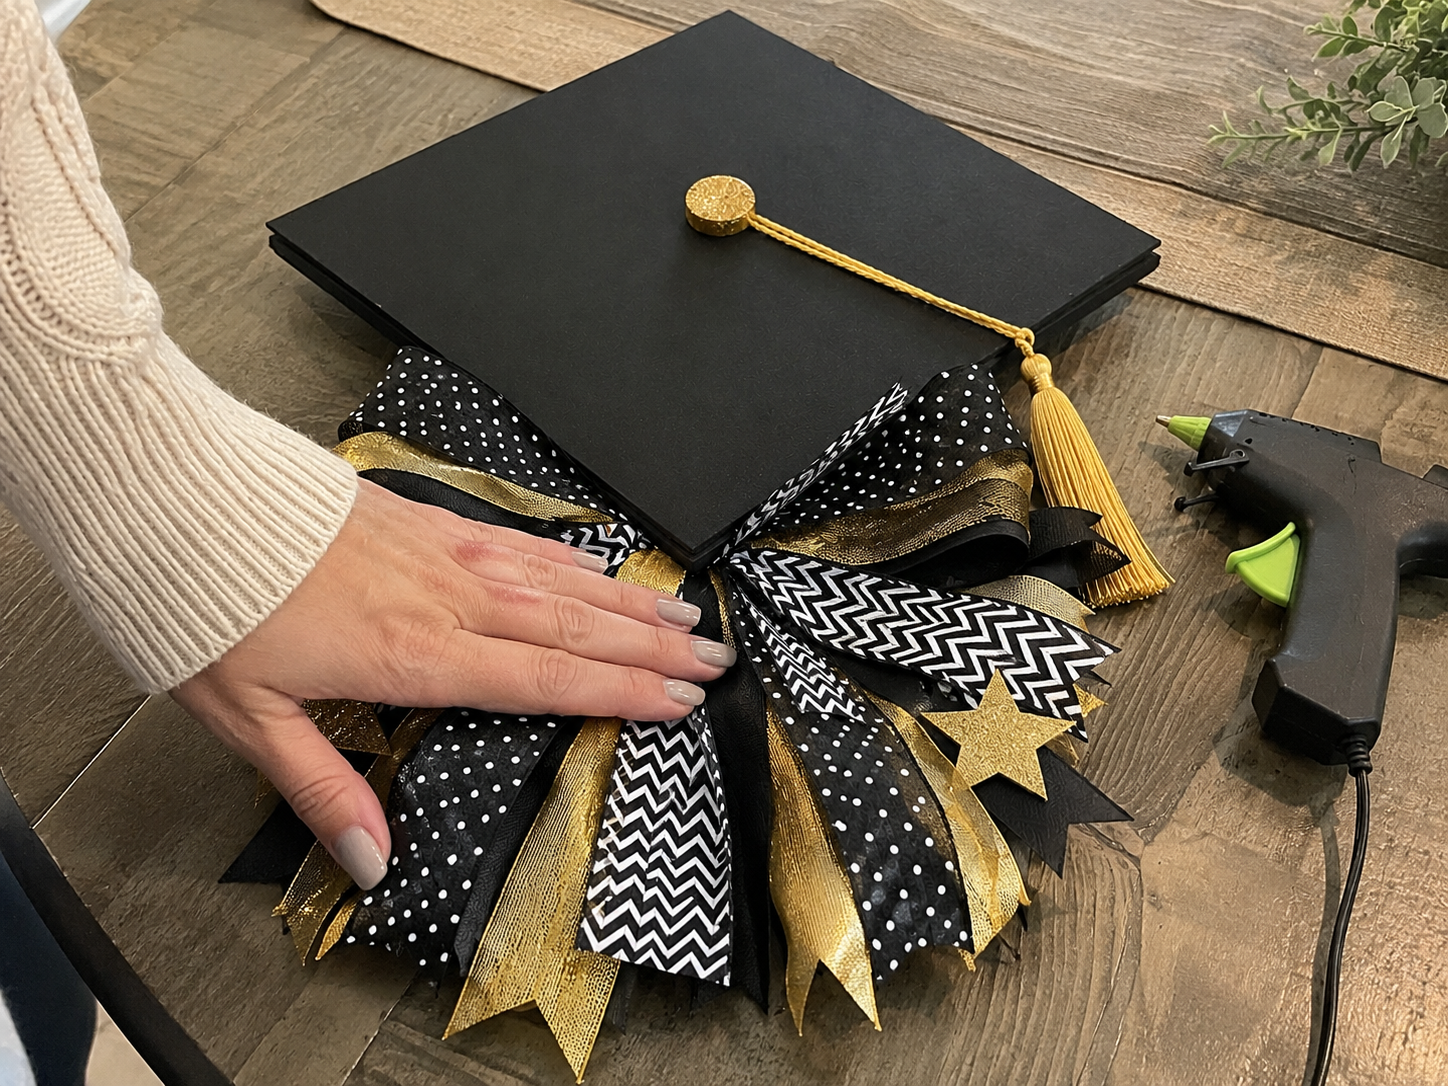
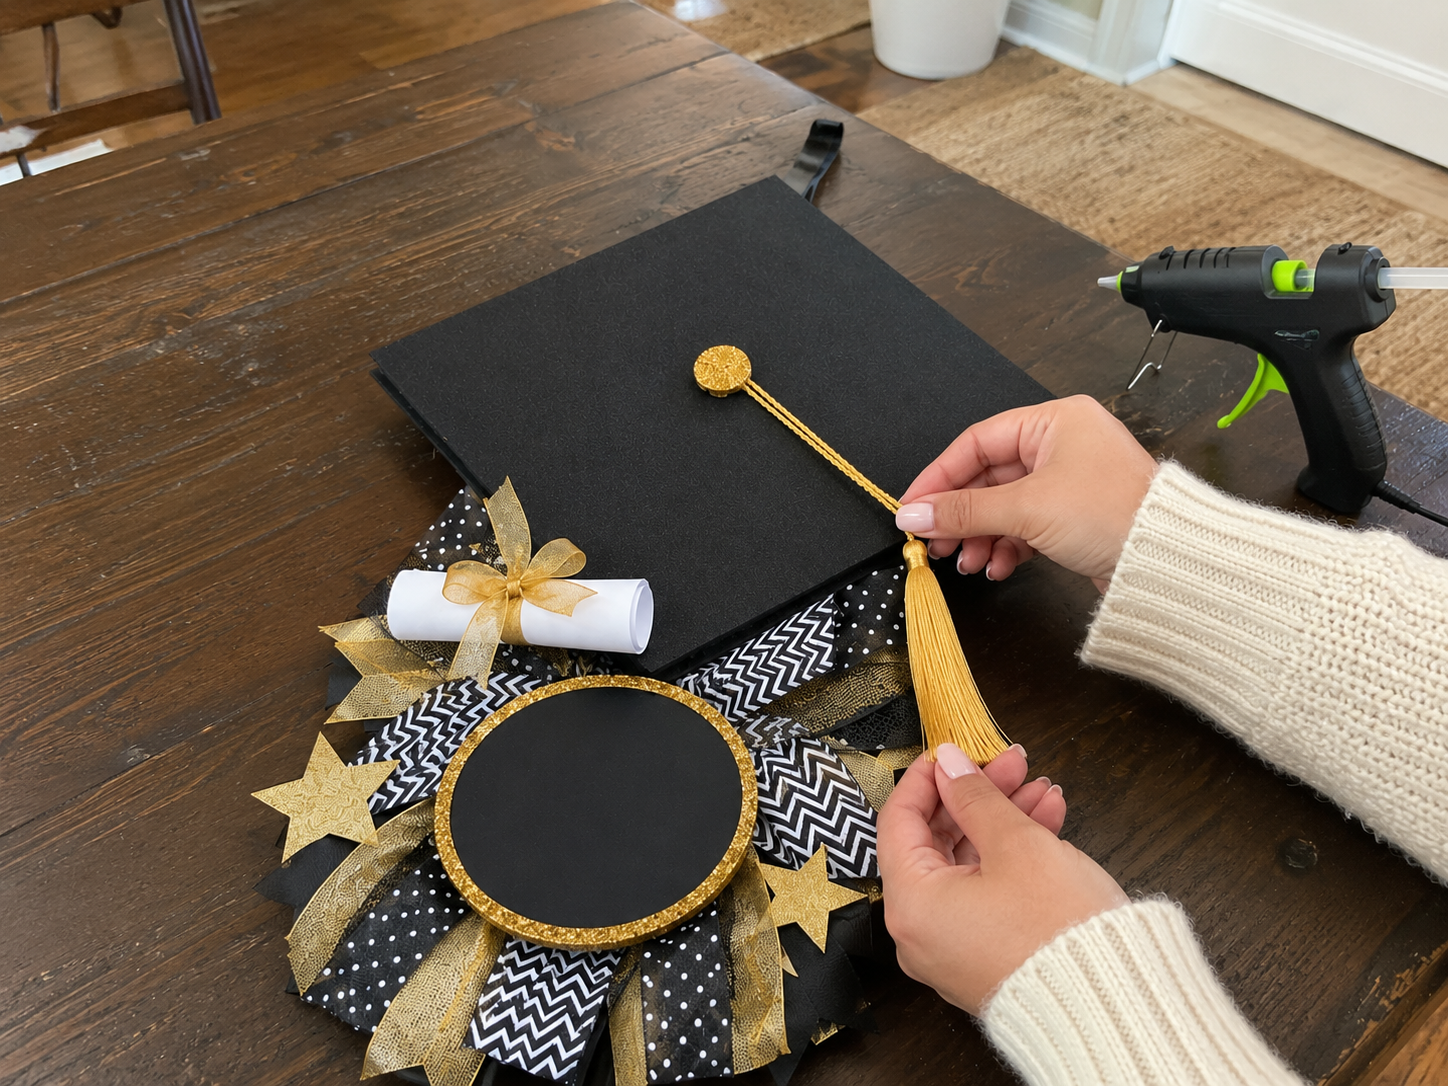
Step 6: Make & Attach Tassel
To create the tassel, wrap gold cord or embroidery thread repeatedly around a small piece of cardboard (about 2-3 inches long) until it’s thick. Tie a separate piece of thread around the top loop to secure it, then cut the bottom loops to form the fringe. Cut another piece of cord and thread it through the top loop for hanging. Attach a small gold glitter foam circle or button to the very center of the top black foam cap. Then, glue the tassel’s hanging cord to the back of this gold circle, allowing the tassel to hang diagonally across the cap, mimicking a real graduation cap tassel.
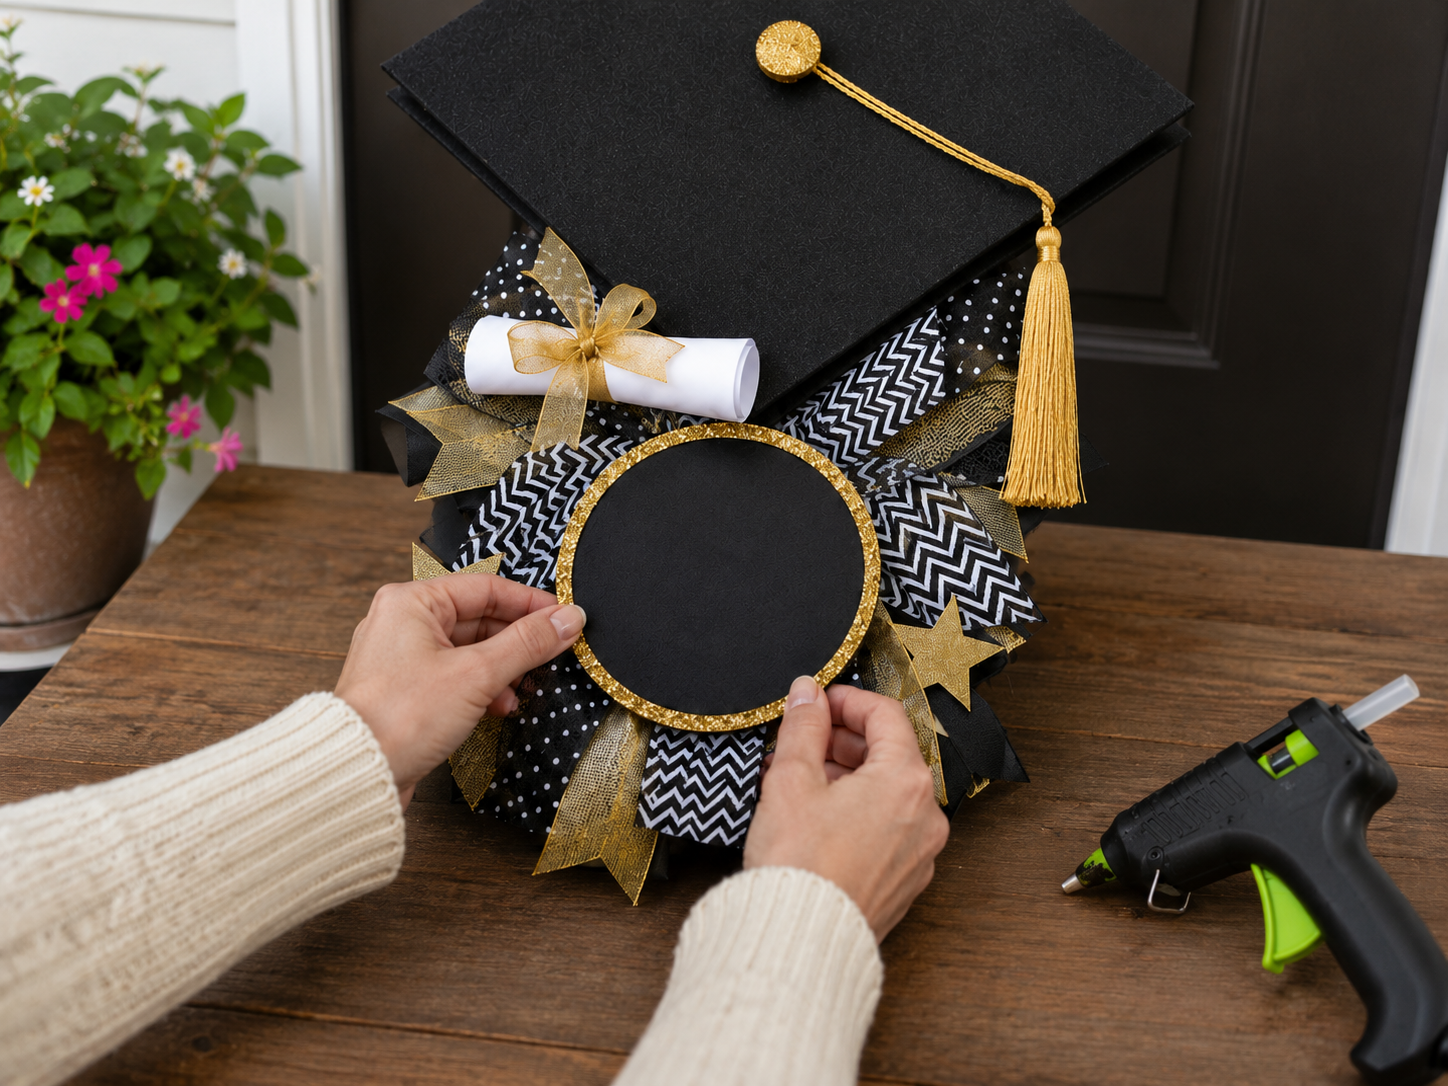
Step 7: Add Center Personalization
Cut a medium-sized circle (about 4-5 inches diameter) from black foam board. Then, cut a slightly larger ring from the gold glitter foam sheet to create a border. Glue the gold glitter ring onto the black circle, creating a blank plaque. Apply hot glue to the back of this plaque and adhere it to the center of your ribbon cluster, on top of all the ribbons. This provides a perfect spot for future personalization like a class year or name.
Step 8: Embellish with Stars
Using small star-shaped punches or by carefully cutting with scissors, create several small gold star cutouts from your gold glitter foam sheet. Strategically glue these stars around the ribbon cluster, particularly near the diploma and the central black circle, to add a festive and celebratory sparkle. Distribute them unevenly for a more dynamic look.

Step 9: Attach Hanger & Display
Flip your finished door hanger over. Cut a strong piece of jute twine or ribbon, or use a pre-made door hanger hook. Create a loop and securely hot glue or firmly attach the ends to the top-back edge of the black foam cap. Reinforce the attachment point with extra glue or even a piece of tape over the glued area for added security. Once dry, your Dollar Tree Graduation Cap Door Hanger is ready to display proudly on your front door!
See also: 5 Easy Dollar Tree Graduation Craft Ideas
📋 Love staying organized while crafting? Check out our printable planners & craft designs at CraftersDT on Etsy and use code CRAFT20 for 20% off your entire order!
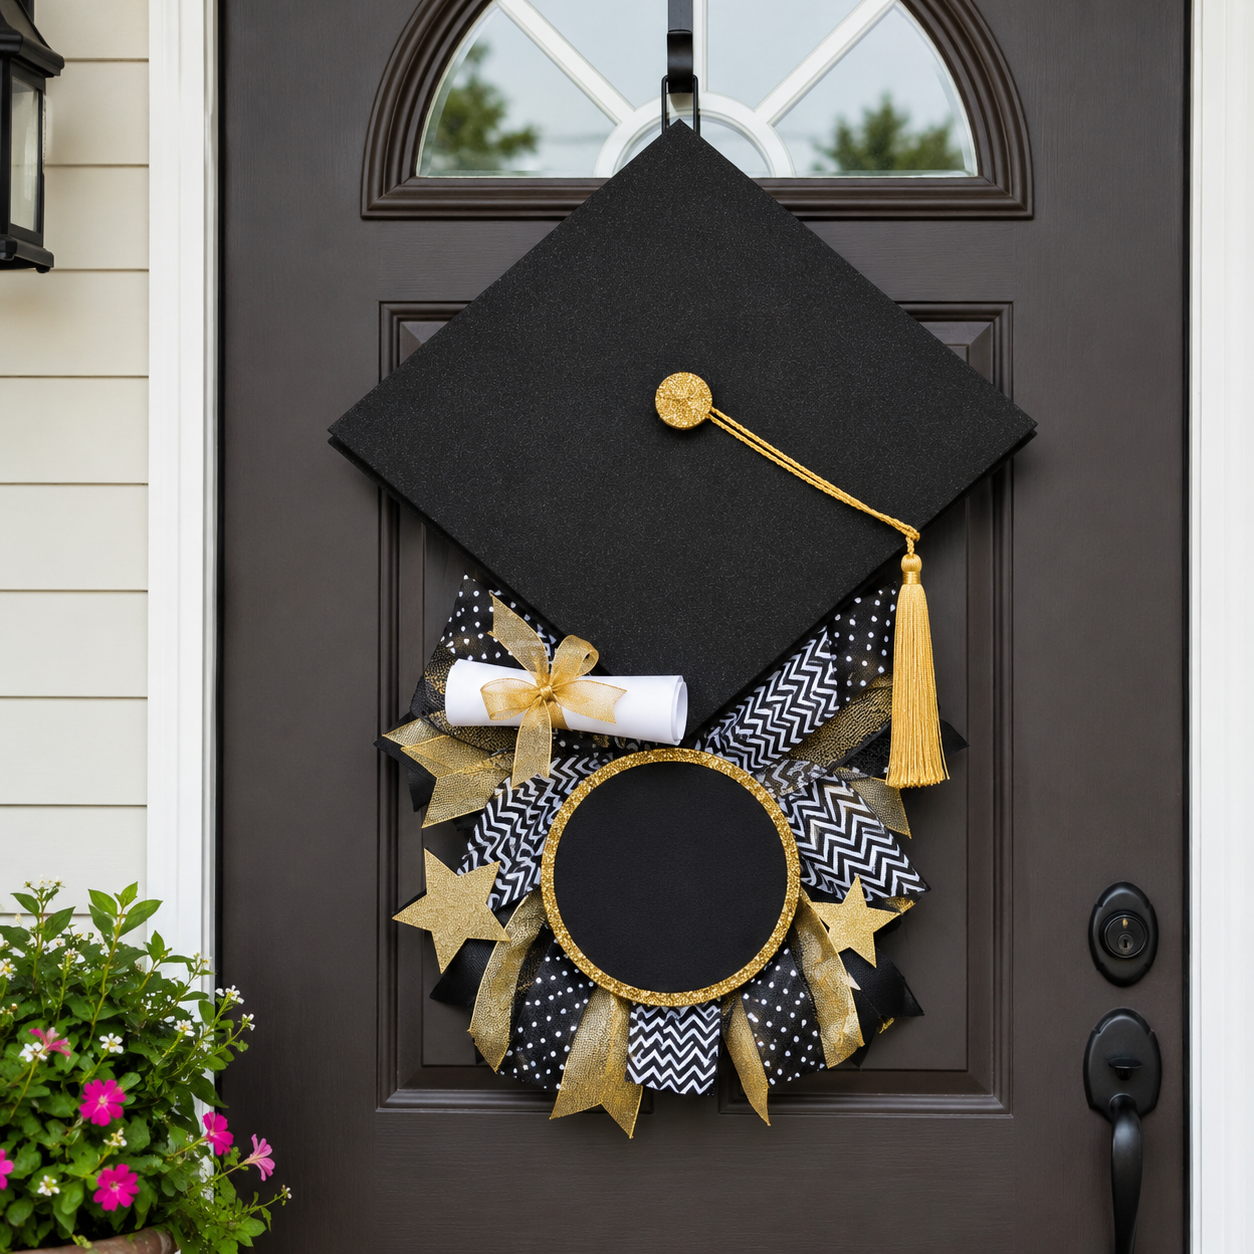
Your Grad Cap Hanger is Ready!
Woohoo, you did it! Your DIY Dollar Tree Graduation Cap Door Hanger looks amazing and is ready to show off your grad’s big achievement. Hang it proudly on their door or use it to welcome guests to their party! Don’t forget to share your creation or try a different color scheme for another school year.
📱 Craftino App
Make more crafts like this
1,000+ Wedding & Party ideas with photo guides & Pro Tips
✓ Step-by-step photo tutorials, nothing left out
✓ Pro Tips for every step
✓ Save crafts & browse fully offline
✓ New ideas added every week
Frequently Asked Questions
What is the total cost to make the DIY Dollar Tree Graduation Cap Door Hanger?
The total cost to make the DIY Dollar Tree Graduation Cap Door Hanger is typically $11-14. This budget-friendly craft uses mostly supplies found at Dollar Tree, making it an affordable option for Wedding & Party decorations.
How long does it take to complete the DIY Dollar Tree Graduation Cap Door Hanger project?
Completing the DIY Dollar Tree Graduation Cap Door Hanger project typically takes about 40-60 minutes. This includes time for assembly and allowing any paint or glue to dry properly.
Is the DIY Dollar Tree Graduation Cap Door Hanger suitable for beginners?
Yes, the DIY Dollar Tree Graduation Cap Door Hanger is an easy craft perfectly suited for beginners. The steps are straightforward and require minimal crafting experience, making it a great first project.
How much paint and ribbon do I need for this DIY Dollar Tree Graduation Cap Door Hanger?
You will need one small bottle (2 oz) of acrylic craft paint in your chosen school color and about 1-2 yards of ribbon (1.5 inches wide) for the hanger and tassel. Dollar Tree often sells both paint and ribbon in various colors.
What type of glue works best for the Dollar Tree Graduation Cap Door Hanger?
For the Dollar Tree Graduation Cap Door Hanger, hot glue works best for quick adhesion and strong bonds on most Dollar Tree materials. A low-temp hot glue gun is safe and effective for this project.
Where can I buy the supplies for the DIY Dollar Tree Graduation Cap Door Hanger?
You can buy almost all the supplies for the DIY Dollar Tree Graduation Cap Door Hanger at Dollar Tree. Items like wooden signs, craft foam, ribbon, and paint are readily available there, keeping the project very budget-friendly.
Is the DIY Dollar Tree Graduation Cap Door Hanger a good gift, and for what occasion?
Yes, the DIY Dollar Tree Graduation Cap Door Hanger makes an excellent gift for any graduating student. It is perfect for graduation parties, high school or college commencements, and as a thoughtful keepsake from a Wedding & Party event.
Can I customize the colors of my DIY Dollar Tree Graduation Cap Door Hanger?
Absolutely, you can easily customize the colors of your DIY Dollar Tree Graduation Cap Door Hanger to match any school’s colors. Simply choose different shades of acrylic craft paint and coordinating ribbon from Dollar Tree to personalize it.
How durable is the DIY Dollar Tree Graduation Cap Door Hanger for outdoor display?
The DIY Dollar Tree Graduation Cap Door Hanger is best suited for indoor display or sheltered outdoor areas like a covered porch. To increase durability for limited outdoor use, you can apply a clear acrylic sealer spray to protect it from light moisture.
What are common mistakes to avoid when making a DIY Dollar Tree Graduation Cap Door Hanger?
A common mistake to avoid when making a DIY Dollar Tree Graduation Cap Door Hanger is applying too much hot glue, which can leave visible strings. Also, ensure paint is fully dry before adding other elements to prevent smudging, typically waiting 15-20 minutes between coats.
Leave a Reply